
# 8.4.3 Android动画合集之属性动画-初见
## 本节引言:
本节给带来的是Android动画中的第三种动画——属性动画(Property Animation), 记得在上一节[8.4.2 Android动画合集之补间动画](http://www.runoob.com/w3cnote/android-tutorial-alphaanimation.html "8.4.2 Android动画合集之补间动画")为Fragment 设置过渡动画的时候,说过,App包和V4包下的Fragment调用setCustomAnimations()对应的 动画类型是不一样的,v4包下的是**Animation**,而app包下的是**Animator**;
**Animation一般动画**就是我们前面学的**帧动画和补间动画**!**Animator**则是本节要讲的**属性动画**!
关于属性动画,大牛郭大叔已经写了三篇非常好的总结文,写得非常赞,就没必要重复造轮子了, 不过这里还是过一遍,大部分内容参考的下面三篇文章:
[Android属性动画完全解析(上),初识属性动画的基本用法](http://blog.csdn.net/guolin_blog/article/details/43536355)
[Android属性动画完全解析(中),ValueAnimator和ObjectAnimator的高级用法](http://blog.csdn.net/guolin_blog/article/details/43816093)
[Android属性动画完全解析(下),Interpolator和ViewPropertyAnimator的用法](http://blog.csdn.net/guolin_blog/article/details/44171115)
写的非常好,或者说你可以直接跳过本文去看上面的三篇文章~
当然,你愿意看我叨叨逼的话,也很欢迎,好了,开始本节内容吧~
## 1.属性动画概念叨叨逼
不BB,直接上图,就是这么暴力~

## 2.ValueAnimator简单使用
**使用流程**:
* 1.调用ValueAnimator的**ofInt**(),**ofFloat**()或**ofObject**()静态方法创建ValueAnimator实例
* 2.调用实例的setXxx方法设置动画持续时间,插值方式,重复次数等
* 3.调用实例的**addUpdateListener**添加**AnimatorUpdateListener**监听器,在该监听器中 可以获得ValueAnimator计算出来的值,你可以值应用到指定对象上~
* 4.调用实例的**start()**方法开启动画! 另外我们可以看到ofInt和ofFloat都有个这样的参数:float/int... values代表可以多个值!
**使用示例**:
**代码实现**:
布局文件:**activity_main.xml**,非常简单,四个按钮,一个ImageView
```
<LinearLayout xmlns:android="http://schemas.android.com/apk/res/android"
android:id="@+id/ly_root"
android:layout_width="match_parent"
android:layout_height="match_parent"
android:orientation="vertical">
<Button
android:id="@+id/btn_one"
android:layout_width="wrap_content"
android:layout_height="wrap_content"
android:text="动画1" />
<Button
android:id="@+id/btn_two"
android:layout_width="wrap_content"
android:layout_height="wrap_content"
android:text="动画2" />
<Button
android:id="@+id/btn_three"
android:layout_width="wrap_content"
android:layout_height="wrap_content"
android:text="动画3" />
<Button
android:id="@+id/btn_four"
android:layout_width="wrap_content"
android:layout_height="wrap_content"
android:text="动画4" />
<ImageView
android:id="@+id/img_babi"
android:layout_width="wrap_content"
android:layout_height="wrap_content"
android:layout_gravity="center"
android:background="@mipmap/img_babi" />
</LinearLayout>
```
接着到**MainActivity.java**, 首先需要一个修改View位置的方法,这里调用**moveView**()设置左边和上边的起始坐标以及宽高!
接着定义了四个动画,分别是:直线移动,缩放,旋转加透明,以及圆形旋转!
然后通过按钮触发对应的动画~
```
public class MainActivity extends AppCompatActivity implements View.OnClickListener {
private Button btn_one;
private Button btn_two;
private Button btn_three;
private Button btn_four;
private LinearLayout ly_root;
private ImageView img_babi;
private int width;
private int height;
@Override
public void onCreate(Bundle savedInstanceState) {
super.onCreate(savedInstanceState);
setContentView(R.layout.activity_main);
bindViews();
}
private void bindViews() {
ly_root = (LinearLayout) findViewById(R.id.ly_root);
btn_one = (Button) findViewById(R.id.btn_one);
btn_two = (Button) findViewById(R.id.btn_two);
btn_three = (Button) findViewById(R.id.btn_three);
btn_four = (Button) findViewById(R.id.btn_four);
img_babi = (ImageView) findViewById(R.id.img_babi);
btn_one.setOnClickListener(this);
btn_two.setOnClickListener(this);
btn_three.setOnClickListener(this);
btn_four.setOnClickListener(this);
img_babi.setOnClickListener(this);
}
@Override
public void onClick(View v) {
switch (v.getId()) {
case R.id.btn_one:
lineAnimator();
break;
case R.id.btn_two:
scaleAnimator();
break;
case R.id.btn_three:
raAnimator();
break;
case R.id.btn_four:
circleAnimator();
break;
case R.id.img_babi:
Toast.makeText(MainActivity.this, "不愧是coder-pig~", Toast.LENGTH_SHORT).show();
break;
}
}
//定义一个修改ImageView位置的方法
private void moveView(View view, int rawX, int rawY) {
int left = rawX - img_babi.getWidth() / 2;
int top = rawY - img_babi.getHeight();
int width = left + view.getWidth();
int height = top + view.getHeight();
view.layout(left, top, width, height);
}
//定义属性动画的方法:
//按轨迹方程来运动
private void lineAnimator() {
width = ly_root.getWidth();
height = ly_root.getHeight();
ValueAnimator xValue = ValueAnimator.ofInt(height,0,height / 4,height / 2,height / 4 * 3 ,height);
xValue.setDuration(3000L);
xValue.addUpdateListener(new ValueAnimator.AnimatorUpdateListener() {
@Override
public void onAnimationUpdate(ValueAnimator animation) {
// 轨迹方程 x = width / 2
int y = (Integer) animation.getAnimatedValue();
int x = width / 2;
moveView(img_babi, x, y);
}
});
xValue.setInterpolator(new LinearInterpolator());
xValue.start();
}
//缩放效果
private void scaleAnimator(){
//这里故意用两个是想让大家体会下组合动画怎么用而已~
final float scale = 0.5f;
AnimatorSet scaleSet = new AnimatorSet();
ValueAnimator valueAnimatorSmall = ValueAnimator.ofFloat(1.0f, scale);
valueAnimatorSmall.setDuration(500);
ValueAnimator valueAnimatorLarge = ValueAnimator.ofFloat(scale, 1.0f);
valueAnimatorLarge.setDuration(500);
valueAnimatorSmall.addUpdateListener(new ValueAnimator.AnimatorUpdateListener() {
@Override
public void onAnimationUpdate(ValueAnimator animation) {
float scale = (Float) animation.getAnimatedValue();
img_babi.setScaleX(scale);
img_babi.setScaleY(scale);
}
});
valueAnimatorLarge.addUpdateListener(new ValueAnimator.AnimatorUpdateListener() {
@Override
public void onAnimationUpdate(ValueAnimator animation) {
float scale = (Float) animation.getAnimatedValue();
img_babi.setScaleX(scale);
img_babi.setScaleY(scale);
}
});
scaleSet.play(valueAnimatorLarge).after(valueAnimatorSmall);
scaleSet.start();
//其实可以一个就搞定的
// ValueAnimator vValue = ValueAnimator.ofFloat(1.0f, 0.6f, 1.2f, 1.0f, 0.6f, 1.2f, 1.0f);
// vValue.setDuration(1000L);
// vValue.addUpdateListener(new ValueAnimator.AnimatorUpdateListener() {
// @Override
// public void onAnimationUpdate(ValueAnimator animation) {
// float scale = (Float) animation.getAnimatedValue();
// img_babi.setScaleX(scale);
// img_babi.setScaleY(scale);
// }
// });
// vValue.setInterpolator(new LinearInterpolator());
// vValue.start();
}
//旋转的同时透明度变化
private void raAnimator(){
ValueAnimator rValue = ValueAnimator.ofInt(0, 360);
rValue.setDuration(1000L);
rValue.addUpdateListener(new ValueAnimator.AnimatorUpdateListener() {
@Override
public void onAnimationUpdate(ValueAnimator animation) {
int rotateValue = (Integer) animation.getAnimatedValue();
img_babi.setRotation(rotateValue);
float fractionValue = animation.getAnimatedFraction();
img_babi.setAlpha(fractionValue);
}
});
rValue.setInterpolator(new DecelerateInterpolator());
rValue.start();
}
//圆形旋转
protected void circleAnimator() {
width = ly_root.getWidth();
height = ly_root.getHeight();
final int R = width / 4;
ValueAnimator tValue = ValueAnimator.ofFloat(0,
(float) (2.0f * Math.PI));
tValue.setDuration(1000);
tValue.addUpdateListener(new ValueAnimator.AnimatorUpdateListener() {
@Override
public void onAnimationUpdate(ValueAnimator animation) {
// 圆的参数方程 x = R * sin(t) y = R * cos(t)
float t = (Float) animation.getAnimatedValue();
int x = (int) (R * Math.sin(t) + width / 2);
int y = (int) (R * Math.cos(t) + height / 2);
moveView(img_babi, x, y);
}
});
tValue.setInterpolator(new DecelerateInterpolator());
tValue.start();
}
}
```
好的,使用的流程非常简单,先创建ValueAnimator对象,调用ValueAnimator.ofInt/ofFloat 获得,然后设置动画持续时间,**addUpdateListener**添加**AnimatorUpdateListener**事件监听, 然后使用参数**animation**的**getAnimatedValue**()获得当前的值,然后我们可以拿着这个值 来修改View的一些属性,从而形成所谓的动画效果,接着设置setInterpolator动画渲染模式, 最后调用start()开始动画的播放~
卧槽,直线方程,圆的参数方程,我都开始方了,这不是高数的东西么, 挂科学渣连三角函数都忘了...
例子参考自github:[MoveViewValueAnimator](https://github.com/nuptboyzhb/MoveViewValueAnimator)
## 3.ObjectAnimator简单使用
比起ValueAnimator,ObjectAnimator显得更为易用,通过该类我们可以**直接** **对任意对象的任意属性进行动画操作**!没错,是任意对象,而不单单只是View对象, 不断地对对象中的某个属性值进行赋值,然后根据对象属性值的改变再来决定如何展现 出来!比如为TextView设置如下动画: **ObjectAnimator.ofFloat(textview, "alpha", 1f, 0f);**
这里就是不断改变alpha的值,从1f - 0f,然后对象根据属性值的变化来刷新界面显示,从而 展现出淡入淡出的效果,而在TextView类中并没有alpha这个属性,ObjectAnimator内部机制是: **寻找传输的属性名对应的get和set方法~,而非找这个属性值!** 不信的话你可以到TextView的源码里找找是否有alpha这个属性! 好的,下面我们利用ObjectAnimator来实现四种补间动画的效果吧~
**运行效果图**:

**代码实现**:
布局直接用的上面那个布局,加了个按钮,把ImageView换成了TextView,这里就不贴代码了, 直接上**MainActivity.java**部分的代码,其实都是大同小异的~
```
public class MainActivity extends AppCompatActivity implements View.OnClickListener {
private Button btn_one;
private Button btn_two;
private Button btn_three;
private Button btn_four;
private Button btn_five;
private LinearLayout ly_root;
private TextView tv_pig;
private int height;
private ObjectAnimator animator1;
private ObjectAnimator animator2;
private ObjectAnimator animator3;
private ObjectAnimator animator4;
private AnimatorSet animSet;
@Override
protected void onCreate(Bundle savedInstanceState) {
super.onCreate(savedInstanceState);
setContentView(R.layout.activity_main);
bindViews();
initAnimator();
}
private void bindViews() {
ly_root = (LinearLayout) findViewById(R.id.ly_root);
btn_one = (Button) findViewById(R.id.btn_one);
btn_two = (Button) findViewById(R.id.btn_two);
btn_three = (Button) findViewById(R.id.btn_three);
btn_four = (Button) findViewById(R.id.btn_four);
btn_five = (Button) findViewById(R.id.btn_five);
tv_pig = (TextView) findViewById(R.id.tv_pig);
height = ly_root.getHeight();
btn_one.setOnClickListener(this);
btn_two.setOnClickListener(this);
btn_three.setOnClickListener(this);
btn_four.setOnClickListener(this);
btn_five.setOnClickListener(this);
tv_pig.setOnClickListener(this);
}
//初始化动画
private void initAnimator() {
animator1 = ObjectAnimator.ofFloat(tv_pig, "alpha", 1f, 0f, 1f, 0f, 1f);
animator2 = ObjectAnimator.ofFloat(tv_pig, "rotation", 0f, 360f, 0f);
animator3 = ObjectAnimator.ofFloat(tv_pig, "scaleX", 2f, 4f, 1f, 0.5f, 1f);
animator4 = ObjectAnimator.ofFloat(tv_pig, "translationY", height / 8, -100, height / 2);
}
@Override
public void onClick(View v) {
switch (v.getId()) {
case R.id.btn_one:
animator1.setDuration(3000l);
animator1.start();
break;
case R.id.btn_two:
animator2.setDuration(3000l);
animator2.start();
break;
case R.id.btn_three:
animator3.setDuration(3000l);
animator3.start();
break;
case R.id.btn_four:
animator4.setDuration(3000l);
animator4.start();
break;
case R.id.btn_five:
//将前面的动画集合到一起~
animSet = new AnimatorSet();
animSet.play(animator4).with(animator3).with(animator2).after(animator1);
animSet.setDuration(5000l);
animSet.start();
break;
case R.id.tv_pig:
Toast.makeText(MainActivity.this, "不愧是coder-pig~", Toast.LENGTH_SHORT).show();
break;
}
}
}
```
用法也非常简单,上面涉及到的组合动画我们下面讲~
## 4.组合动画与AnimatorListener
从上面两个例子中我们都体验了一把组合动画,用到了**AnimatorSet**这个类!
我们调用的play()方法,然后传入第一个开始执行的动画,此时他会返回一个Builder类给我们:
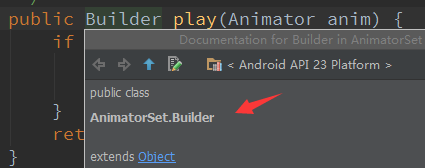
接下来我们可以调用Builder给我们提供的四个方法,来组合其他的动画:
* **after**(Animator anim) 将现有动画插入到传入的动画之后执行
* **after**(long delay) 将现有动画延迟指定毫秒后执行
* **before**(Animator anim) 将现有动画插入到传入的动画之前执行
* **with**(Animator anim) 将现有动画和传入的动画同时执行
嗯,很简单,接下来要说下动画事件的监听,上面我们ValueAnimator的监听器是 **AnimatorUpdateListener**,当值状态发生改变时候会回调**onAnimationUpdate**方法!
除了这种事件外还有:动画进行状态的监听~ **AnimatorListener**,我们可以调用**addListener**方法 添加监听器,然后重写下面四个回调方法:
* **onAnimationStart()**:动画开始
* **onAnimationRepeat()**:动画重复执行
* **onAnimationEnd()**:动画结束
* **onAnimationCancel()**:动画取消
没错,加入你真的用AnimatorListener的话,四个方法你都要重写,当然和前面的手势那一节一样, Android已经给我们提供好一个适配器类:**AnimatorListenerAdapter**,该类中已经把每个接口 方法都实现好了,所以我们这里只写一个回调方法也可以额!
## 5.使用XML来编写动画
使用XML来编写动画,画的时间可能比Java代码长一点,但是重用起来就轻松很多! 对应的XML标签分别为:<**animator**><**objectAnimator**><**set**> 相关的属性解释如下:
* **android:ordering**:指定动画的播放顺序:sequentially(顺序执行),together(同时执行)
* **android:duration**:动画的持续时间
* **android:propertyName**="x":这里的x,还记得上面的"alpha"吗?加载动画的那个对象里需要 定义getx和setx的方法,objectAnimator就是通过这里来修改对象里的值的!
* **android:valueFrom**="1" :动画起始的初始值
* **android:valueTo**="0" :动画结束的最终值
* **android:valueType**="floatType":变化值的数据类型
**使用例子如下**:
①**从0到100平滑过渡的动画**:
```
<animator xmlns:android="http://schemas.android.com/apk/res/android"
android:valueFrom="0"
android:valueTo="100"
android:valueType="intType"/>
```
②**将一个视图的alpha属性从1变成0**:
```
<objectAnimator xmlns:android="http://schemas.android.com/apk/res/android"
android:valueFrom="1"
android:valueTo="0"
android:valueType="floatType"
android:propertyName="alpha"/>
```
③**set动画使用演示**:
```
<set android:ordering="sequentially" >
<set>
<objectAnimator
android:duration="500"
android:propertyName="x"
android:valueTo="400"
android:valueType="intType" />
<objectAnimator
android:duration="500"
android:propertyName="y"
android:valueTo="300"
android:valueType="intType" />
</set>
<objectAnimator
android:duration="500"
android:propertyName="alpha"
android:valueTo="1f" />
</set>
```
**加载我们的动画文件**:
```
AnimatorSet set = (AnimatorSet)AnimatorInflater.loadAnimator(mContext,
R.animator.property_animator);
animator.setTarget(view);
animator.start();
```
## 6.本节示例代码下载:
[AnimatorDemo1.zip](http://static.runoob.com/download/AnimatorDemo1.zip)
[AnimatorDemo2.zip](http://static.runoob.com/download/AnimatorDemo2.zip)
## 本节小结:
> 好的,本节给大家捋了一捋安卓中属性动画的基本用法,不知道你get了没,内容还是比较简单 的,而且例子比较有趣,相信大家会喜欢,嗯,就说这么多,谢谢~
感谢**郭神**的文章~
> 
- 1.0 Android基础入门教程
- 1.0.1 2015年最新Android基础入门教程目录
- 1.1 背景相关与系统架构分析
- 1.2 开发环境搭建
- 1.2.1 使用Eclipse + ADT + SDK开发Android APP
- 1.2.2 使用Android Studio开发Android APP
- 1.3 SDK更新不了问题解决
- 1.4 Genymotion模拟器安装
- 1.5.1 Git使用教程之本地仓库的基本操作
- 1.5.2 Git之使用GitHub搭建远程仓库
- 1.6 .9(九妹)图片怎么玩
- 1.7 界面原型设计
- 1.8 工程相关解析(各种文件,资源访问)
- 1.9 Android程序签名打包
- 1.11 反编译APK获取代码&资源
- 2.1 View与ViewGroup的概念
- 2.2.1 LinearLayout(线性布局)
- 2.2.2 RelativeLayout(相对布局)
- 2.2.3 TableLayout(表格布局)
- 2.2.4 FrameLayout(帧布局)
- 2.2.5 GridLayout(网格布局)
- 2.2.6 AbsoluteLayout(绝对布局)
- 2.3.1 TextView(文本框)详解
- 2.3.2 EditText(输入框)详解
- 2.3.3 Button(按钮)与ImageButton(图像按钮)
- 2.3.4 ImageView(图像视图)
- 2.3.5.RadioButton(单选按钮)&Checkbox(复选框)
- 2.3.6 开关按钮ToggleButton和开关Switch
- 2.3.7 ProgressBar(进度条)
- 2.3.8 SeekBar(拖动条)
- 2.3.9 RatingBar(星级评分条)
- 2.4.1 ScrollView(滚动条)
- 2.4.2 Date & Time组件(上)
- 2.4.3 Date & Time组件(下)
- 2.4.4 Adapter基础讲解
- 2.4.5 ListView简单实用
- 2.4.6 BaseAdapter优化
- 2.4.7ListView的焦点问题
- 2.4.8 ListView之checkbox错位问题解决
- 2.4.9 ListView的数据更新问题
- 2.5.0 构建一个可复用的自定义BaseAdapter
- 2.5.1 ListView Item多布局的实现
- 2.5.2 GridView(网格视图)的基本使用
- 2.5.3 Spinner(列表选项框)的基本使用
- 2.5.4 AutoCompleteTextView(自动完成文本框)的基本使用
- 2.5.5 ExpandableListView(可折叠列表)的基本使用
- 2.5.6 ViewFlipper(翻转视图)的基本使用
- 2.5.7 Toast(吐司)的基本使用
- 2.5.8 Notification(状态栏通知)详解
- 2.5.9 AlertDialog(对话框)详解
- 2.6.0 其他几种常用对话框基本使用
- 2.6.1 PopupWindow(悬浮框)的基本使用
- 2.6.2 菜单(Menu)
- 2.6.3 ViewPager的简单使用
- 2.6.4 DrawerLayout(官方侧滑菜单)的简单使用
- 3.1.1 基于监听的事件处理机制
- 3.2 基于回调的事件处理机制
- 3.3 Handler消息传递机制浅析
- 3.4 TouchListener PK OnTouchEvent + 多点触碰
- 3.5 监听EditText的内容变化
- 3.6 响应系统设置的事件(Configuration类)
- 3.7 AnsyncTask异步任务
- 3.8 Gestures(手势)
- 4.1.1 Activity初学乍练
- 4.1.2 Activity初窥门径
- 4.1.3 Activity登堂入室
- 4.2.1 Service初涉
- 4.2.2 Service进阶
- 4.2.3 Service精通
- 4.3.1 BroadcastReceiver牛刀小试
- 4.3.2 BroadcastReceiver庖丁解牛
- 4.4.2 ContentProvider再探——Document Provider
- 4.5.1 Intent的基本使用
- 4.5.2 Intent之复杂数据的传递
- 5.1 Fragment基本概述
- 5.2.1 Fragment实例精讲——底部导航栏的实现(方法1)
- 5.2.2 Fragment实例精讲——底部导航栏的实现(方法2)
- 5.2.3 Fragment实例精讲——底部导航栏的实现(方法3)
- 5.2.4 Fragment实例精讲——底部导航栏+ViewPager滑动切换页面
- 5.2.5 Fragment实例精讲——新闻(购物)类App列表Fragment的简单实现
- 6.1 数据存储与访问之——文件存储读写
- 6.2 数据存储与访问之——SharedPreferences保存用户偏好参数
- 6.3.1 数据存储与访问之——初见SQLite数据库
- 6.3.2 数据存储与访问之——又见SQLite数据库
- 7.1.1 Android网络编程要学的东西与Http协议学习
- 7.1.2 Android Http请求头与响应头的学习
- 7.1.3 Android HTTP请求方式:HttpURLConnection
- 7.1.4 Android HTTP请求方式:HttpClient
- 7.2.1 Android XML数据解析
- 7.2.2 Android JSON数据解析
- 7.3.1 Android 文件上传
- 7.3.2 Android 文件下载(1)
- 7.3.3 Android 文件下载(2)
- 7.4 Android 调用 WebService
- 7.5.1 WebView(网页视图)基本用法
- 7.5.2 WebView和JavaScrip交互基础
- 7.5.3 Android 4.4后WebView的一些注意事项
- 7.5.4 WebView文件下载
- 7.5.5 WebView缓存问题
- 7.5.6 WebView处理网页返回的错误码信息
- 7.6.1 Socket学习网络基础准备
- 7.6.2 基于TCP协议的Socket通信(1)
- 7.6.3 基于TCP协议的Socket通信(2)
- 7.6.4 基于UDP协议的Socket通信
- 8.1.1 Android中的13种Drawable小结 Part 1
- 8.1.2 Android中的13种Drawable小结 Part 2
- 8.1.3 Android中的13种Drawable小结 Part 3
- 8.2.1 Bitmap(位图)全解析 Part 1
- 8.2.2 Bitmap引起的OOM问题
- 8.3.1 三个绘图工具类详解
- 8.3.2 绘图类实战示例
- 8.3.3 Paint API之—— MaskFilter(面具)
- 8.3.4 Paint API之—— Xfermode与PorterDuff详解(一)
- 8.3.5 Paint API之—— Xfermode与PorterDuff详解(二)
- 8.3.6 Paint API之—— Xfermode与PorterDuff详解(三)
- 8.3.7 Paint API之—— Xfermode与PorterDuff详解(四)
- 8.3.8 Paint API之—— Xfermode与PorterDuff详解(五)
- 8.3.9 Paint API之—— ColorFilter(颜色过滤器)(1/3)
- 8.3.10 Paint API之—— ColorFilter(颜色过滤器)(2-3)
- 8.3.11 Paint API之—— ColorFilter(颜色过滤器)(3-3)
- 8.3.12 Paint API之—— PathEffect(路径效果)
- 8.3.13 Paint API之—— Shader(图像渲染)
- 8.3.14 Paint几个枚举/常量值以及ShadowLayer阴影效果
- 8.3.15 Paint API之——Typeface(字型)
- 8.3.16 Canvas API详解(Part 1)
- 8.3.17 Canvas API详解(Part 2)剪切方法合集
- 8.3.18 Canvas API详解(Part 3)Matrix和drawBitmapMash
- 8.4.1 Android动画合集之帧动画
- 8.4.2 Android动画合集之补间动画
- 8.4.3 Android动画合集之属性动画-初见
- 8.4.4 Android动画合集之属性动画-又见
- 9.1 使用SoundPool播放音效(Duang~)
- 9.2 MediaPlayer播放音频与视频
- 9.3 使用Camera拍照
- 9.4 使用MediaRecord录音
- 10.1 TelephonyManager(电话管理器)
- 10.2 SmsManager(短信管理器)
- 10.3 AudioManager(音频管理器)
- 10.4 Vibrator(振动器)
- 10.5 AlarmManager(闹钟服务)
- 10.6 PowerManager(电源服务)
- 10.7 WindowManager(窗口管理服务)
- 10.8 LayoutInflater(布局服务)
- 10.9 WallpaperManager(壁纸管理器)
- 10.10 传感器专题(1)——相关介绍
- 10.11 传感器专题(2)——方向传感器
- 10.12 传感器专题(3)——加速度/陀螺仪传感器
- 10.12 传感器专题(4)——其他传感器了解
- 10.14 Android GPS初涉
- 11.0《2015最新Android基础入门教程》完结散花~