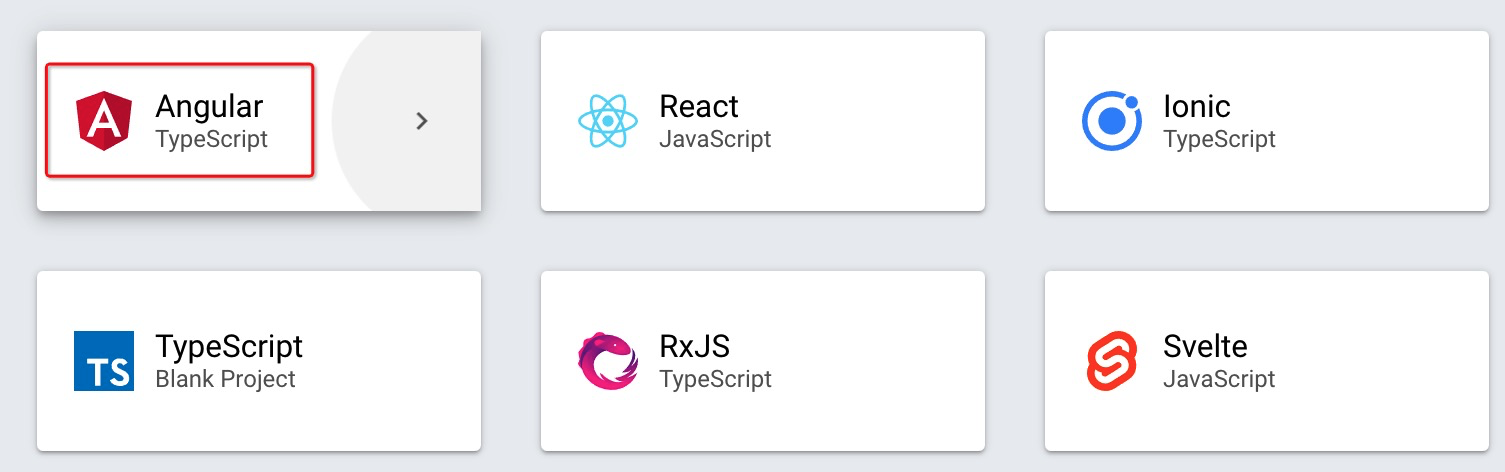
在本地开发前,可以先来到线上感受一下 angular。 打开[https://stackblitz.com](https://stackblitz.com/)并如图点击:

接下来选择Angular
稍等片刻,页面启动功能后有三部分组成:
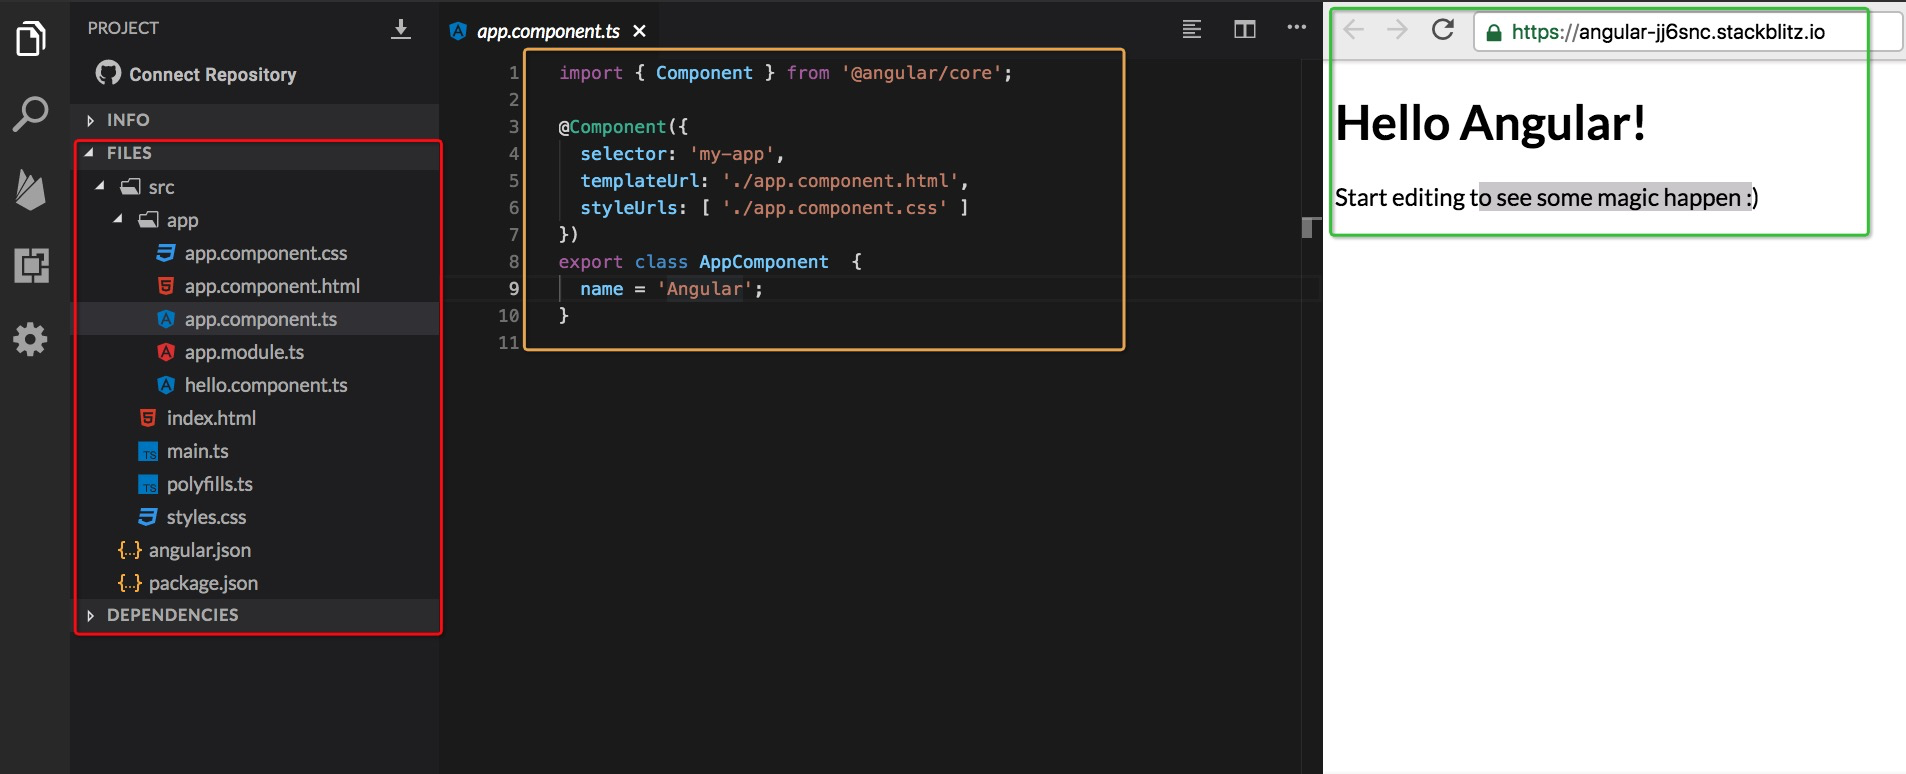
从左至右为:文件目录区、代码区、阅览区。
在最左侧的文件目录中,通过观察发现与以前接触jquery项目略有不同:jquery或其它的传统项目,一般由主体的三个文件组件:html、css及js文件。比如:[jquery示例](https://codepen.io/shivasurya/pen/FatiB),再比如[vue示例](https://codepen.io/wa23/pen/pObyrq)、[angularjs示例](https://codepen.io/chrisoncode/pen/xFcdI);而angular一个最简单的demo,竟然使用了10多个文件,而且有的文件竟然有上100行。不得不说这的确是由于angular的特点而带来了上手难度大的缺点。在这种情况下手工来一行行代码来初始一个项目便显示不现实了。这好比以前只要掌握基本的打铁技术就可以制造用来耕种的农具一样,在现在农业高度自动化的时代,仅靠手工已然制造不出联合收割机了。
Anguar当然也想到了这个问题。Anguar已经友善的提供了`Angular-cli`,有了这个工具便可以轻松的来初始化一个angular项目了。
> 如果你仅仅是学习前台,那么完全可以在参考[angular中文网入门教程](https://www.angular.cn/start)的基础上使用stackblitz提供的在线环境。
# angular-cli
`Angular-cli`( `cli` = `command line interface` 命令行接)是一个用于生产`Anuglar`应用程序的智能生产线,在开发`Angular`之前,我们必须首先安装`Angular-cli`。
> 和生活中的生产线一线,如果没有它一些产品也是可以生产的,只是生产效率和质量难以得到控制罢了。
## 安装
`npm install -g @angular/cli@8.3.4 --registry=https://registry.npm.taobao.org`
```shell
panjiedeMac-Pro:~ panjie$ npm install -g @angular/cli@8.3.4 --registry=https://registry.npm.taobao.org
/usr/local/bin/ng -> /usr/local/lib/node_modules/@angular/cli/bin/ng
> @angular/cli@8.3.4 postinstall /usr/local/lib/node_modules/@angular/cli
> node ./bin/postinstall/script.js
+ @angular/cli@8.3.4
added 7 packages from 5 contributors, removed 1322 packages and updated 236 packages in 18.462s
```
## 验证
`ng --version`
```shell
panjiedeMac-Pro:~ panjie$ ng --version
_ _ ____ _ ___
/ \ _ __ __ _ _ _| | __ _ _ __ / ___| | |_ _|
/ △ \ | '_ \ / _` | | | | |/ _` | '__| | | | | | |
/ ___ \| | | | (_| | |_| | | (_| | | | |___| |___ | |
/_/ \_\_| |_|\__, |\__,_|_|\__,_|_| \____|_____|___|
|___/
Angular CLI: 8.3.4
Node: 10.16.3
OS: darwin x64
Angular:
...
Package Version
------------------------------------------------------
@angular-devkit/architect 0.803.4
@angular-devkit/core 8.3.4
@angular-devkit/schematics 8.3.4
@schematics/angular 8.3.4
@schematics/update 0.803.4
rxjs 6.4.0
```
> 官方教程中的命令是`npm install -g @angular/cli`,在这被改动成`npm install -g @angular/cli@8.3.4 --registry=https://registry.npm.taobao.org`主要是为了统一版本及解决慢网络问题。
# 项目初始化
一、首先打开D盘建立angularStudy文件夹,并使用shell进入该文件夹。
>[info] OSX及Liunx用户,推荐使用`~/angularStudy`文件夹。 `~/`表示当前登录用户文件夹,在OSX中位于`/Users/当前登录用户`;在Windows中,默认位于`C:/Users/当前登录用户`;在ubuntu中,默认位于`/usr/home/当前登录用户`。
二、然后运行以下命令:
`ng new hello-world`
第一个提示问我们是否添加`Anguar routing`,输入`y`,回车。
```
panjiedeMac-Pro:angularStudy panjie$ ng new hello-world
? Would you like to add Angular routing? (y/N) y
```
接着使用上下键选择`Sass`,回车。
```
panjiedeMac-Pro:angularStudy panjie$ ng new hello-world
? Would you like to add Angular routing? Yes
? Which stylesheet format would you like to use?
CSS
SCSS [ https://sass-lang.com/documentation/syntax#scss ]
❯ Sass [ https://sass-lang.com/documentation/syntax#the-indented-syntax ]
Less [ http://lesscss.org ]
Stylus [ http://stylus-lang.com ]
```
最后是耐心的等待,等待的时间取决于你的网络环境及CPU配置情况。安装完成后,得到如下提示表示安装成功。
```
added 1456 packages from 1071 contributors and audited 18840 packages in 165.665s
found 0 vulnerabilities
Successfully initialized git.
```
## 慢网络问题
解决慢网络的方法有很多种,这貌似已经成为了一门专门的学问,在此我们给出最笨的一种。
前面的几个步骤与正常网络相同,即:`ng new hello-world` -> `y` -> `sass`。回车后,会显示自动为我们创建了一些文件,并开始进行网络请求安装第三方包。
```
CREATE hello-world/e2e/protractor.conf.js (810 bytes)
CREATE hello-world/e2e/tsconfig.json (214 bytes)
CREATE hello-world/e2e/src/app.e2e-spec.ts (644 bytes)
CREATE hello-world/e2e/src/app.po.ts (262 bytes)
⸨ ░░░░░░░░░░░░░░░░░⸩ ⠴ fetchMetadata: sill pacote range manifest for aria-query@^3.0.0 fetched in 8`
```
此时使用Ctrl-C组合键来终止安装,接下来在`shell`中进入`hello-world`文件夹。使用`npm install --registry=https://registry.npm.taobao.org`来继续完成安装。
```
panjiedeMac-Pro:hello-world panjie$ npm install --registry=https://registry.npm.taobao.org
up to date in 7.226s
```
## 验证
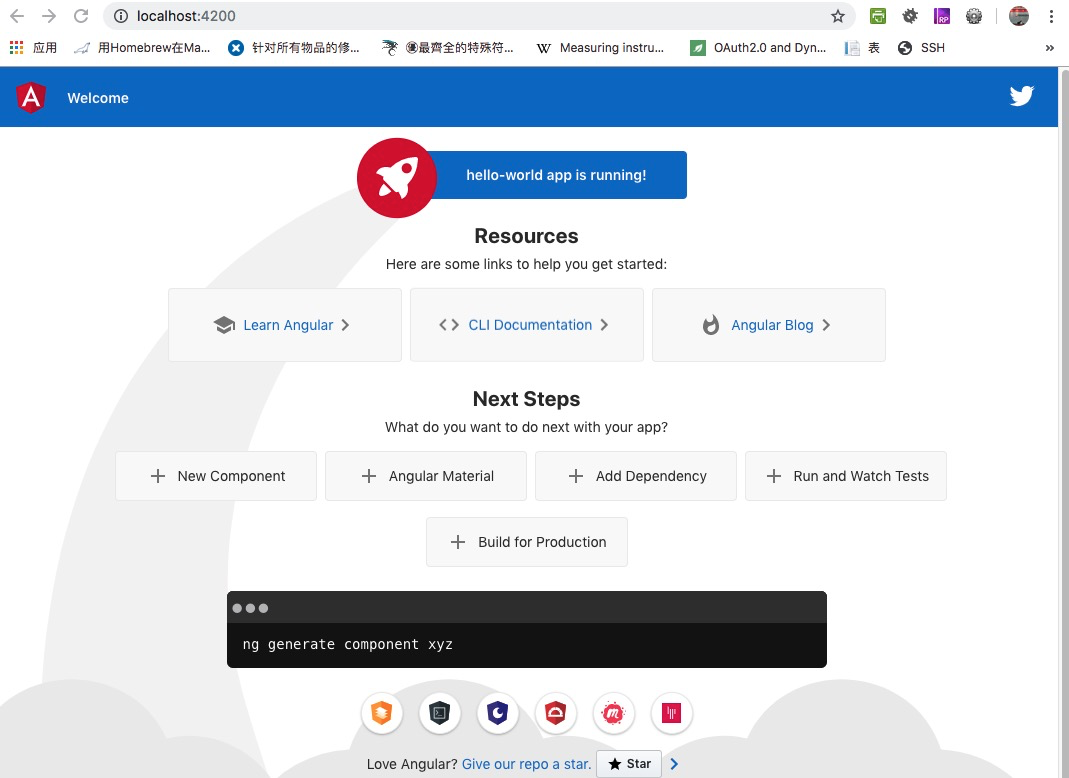
在`hello-world`文件夹中,使用`ng serve --open`来启动第一个`angular`应用并在浏览器中查看效果。
```
panjiedeMac-Pro:hello-world panjie$ ng serve --open
10% building 3/3 modules 0 activeℹ 「wds」: Project is running at http://localhost:4200/webpack-dev-server/
ℹ 「wds」: webpack output is served from /
ℹ 「wds」: 404s will fallback to //index.html
chunk {main} main.js, main.js.map (main) 49.4 kB [initial] [rendered]
chunk {polyfills} polyfills.js, polyfills.js.map (polyfills) 264 kB [initial] [rendered]
chunk {runtime} runtime.js, runtime.js.map (runtime) 6.15 kB [entry] [rendered]
chunk {styles} styles.js, styles.js.map (styles) 10.1 kB [initial] [rendered]
chunk {vendor} vendor.js, vendor.js.map (vendor) 4.08 MB [initial] [rendered]
Date: 2019-09-18T07:16:28.646Z - Hash: 7f1e5facc82a553e3e7b - Time: 6999ms
** Angular Live Development Server is listening on localhost:4200, open your browser on http://localhost:4200/ **
ℹ 「wdm」: Compiled successfully.
```
编译成功后浏览器自动打开了页面:[http://localhost:4200/](http://localhost:4200/)
# Hello Angular
使用最喜爱的编辑器打开`hello-world`文件夹,找到`src/app/app.component.html`,只保留最后一行,其它的代码全部删除:
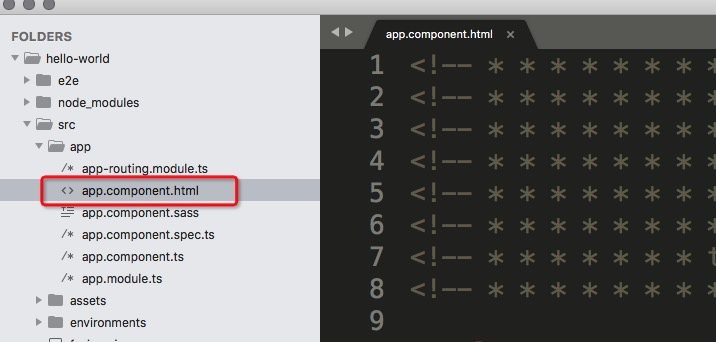
删除后代码:
```html
<router-outlet></router-outlet>
```
加入Hello Angular!
```html
<h1 style="text-align: center; margin-top: 100px;">
Hello Angular!
</h1>
<router-outlet></router-outlet>
```
使用ctrl+s保存文件后,浏览器将自动刷新展示最新的效果。
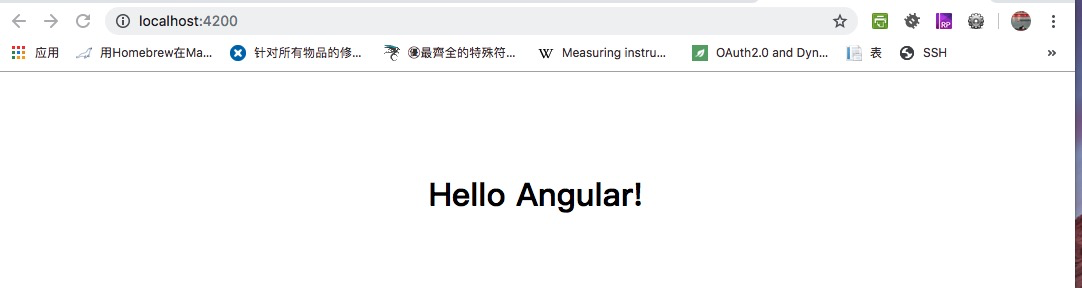
至此:熟悉的Hello World展现在我们的面前。恭喜你,已经迈出了坚实的第一步。
# 参考文档
[https://www.angular.cn/guide/setup-local](https://www.angular.cn/guide/setup-local)
[www.angular.cn](https://www.angular.cn/guide/setup-local)
- 序言
- 第一章:Hello World
- 第一节:Angular准备工作
- 1 Node.js
- 2 npm
- 3 WebStorm
- 第二节:Hello Angular
- 第三节:Spring Boot准备工作
- 1 JDK
- 2 MAVEN
- 3 IDEA
- 第四节:Hello Spring Boot
- 1 Spring Initializr
- 2 Hello Spring Boot!
- 3 maven国内源配置
- 4 package与import
- 第五节:Hello Spring Boot + Angular
- 1 依赖注入【前】
- 2 HttpClient获取数据【前】
- 3 数据绑定【前】
- 4 回调函数【选学】
- 第二章 教师管理
- 第一节 数据库初始化
- 第二节 CRUD之R查数据
- 1 原型初始化【前】
- 2 连接数据库【后】
- 3 使用JDBC读取数据【后】
- 4 前后台对接
- 5 ng-if【前】
- 6 日期管道【前】
- 第三节 CRUD之C增数据
- 1 新建组件并映射路由【前】
- 2 模板驱动表单【前】
- 3 httpClient post请求【前】
- 4 保存数据【后】
- 5 组件间调用【前】
- 第四节 CRUD之U改数据
- 1 路由参数【前】
- 2 请求映射【后】
- 3 前后台对接【前】
- 4 更新数据【前】
- 5 更新某个教师【后】
- 6 路由器链接【前】
- 7 观察者模式【前】
- 第五节 CRUD之D删数据
- 1 绑定到用户输入事件【前】
- 2 删除某个教师【后】
- 第六节 代码重构
- 1 文件夹化【前】
- 2 优化交互体验【前】
- 3 相对与绝对地址【前】
- 第三章 班级管理
- 第一节 JPA初始化数据表
- 第二节 班级列表
- 1 新建模块【前】
- 2 初识单元测试【前】
- 3 初始化原型【前】
- 4 面向对象【前】
- 5 测试HTTP请求【前】
- 6 测试INPUT【前】
- 7 测试BUTTON【前】
- 8 @RequestParam【后】
- 9 Repository【后】
- 10 前后台对接【前】
- 第三节 新增班级
- 1 初始化【前】
- 2 响应式表单【前】
- 3 测试POST请求【前】
- 4 JPA插入数据【后】
- 5 单元测试【后】
- 6 惰性加载【前】
- 7 对接【前】
- 第四节 编辑班级
- 1 FormGroup【前】
- 2 x、[x]、{{x}}与(x)【前】
- 3 模拟路由服务【前】
- 4 测试间谍spy【前】
- 5 使用JPA更新数据【后】
- 6 分层开发【后】
- 7 前后台对接
- 8 深入imports【前】
- 9 深入exports【前】
- 第五节 选择教师组件
- 1 初始化【前】
- 2 动态数据绑定【前】
- 3 初识泛型
- 4 @Output()【前】
- 5 @Input()【前】
- 6 再识单元测试【前】
- 7 其它问题
- 第六节 删除班级
- 1 TDD【前】
- 2 TDD【后】
- 3 前后台对接
- 第四章 学生管理
- 第一节 引入Bootstrap【前】
- 第二节 NAV导航组件【前】
- 1 初始化
- 2 Bootstrap格式化
- 3 RouterLinkActive
- 第三节 footer组件【前】
- 第四节 欢迎界面【前】
- 第五节 新增学生
- 1 初始化【前】
- 2 选择班级组件【前】
- 3 复用选择组件【前】
- 4 完善功能【前】
- 5 MVC【前】
- 6 非NULL校验【后】
- 7 唯一性校验【后】
- 8 @PrePersist【后】
- 9 CM层开发【后】
- 10 集成测试
- 第六节 学生列表
- 1 分页【后】
- 2 HashMap与LinkedHashMap
- 3 初识综合查询【后】
- 4 综合查询进阶【后】
- 5 小试综合查询【后】
- 6 初始化【前】
- 7 M层【前】
- 8 单元测试与分页【前】
- 9 单选与多选【前】
- 10 集成测试
- 第七节 编辑学生
- 1 初始化【前】
- 2 嵌套组件测试【前】
- 3 功能开发【前】
- 4 JsonPath【后】
- 5 spyOn【后】
- 6 集成测试
- 7 @Input 异步传值【前】
- 8 值传递与引入传递
- 9 @PreUpdate【后】
- 10 表单验证【前】
- 第八节 删除学生
- 1 CSS选择器【前】
- 2 confirm【前】
- 3 功能开发与测试【后】
- 4 集成测试
- 5 定制提示框【前】
- 6 引入图标库【前】
- 第九节 集成测试
- 第五章 登录与注销
- 第一节:普通登录
- 1 原型【前】
- 2 功能设计【前】
- 3 功能设计【后】
- 4 应用登录组件【前】
- 5 注销【前】
- 6 保留登录状态【前】
- 第二节:你是谁
- 1 过滤器【后】
- 2 令牌机制【后】
- 3 装饰器模式【后】
- 4 拦截器【前】
- 5 RxJS操作符【前】
- 6 用户登录与注销【后】
- 7 个人中心【前】
- 8 拦截器【后】
- 9 集成测试
- 10 单例模式
- 第六章 课程管理
- 第一节 新增课程
- 1 初始化【前】
- 2 嵌套组件测试【前】
- 3 async管道【前】
- 4 优雅的测试【前】
- 5 功能开发【前】
- 6 实体监听器【后】
- 7 @ManyToMany【后】
- 8 集成测试【前】
- 9 异步验证器【前】
- 10 详解CORS【前】
- 第二节 课程列表
- 第三节 果断
- 1 初始化【前】
- 2 分页组件【前】
- 2 分页组件【前】
- 3 综合查询【前】
- 4 综合查询【后】
- 4 综合查询【后】
- 第节 班级列表
- 第节 教师列表
- 第节 编辑课程
- TODO返回机制【前】
- 4 弹出框组件【前】
- 5 多路由出口【前】
- 第节 删除课程
- 第七章 权限管理
- 第一节 AOP
- 总结
- 开发规范
- 备用