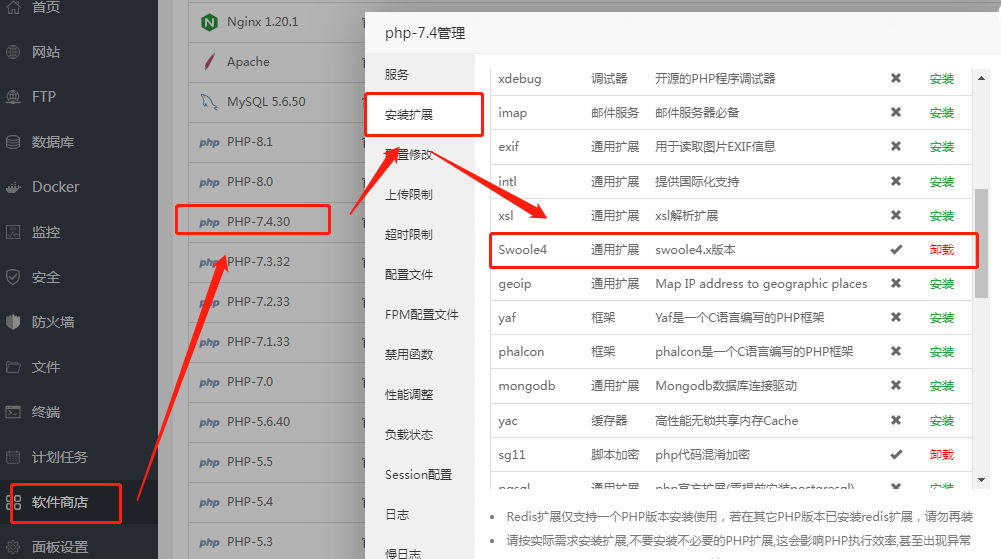
第一步:登录宝塔,【软件商店】找到php7.4,点击设置,【安装扩展】找到 swoole,点击安装
#
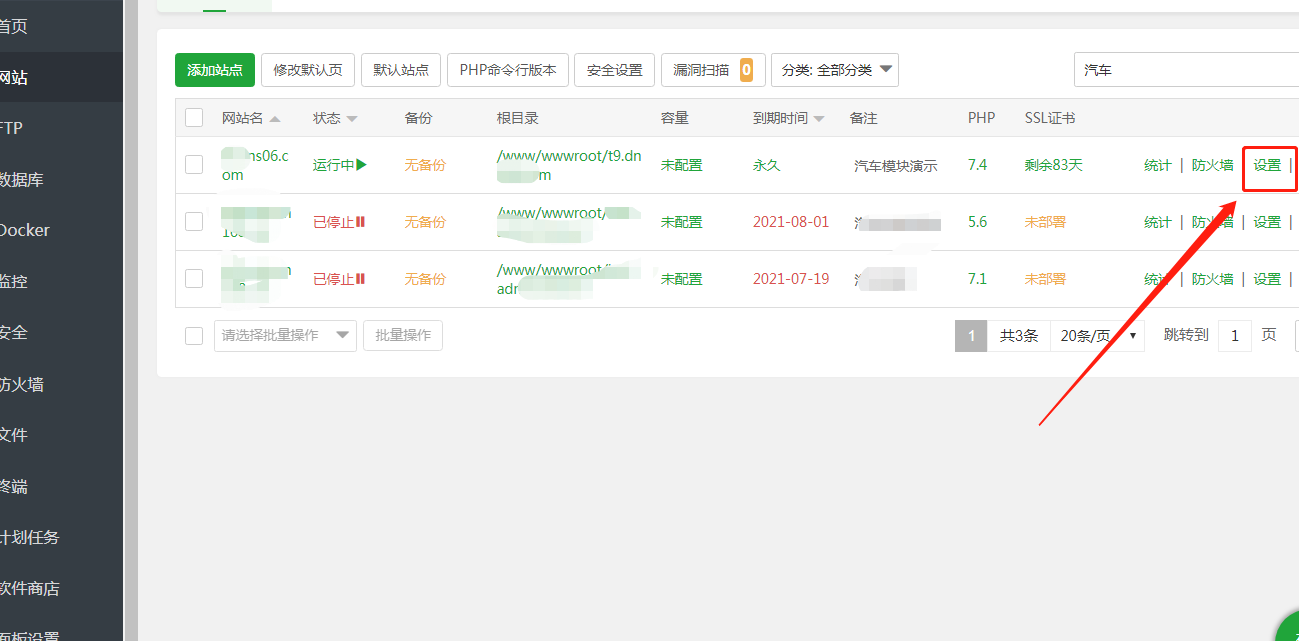
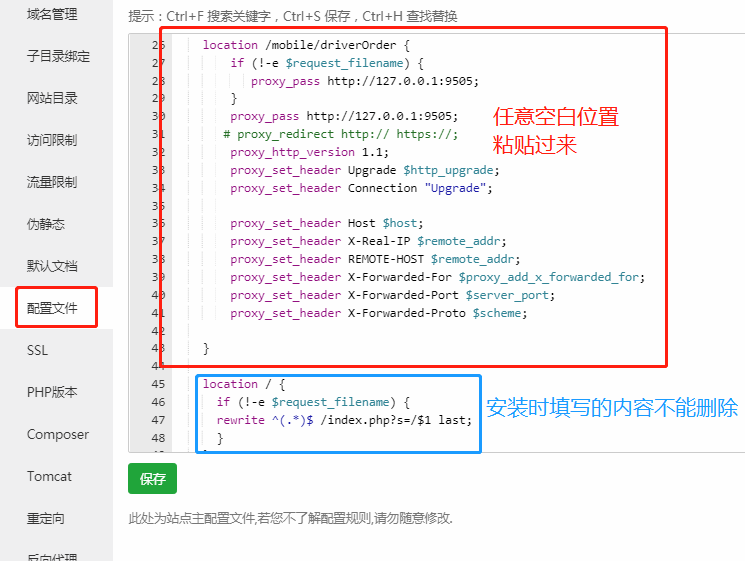
第二步:找到站点域名,点击【设置】-【配置文件】,输入以下代码,添加一个新的,之前的不能删除
location /mobile/driverOrder {
if (!-e $request_filename) {
proxy_pass http://127.0.0.1:9505;
}
proxy_pass http://127.0.0.1:9505;
# proxy_redirect http:// https://;
proxy_http_version 1.1;
proxy_set_header Upgrade $http_upgrade;
proxy_set_header Connection "Upgrade";
proxy_set_header Host $host;
proxy_set_header X-Real-IP $remote_addr;
proxy_set_header REMOTE-HOST $remote_addr;
proxy_set_header X-Forwarded-For $proxy_add_x_forwarded_for;
proxy_set_header X-Forwarded-Port $server_port;
proxy_set_header X-Forwarded-Proto $scheme;
}
#
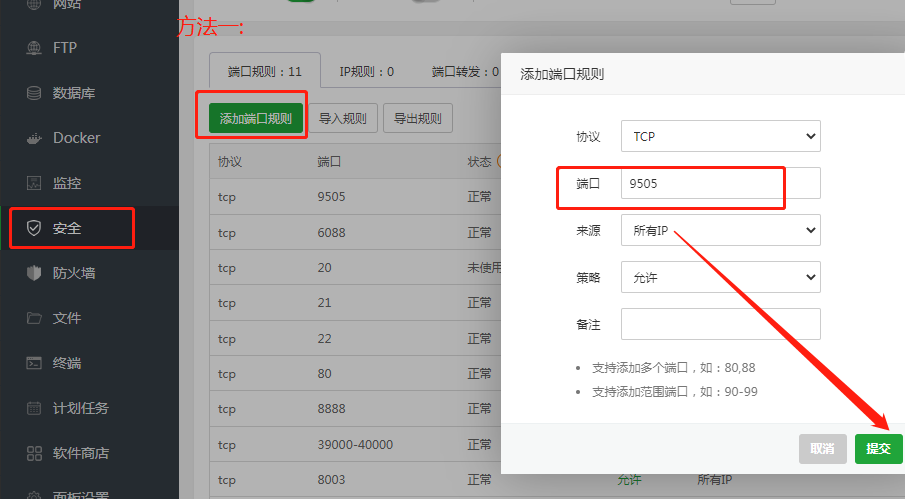
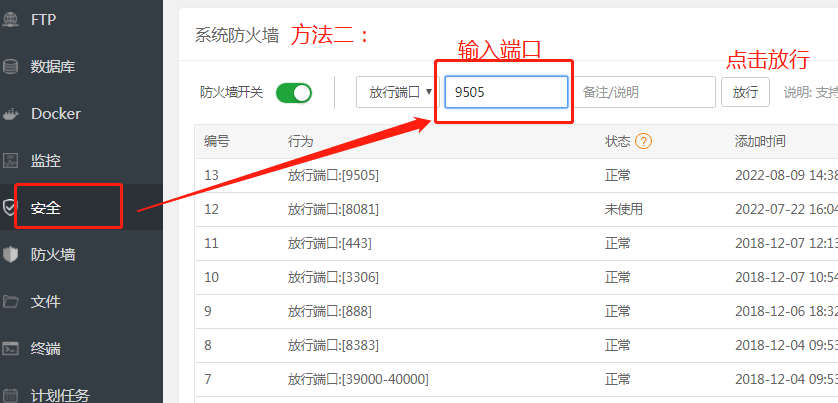
第三步:点击【安全】,点击添加端口9505或者直接输入端口信息9505,点击放行
#
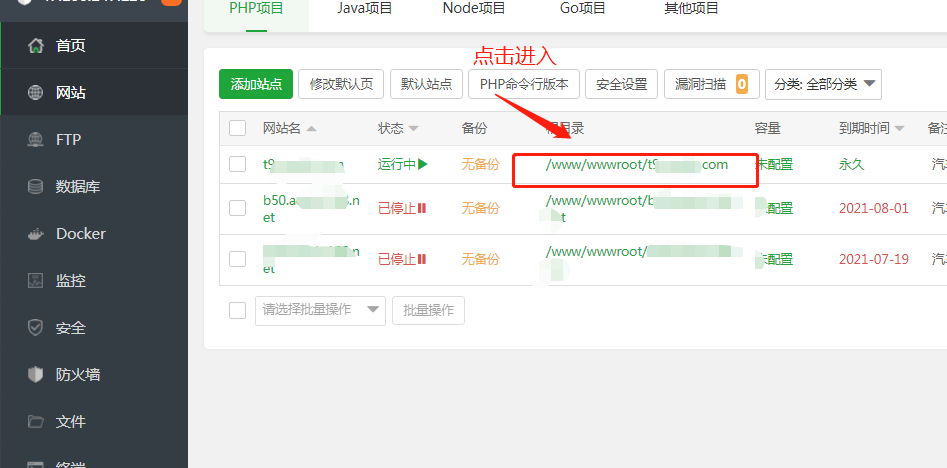
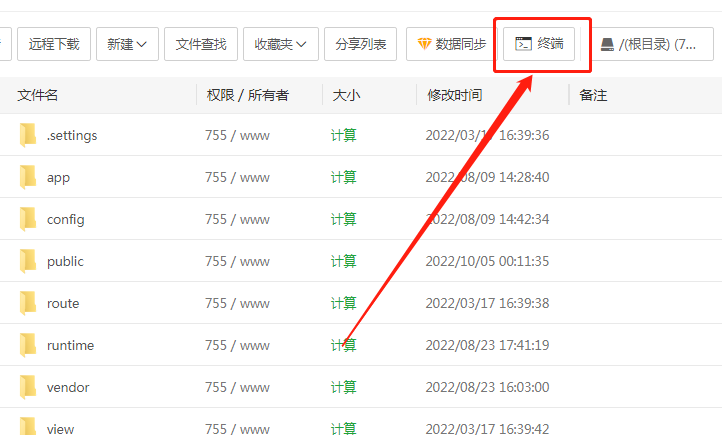
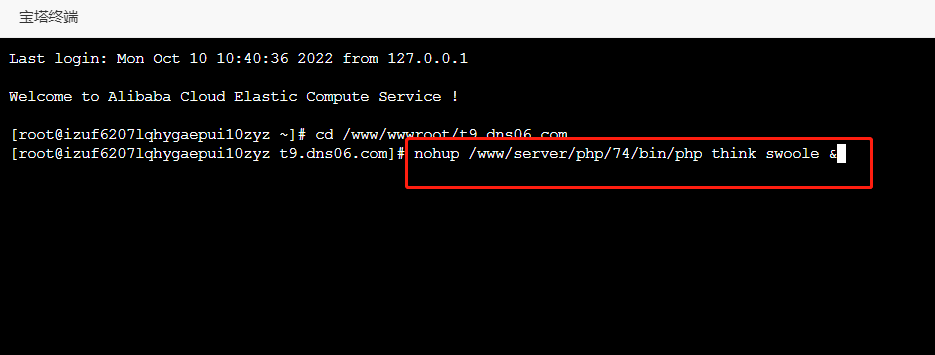
第四步:回到站点,点击目录进入,找到【终端】,输入(或粘贴)
nohup /www/server/php/74/bin/php think swoole & 回车
如下图所示:
#
回车后,如下图所示

#
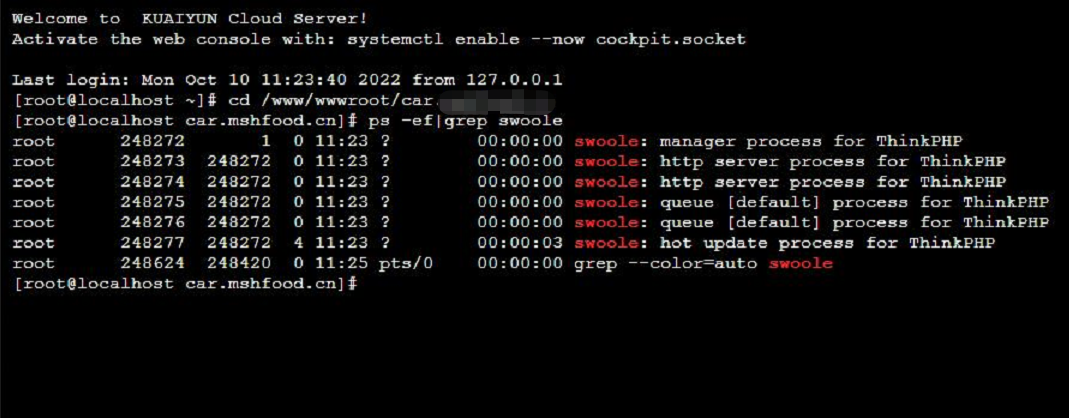
如果不确定是否配置好了,可以在输入 ps -ef|grep swoole 或关闭终端重新打开再输入ps -ef|grep swoole回车,出现下图的样式说明执行成功
#
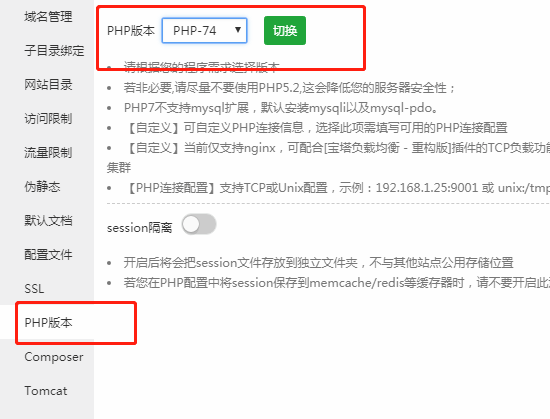
最后,如果站点选择的版本不是php7.4的,需要点击站点设置,php版本改成7.4的
- 空白目录
- 基本描述
- 环境介绍
- 常见问题
- 高德地图配额问题
- 启动代驾
- 微信昵称带符号授权不起的问题
- 基本帮助
- 小程序绑定教程
- 腾讯key申请教程
- 小程序如何提交审核
- 后台安装教程
- 前端上传代码
- 地理位置申请
- 用户隐私保护指引设置
- 安装版本更新后 后台打不开
- 骗审要关闭的功能
- 号码隐私保护申请流程
- 后台操作
- 商家中心
- 商家设置
- 商家列表
- 商家等级
- 商家服务分类
- 商城订单
- 平台管理
- 短信配置
- 系统设置
- 支付设置
- 主商户
- 服务商
- 充值设置
- 救援类型
- 通知设置
- 隐私服务
- 号码隐私充值
- 打印机管理
- 会员管理
- 会员等级
- 会员
- 推广管理
- 分销代理设置
- 提现申请
- 佣金记录
- 代理列表
- 代理审核
- 代理协议设置
- 挪车码
- 套卡管理
- 套卡列表
- 权限申请
- 系统管理
- 管理员管理
- 角色管理
- 配置管理
- 上传管理
- 管理日志
- 手机端操作
- 商家门店入驻
- 我的分销
- 互助挪车
- 平台客服
- 区域代理
- 门店收益计算
- 车辆违章查询
- 违章查询申请
- 套餐查询
- 免费查询
- 违章设置
- 违章查询使用
- 代驾管理
- 费用设置
- 代驾城市选择
- 代驾司机基本设置
- 用户相关基本设置
- 代驾高德地图设置
- 取消代驾定时任务
- 门店后台相关设置
- 门店认领设置
- 选择门店行业类目
- 门店入驻协议等审核信息
- 门店手机端相关设置
- 商家小店套卡设置
- 用户如何购买消费小店套卡
- 如何添加员工管理
- 员工如何核销
- 门店优惠券设置
- 用户如何领取使用门店优惠券
- 新闻资讯
- 如何添加文章
- 如何添加文章分类
- 首页新闻展示和开启
- 平台商城相关设置
- 商品分类
- 商品管理
- 平台优惠券
- 订单列表
- 平台商城设置
- 任务活动
- 单次任务
- 周期任务
- 如何领取任务
- 落地页相关设置
- 功能说明
- 申请聚推客接口
- 后台落地页添加
- 手机端首页如何添加落地页
- 首页页面配置相关设置
- 首页顶部轮播图设置
- 首页导航相关设置
- 首页热门展示设置
- 服务页图标相关设置
- 推广分销相关配置
- 推广海报设置
- 分销等级设置
- 推广分销利润设置
- 分销推广奖励
- 代理相关设置
- 区域代理申请
- 区域代理审核
- 代理分润设置
