# **文件准备(视频讲解在群公告的资料库)**
> 群文件中下载【直播相关配置】或者群公告中的资料库提取码中下载【直播相关配置】
> 视频教程:[https://pan.baidu.com/s/1XyZLMFQnHsQfRXoqgOGXsg](https://pan.baidu.com/s/1XyZLMFQnHsQfRXoqgOGXsg)
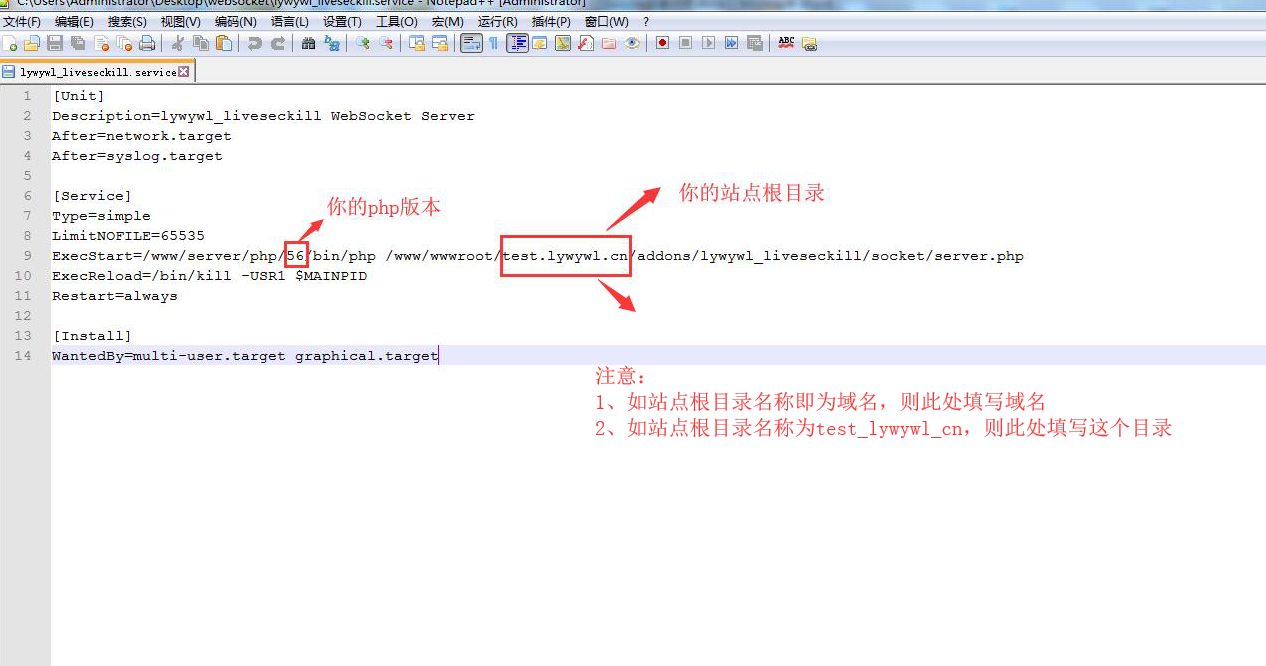
1. 文件名:lywywl_liveseckill.service
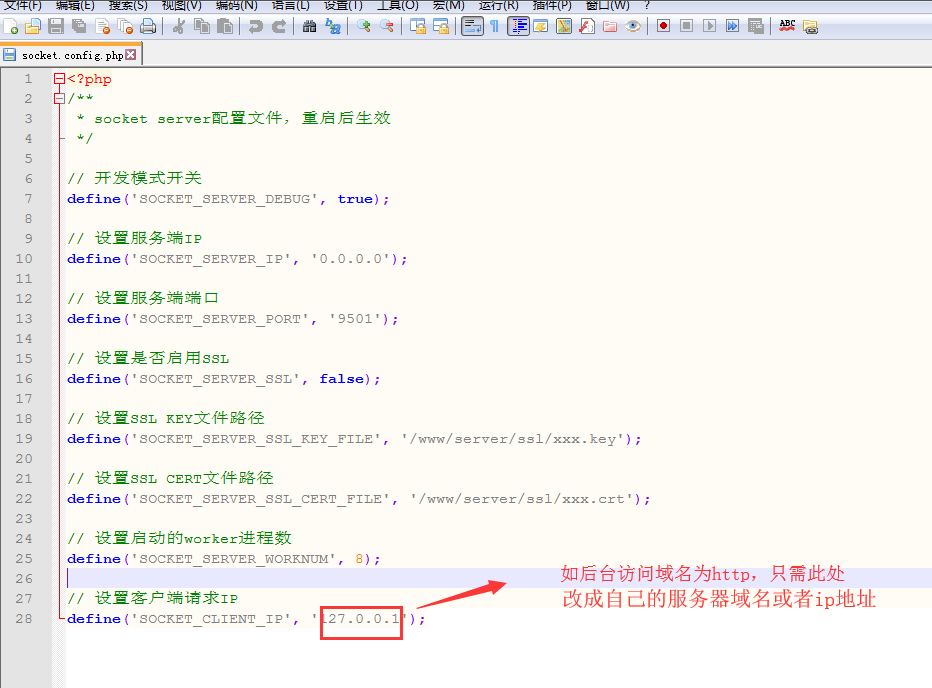
2. 文件名:socket.config.php
# **redis配置**
## **1. 安装redis**
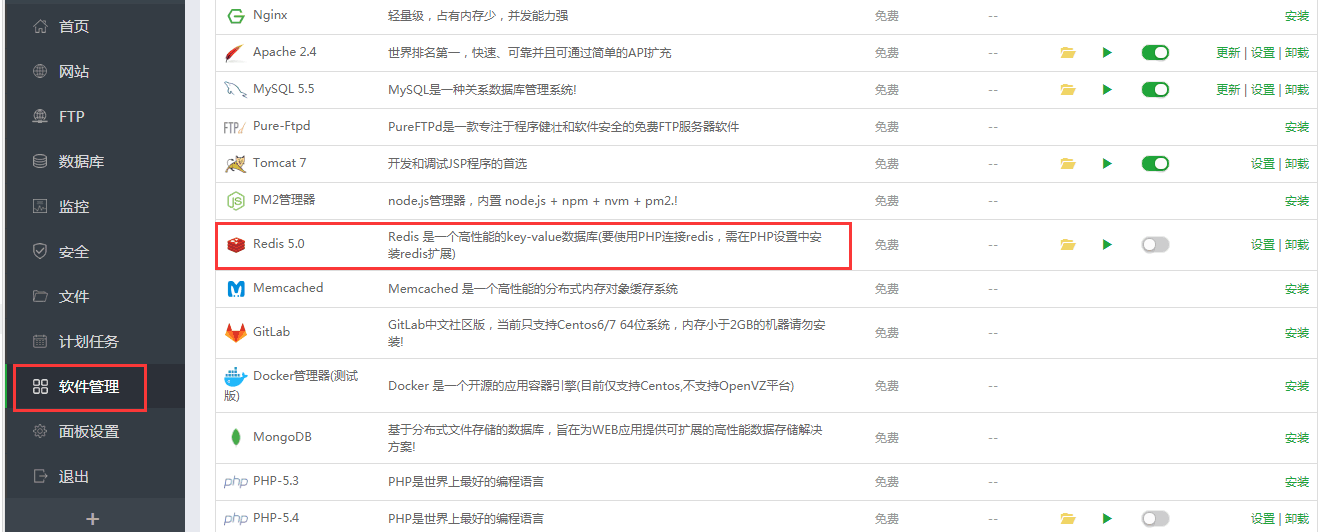
打开宝塔面板,软件管理,安装Redis并启用
## **2. PHP设置中安装redis扩展**
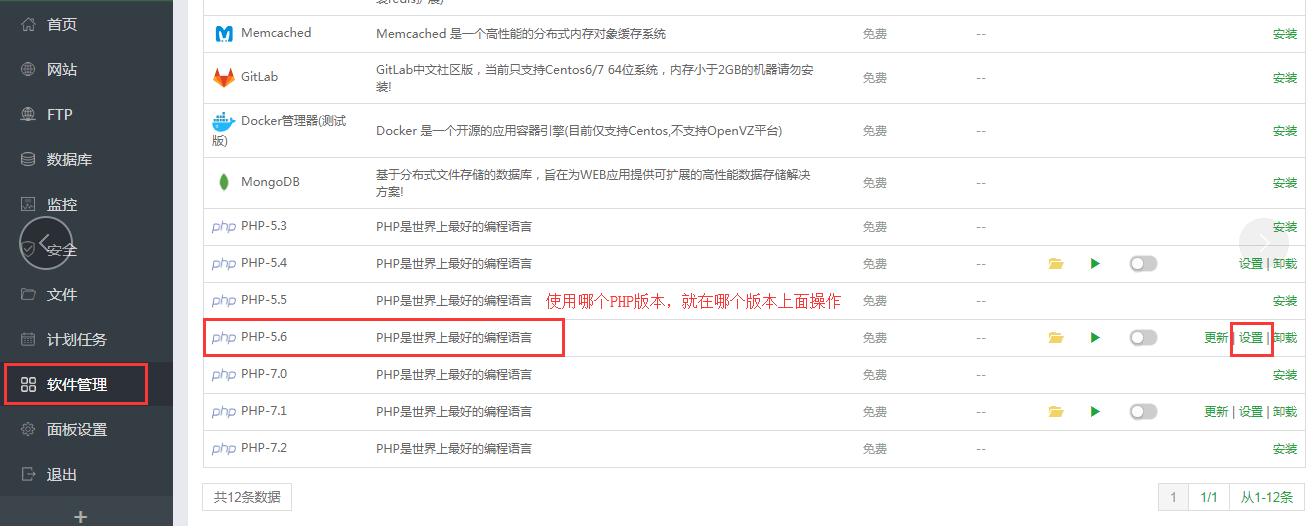
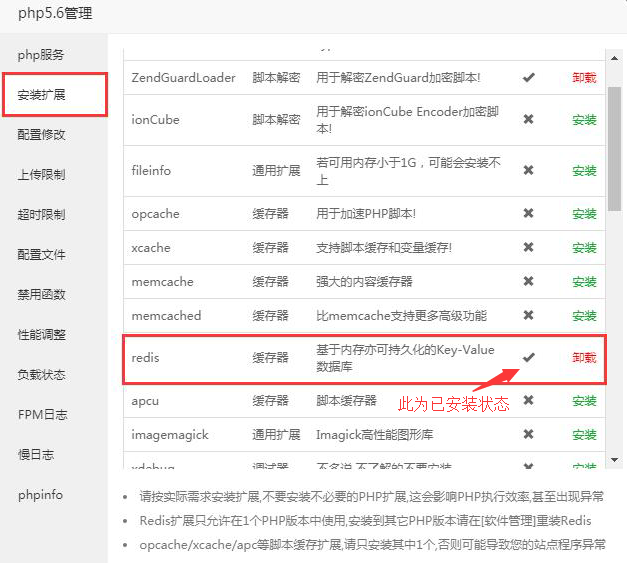
查看微擎站点对应的php版本是多少,然后在下图对应php版本中安装redis扩展
## **3. 修改微擎配置文件**
位置:网站-微擎安装目录-data-config.php
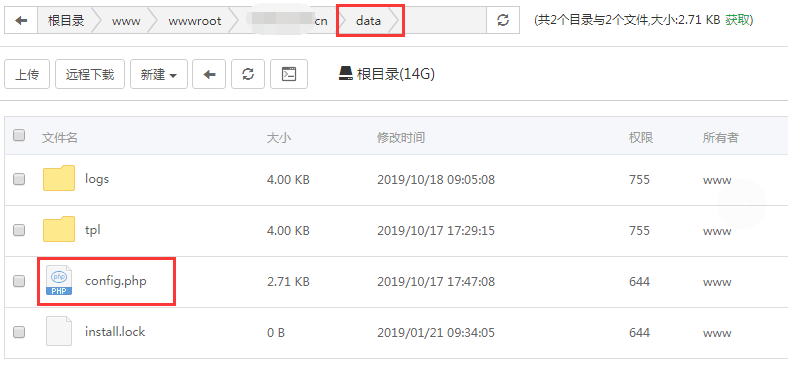
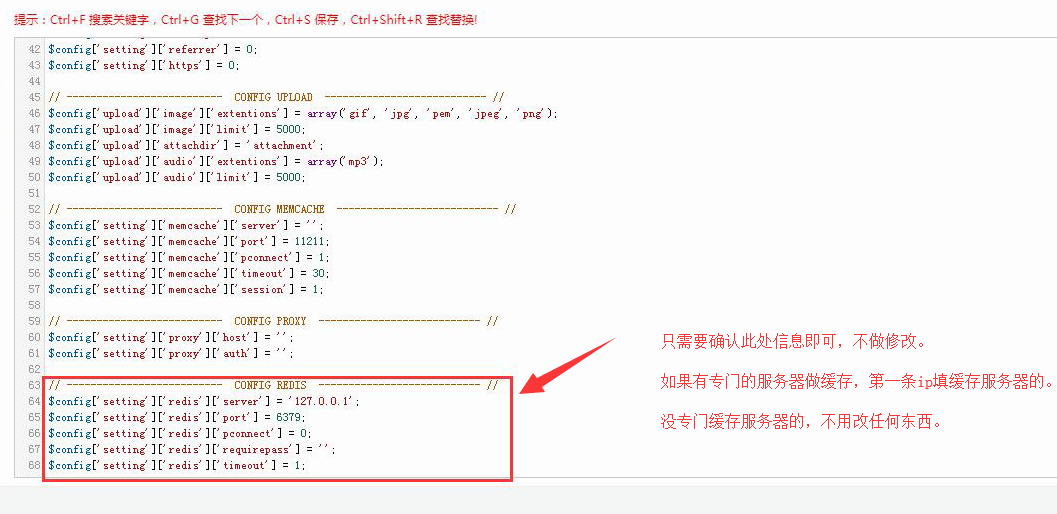
> 代码如下,如config.php中没有此代码,复制粘贴即可
```
// -------------------------- CONFIG REDIS --------------------------- //
$config['setting']['redis']['server']='127.0.0.1';
$config['setting']['redis']['port']=6379;
$config['setting']['redis']['pconnect']=0;
$config['setting']['redis']['requirepass']='';
$config['setting']['redis']['timeout']=1;
```
# **swoole 安装**
> 要在宝塔面板的【安全】放行9501端口,放行之后会显示未使用,按照下面步骤操作成功后会显示正常。
要在云服务器[你的服务商,如腾讯、阿里、百度.....]的安全组里放行9501端口
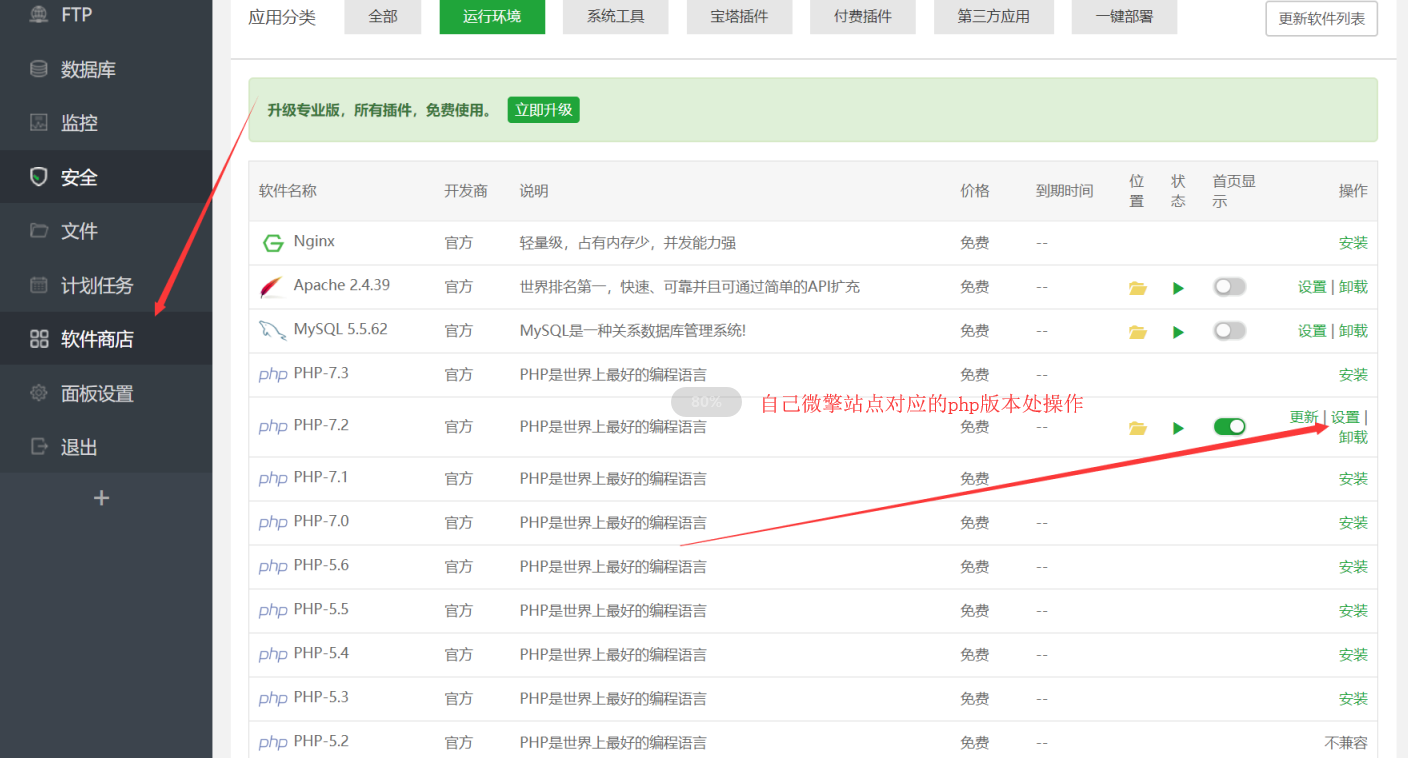
## **1. 找到微擎站点对应的php版本**
> 宝塔面板——【软件管理】——【微擎站点对应php版本】——【设置】
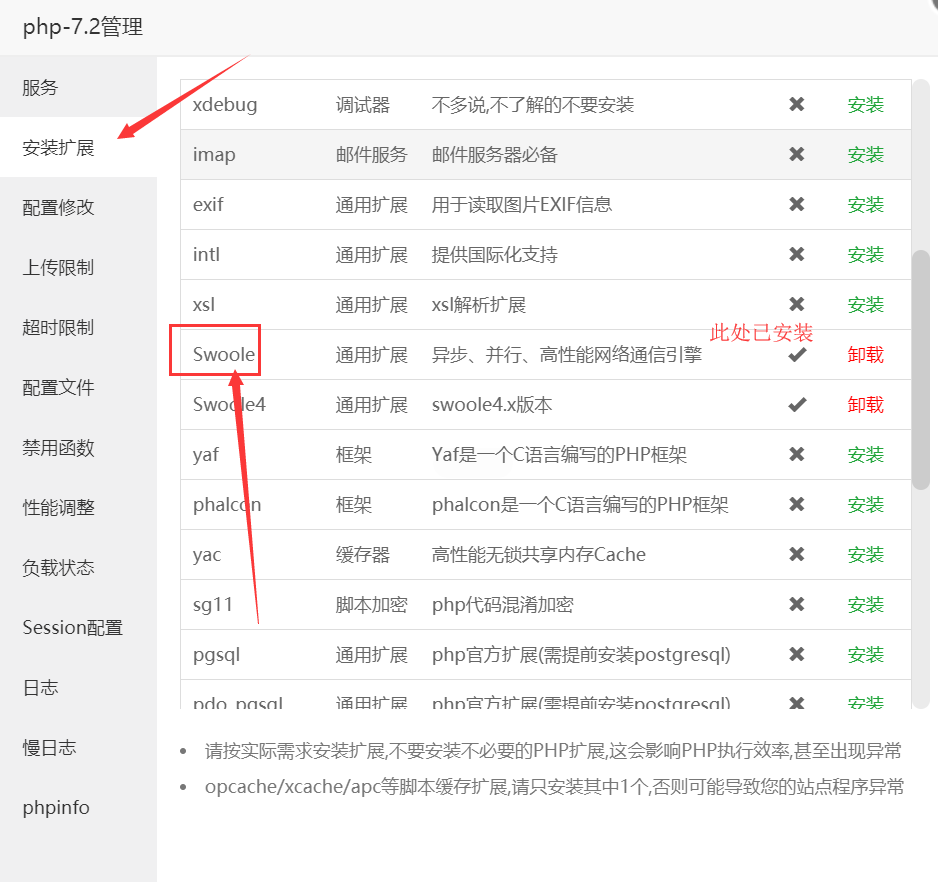
## **2 安装swoole**
> 【安装扩展】——【安装Swoole】
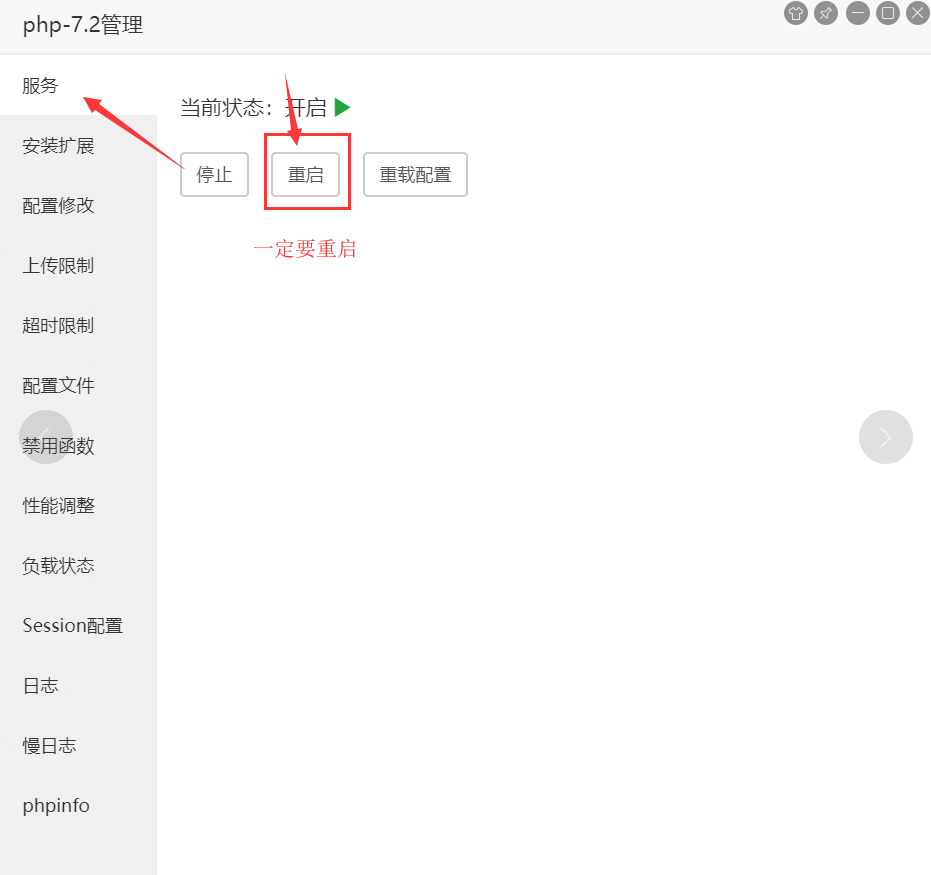
## **3. 重启php服务**
> 安装好后,还在设置内点击【php服务】——重启
# **开启通讯进程服务**
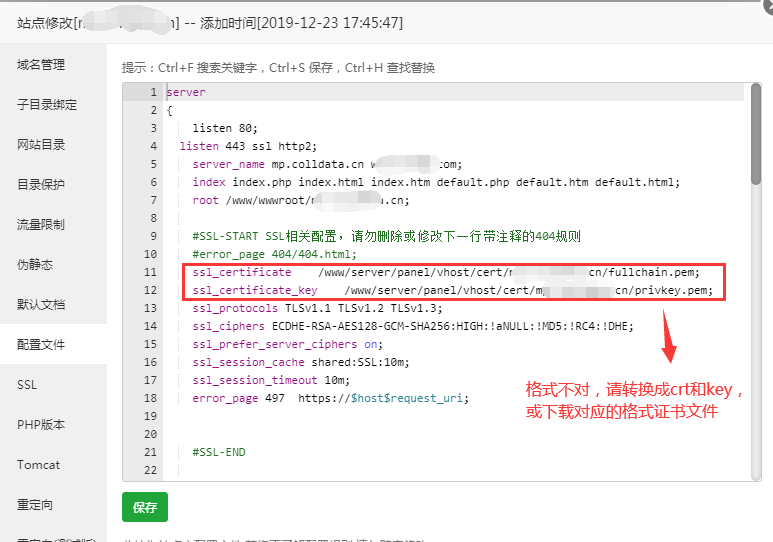
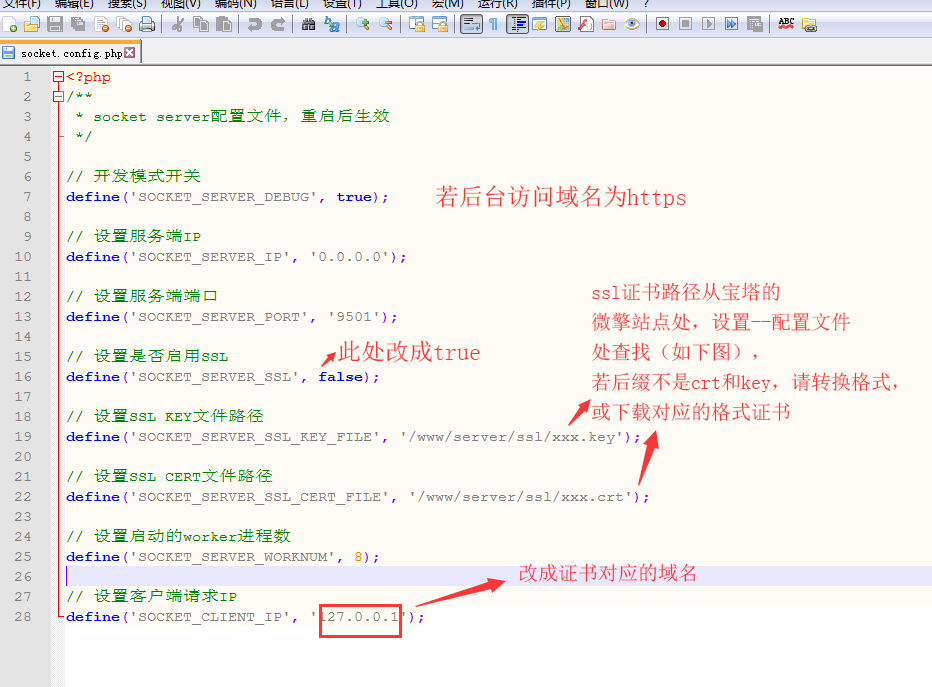
## **1. 修改配置文件socket.config.php**
## **2. 上传至微擎站点目录**
修改完后请将文件上传至【宝塔面板】——【网站】——【对应微擎站点】,打开目录addons\lywywl_liveseckill\socket\目录下
# **使用systemd管理swoole服务**
## **1. 修改配置文件lywywl_liveseckill.service**
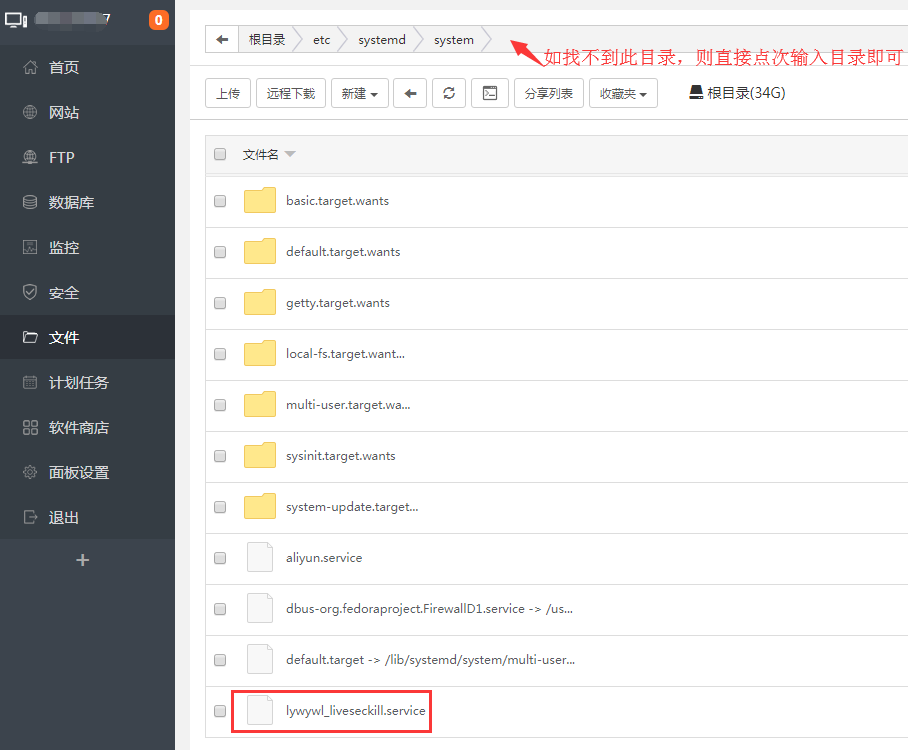
## **2. 上传至服务器根目录/etc/systemd/system/(若服务器系统为centOS 6 版本,请参考其他目录)**
# **打开ssh终端连接上服务器**
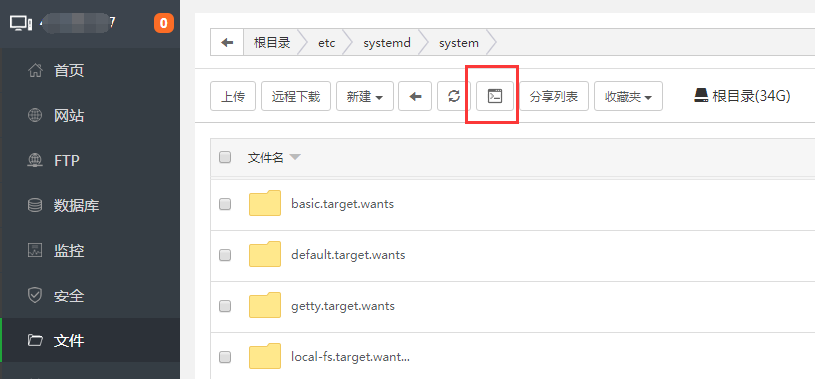
## **1. ssh终端无密码时**
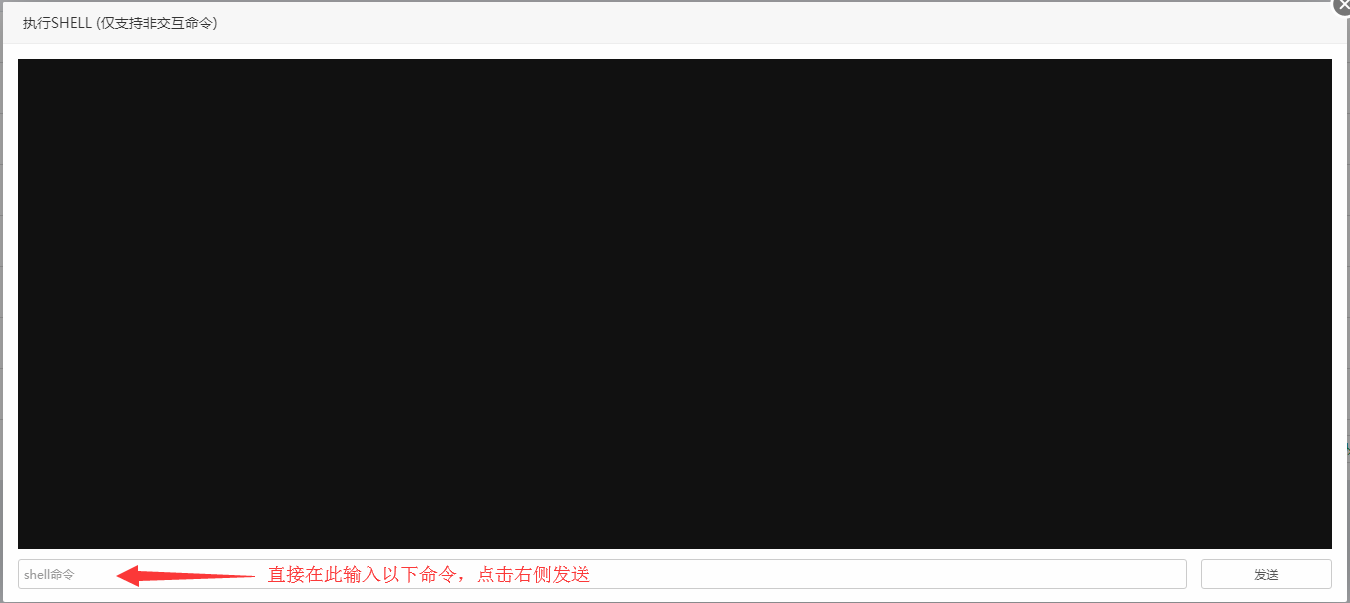
reload守护进程使其生效(每次修改lywywl_liveseckill.service 文件后都需要执行生效)
```
sudo systemctl --system daemon-reload
```
启动服务
```
sudo systemctl start lywywl_liveseckill.service
```
查看服务状态
```
sudo systemctl status lywywl_liveseckill.service
```
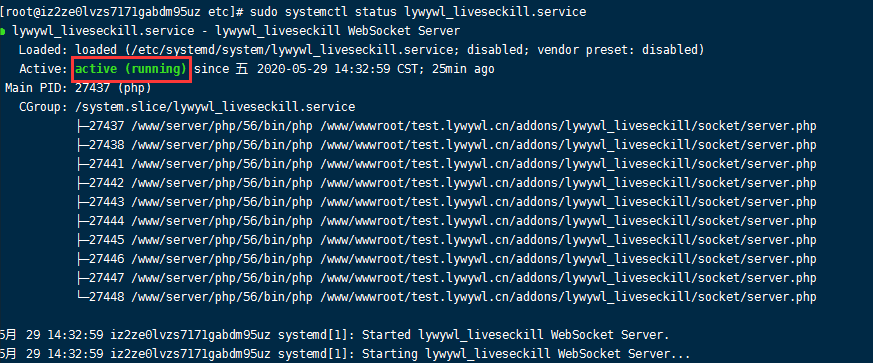
执行后出现以active(running),表示服务启动成功
## **2. ssh终端有密码时**
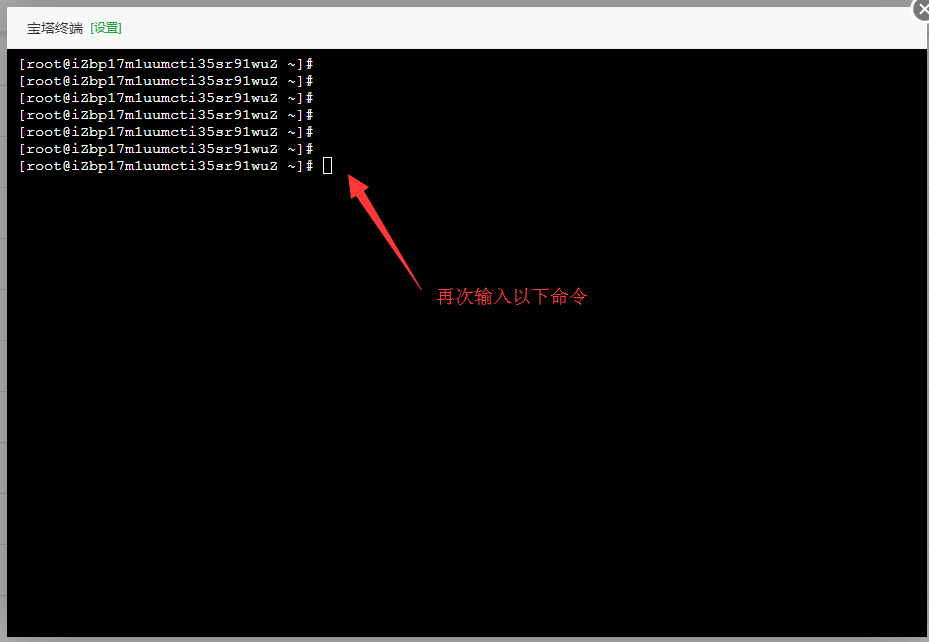
reload守护进程使其生效(每次修改lywywl_liveseckill.service 文件后都需要执行生效)
```
sudo systemctl --system daemon-reload
```
启动服务
```
sudo systemctl start lywywl_liveseckill.service
```
查看服务状态
```
sudo systemctl status lywywl_liveseckill.service
```
执行后出现以active(running),表示服务启动成功

## **提供其他命令,已备使用**
停止服务
```
sudo systemctl stop lywywl_liveseckill.service
```
其他命令
#重启服务
```
sudo systemctl reload lywywl_liveseckill.service
```
#开机启动
```
sudo systemctl enable lywywl_liveseckill.service
```
#取消开机启动
```
sudo systemctl disable lywywl_liveseckill.service
```
