
## 一,安装firebase/php-jwt扩展:
1,命令:
~~~
liuhongdi@lhdpc:/data/php/admapi$ composer require firebase/php-jwt
~~~
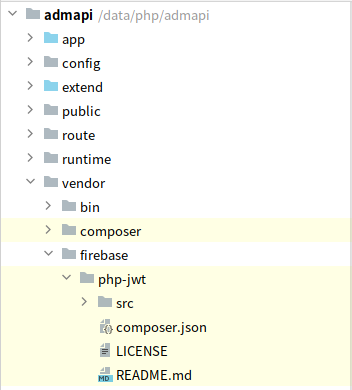
2,安装成功后的位置:
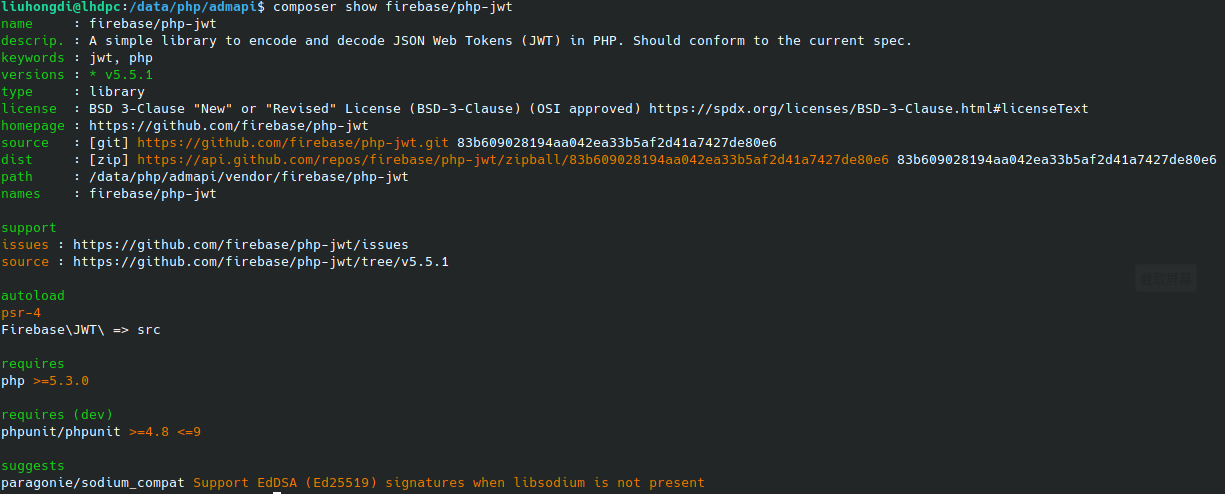
3,查看firebase/php-jwt的版本:
~~~
liuhongdi@lhdpc:/data/php/admapi$ composer show firebase/php-jwt
~~~
## 二,前端vue代码:
Login.vue
~~~
<template>
<div style="padding:20px;display: flex;align-items:center;justify-content: center;">
<form :model="account" style="margin-top:50px;width:400px;">
<input v-model="account.username" placeholder="请输入用户名" style="width:392px;font-size:16px;" /><br/>
<input v-model="account.password" type="password" placeholder="请输入密码" style="width:392px;margin-top:10px;font-size:16px;" /><br/>
<!--v-loading.fullscreen.lock="isLoading"-->
<div @click="login" style="margin-top:10px;width: 100%;height:40px;line-height:40px;background: #ff0000;border-radius: 10px;">
登录
</div>
<div @click="info" style="margin-top:10px;width: 100%;height:40px;line-height:40px;background: #ff0000;border-radius: 10px;">
info
</div>
<div class="text-align-right">
</div>
</form>
</div>
</template>
<script>
import { ref, reactive } from "vue";
import { ElMessage } from "element-plus";
import { apiLogin,apiInfo,apiToken} from '@/api/api';
export default {
name: "Login",
setup() {
const accountRef = ref(null);
//表单字段
const account = reactive({
username: "",
password: "",
});
//登录
const login = async () => {
console.log('begin login');
var data = new FormData();
data.append("username",account.username);
data.append("password",account.password);
apiLogin(data).then(res => {
//成功
if (res.code == 0) {
//保存jwt token到本地
localStorage.setItem('token', res.data.token);
//提示
ElMessage.success("登录成功!");
} else {
ElMessage.error("登录失败:"+res.msg);
}
}).catch((error) => {
console.log(error)
})
};
const login2 = () => {
console.log('begin login2');
}
const info = () => {
apiInfo().then(res => {
//成功
if (res.code == 0) {
//保存jwt token到本地
//localStorage.setItem('token', res.data.token);
//提示
//ElMessage.success("登录成功!");
console.log(res.data);
} else {
ElMessage.error("用户信息获取失败:"+res.msg);
}
}).catch((error) => {
console.log(error)
})
}
return {
account,
//loginRules,
accountRef,
login,
login2,
info,
//isLoading,
};
},
}
</script>
<style scoped>
</style>
~~~
api/axios.js
```
...
//post
export function postForm (url, params) {
return new Promise((resolve, reject) => {
let headers = {
'Content-Type': 'application/x-www-form-urlencoded',
}
//判断params中是否包含X-CSRF-TOKEN
var token = "";
if (params.has("X-CSRF-TOKEN")) {
token = params.get("X-CSRF-TOKEN");
params.delete("X-CSRF-TOKEN");
headers = {
'Content-Type': 'application/x-www-form-urlencoded',
'X-CSRF-TOKEN': token,
}
}
_axios.post(url, params,{headers})
.then(res => {
resolve(res.data)
})
.catch(err => {
console.log("api error:");
console.log(err);
//alert(err);
reject(err.data)
})
})
}
...
```
api/api.js
```
//get,
import { get, postForm} from './axios'
//user
export const apiLogin = pLogin => postForm('/api/auth/login', pLogin)
...
```
## 三,后端php代码:
1,创建middleware
~~~
liuhongdi@lhdpc:/data/php/admapi$ php think make:middleware CheckJwt
Middleware:app\middleware\CheckJwt created successfully.
~~~
2,CheckJwt的代码:
~~~
<?php
declare (strict_types = 1);
namespace app\middleware;
use app\lib\util\JwtUtil;
class CheckJwt
{
/**
* 处理请求,得到用户信息
*
* @param \think\Request $request
* @param \Closure $next
* @return Response
*/
public function handle($request, \Closure $next)
{
$auth = $request->header('authorization');
if ($auth == null) {
return $next($request);
}
$token = str_replace("Bearer ","",$auth);
$jUtil = new JwtUtil();
$res = $jUtil->verifyjwt($token);
if (isset($res['code']) && isset($res['userId']) && $res['code'] == 0 && is_int($res['userId'])) {
$userId = $res['userId'];
$request->auth = $userId;
} else {
$request->auth = 0;
}
return $next($request);
}
}
~~~
3,app/middleware.php
使从jwt得到用户信息的middleware生效:
~~~
<?php
// 全局中间件定义文件
return [
app\middleware\CheckJwt::class,
];
~~~
4,controller/Auth.php
~~~
<?php
declare (strict_types = 1);
namespace app\controller;
use app\BaseController;
use think\facade\Cache;
use think\Request;
use app\result\Result;
use think\response\Json;
use app\validate\Login as LoginValidate;
use app\validate\GoodsList as GoodsListValidate;
use think\exception\ValidateException;
use app\lib\util\JwtUtil;
class Auth extends BaseController
{
/*
*得到form token
*
*@return \think\Response
* */
public function token():Json {
$type="sha1";
$type = is_callable($type) ? $type : 'md5';
$token = call_user_func($type, $this->request->server('REQUEST_TIME_FLOAT'));
$key = uniqid();
Cache::set($key,$token,300);
$res = [
"token"=>$key.$token,
];
return Result::Success($res);
}
/**
* 登录
*
* @return \think\Response
*/
public function login():Json {
// Header验证
if ($this->request->header('X-CSRF-TOKEN')){
$reqToken = $this->request->header('X-CSRF-TOKEN');
$key = substr($reqToken,0,13);
$value = Cache::get($key);
$origToken = $key.$value;
if ($origToken === $reqToken) {
//验证通过
} else {
//验证不通过
return Result::Error(422,'表单token错误');
}
} else {
return Result::Error(423,'找不到表单token');
}
try {
validate(LoginValidate::class)
->check($_POST);
} catch (ValidateException $e) {
// 验证失败 输出错误信息
return Result::Error(422,$e->getError());
}
if ($_POST["username"] == "dddddd" && $_POST["password"] == "111111"){
//验证成功,生成jwt返回
$userId = 123;
$jUtil = new JwtUtil();
$token = $jUtil->createJwt($userId);
$res = ["token"=>$token];
// 防止重复提交
Cache::delete($key);
return Result::Success($res);
} else {
return Result::Error(422,"用户名密码错误");
}
}
}
~~~
Result.php
```
<?php
namespace app\result;
use think\response\Json;
class Result {
//success
static public function Success($data):Json {
$rs = [
'code'=>0,
'msg'=>"success",
'data'=>$data,
];
return json($rs);
}
//error
static public function Error($code,$msg):Json {
$rs = [
'code'=>$code,
'msg'=>$msg,
'data'=>"",
];
return json($rs);
}
}
```
5,lib/util/JwtUtil.php
~~~
<?php
namespace app\lib\util;
use Firebase\JWT\ExpiredException;
use Firebase\JWT\JWT;
class JwtUtil {
private $signKey = "lhd@2001:liuhongdi";
private $timeMinutes = 5;
/**
* 根据json web token设置的规则生成token
* @return \think\response\Json
*/
public function createJwt($userId):string
{
$key = md5($this->signKey); //jwt的签发**,验证token的时候需要用到
$time = time(); //签发时间
$expire = $time + $this->timeMinutes*60; //过期时间
$token = array(
"userId" => $userId,
"iss" => "http://www.liuhongdi.com/",//签发组织
"aud" => "lhd", //签发作者
"iat" => $time, //签发时间
"nbf" => $time, //生效时间
"exp" => $expire //过期时间
);
$jwt = JWT::encode($token,$key);
return $jwt;
}
/**
* 验证token
* @return \think\response\Json
*/
public function verifyjwt($token)
{
$key = md5($this->signKey); //jwt的签发**,验证token的时候需要用到
try{
$jwtAuth = json_encode(JWT::decode($token,$key,array("HS256")));
$authInfo = json_decode($jwtAuth,true);
if (!$authInfo['userId']){
return ['code'=>0,'msg'=>"用户不存在"];
}
return ['code'=>0,'userId'=>$authInfo['userId'],'msg'=>"ok"];
}catch (ExpiredException $e){
return ['code'=>0,'msg'=>"token过期"];
}catch (\Exception $e){
return ['code'=>0,'msg'=>$e->getMessage()];
}
}
}
~~~
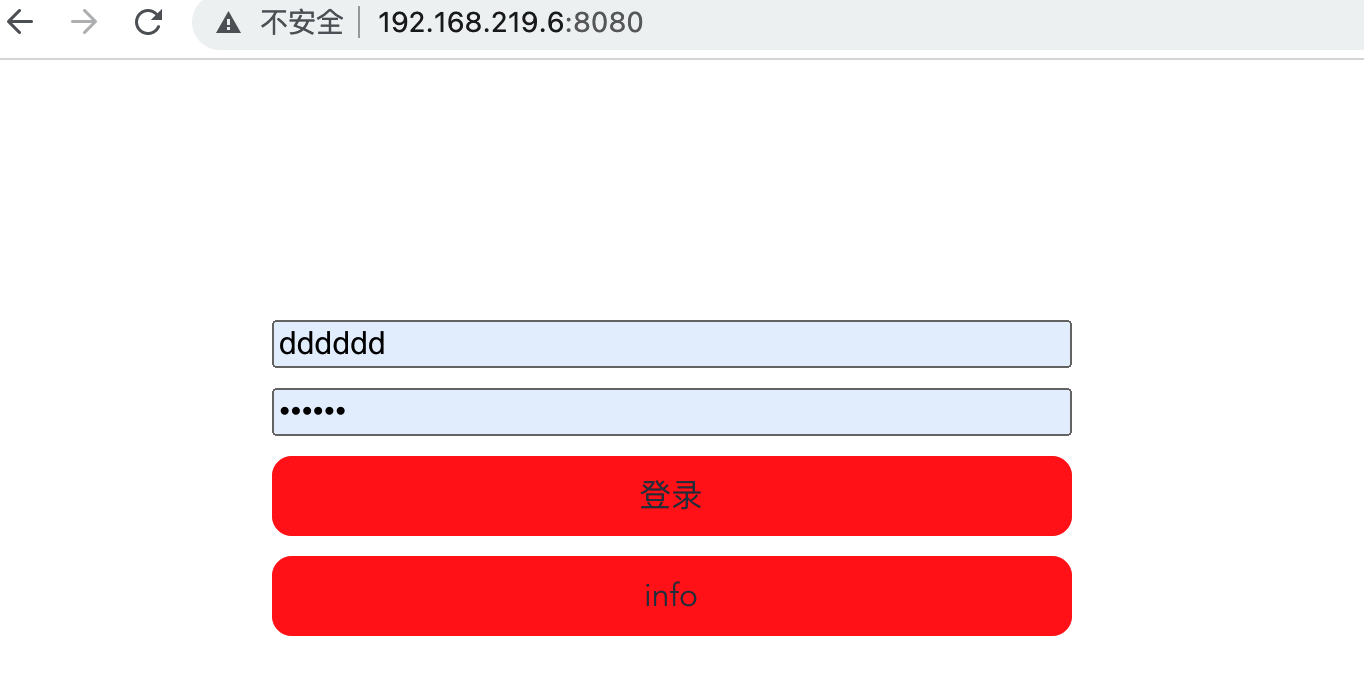
## 四,效果测试
1,界面:用户名 dddddd,密码;111111,可见php的代码:
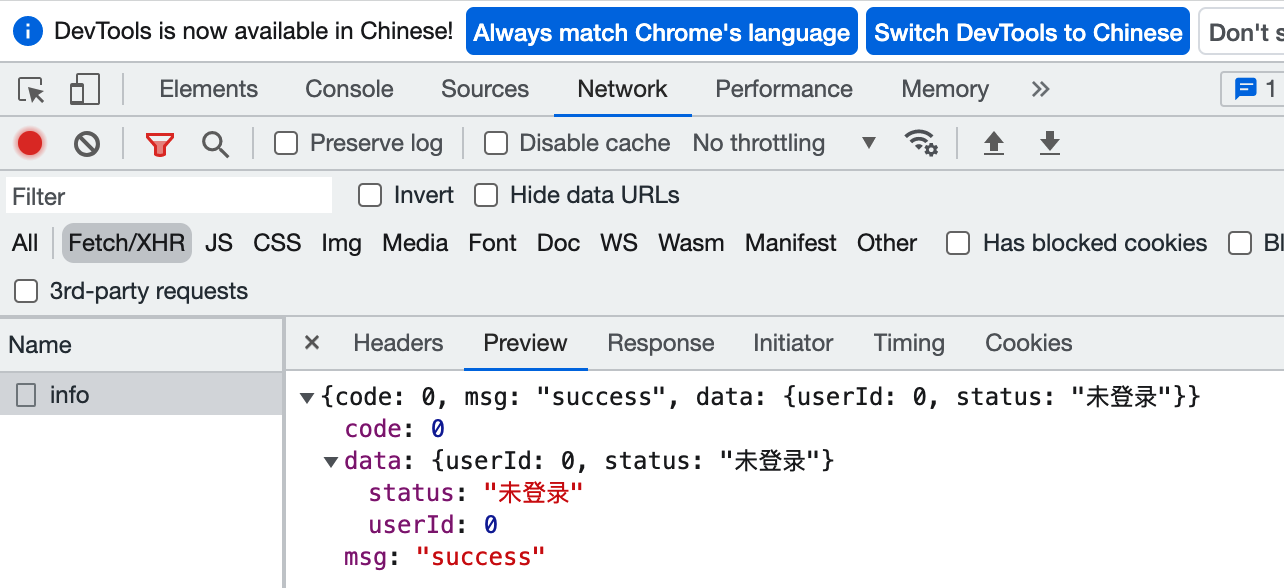
2,未登录时点info
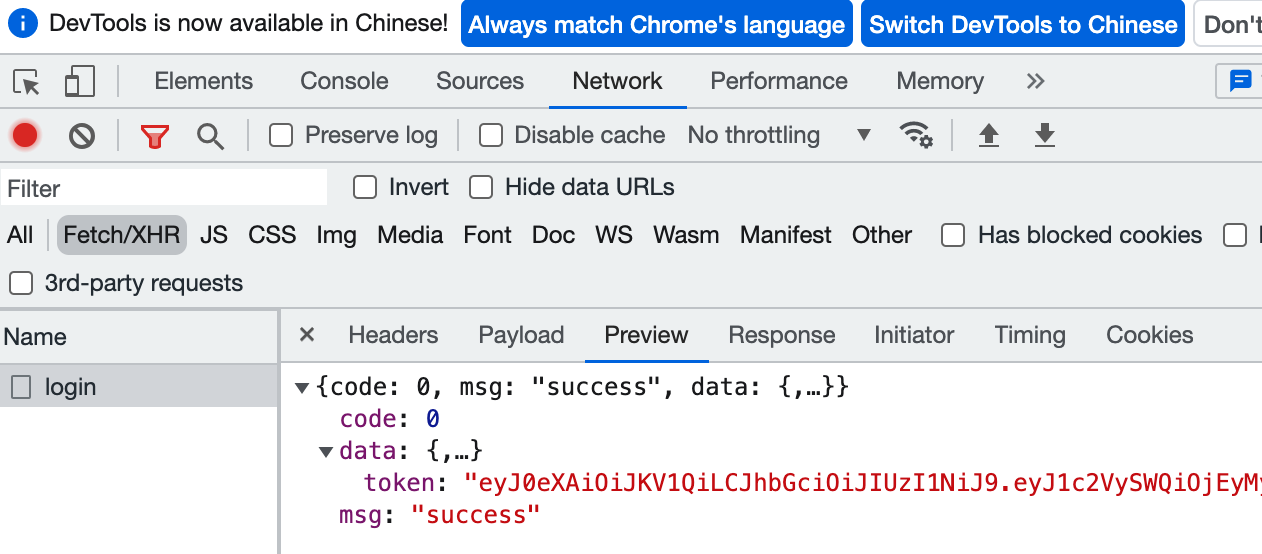
3,登录后的返回:
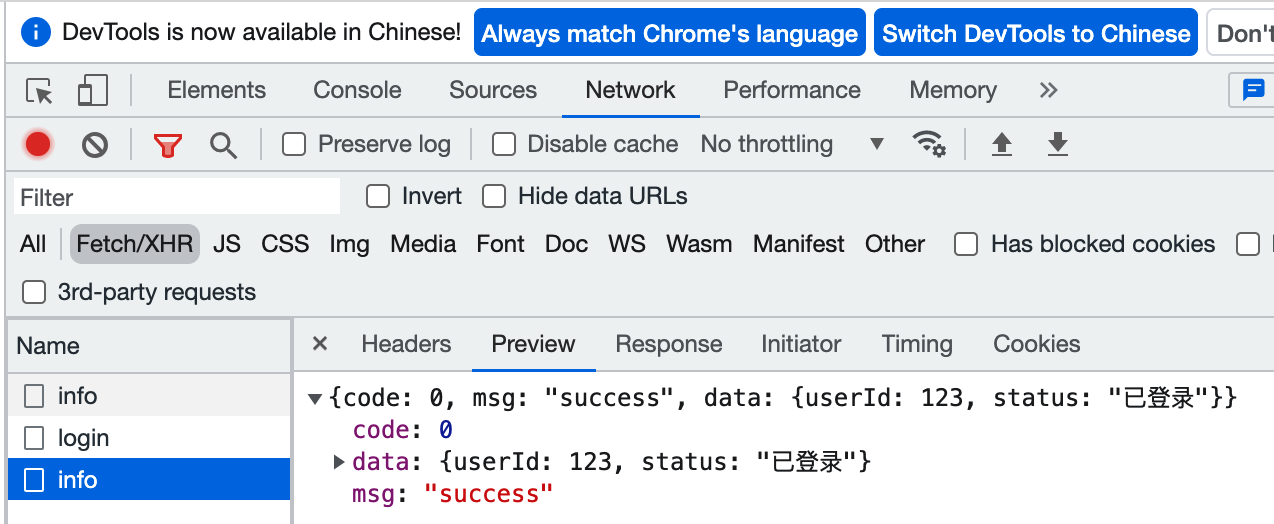
4,登录后查看info的返回:
- thinkphp6执行流程(一)
- php中use关键字用法详解
- Thinkphp6使用腾讯云发送短信步骤
- 路由配置
- Thinkphp6,static静态资源访问路径问题
- ThinkPHP6.0+ 使用Redis 原始用法
- smarty在thinkphp6.0中的最佳实践
- Thinkphp6.0 搜索器使用方法
- 从已有安装包(vendor)恢复 composer.json
- tp6with的用法,表间关联查询
- thinkphp6.x多对多如何添加中间表限制条件
- thinkphp6 安装JWT
- 缓存类型
- 请求信息和HTTP头信息
- 模型事件用法
- 助手函数汇总
- tp6集成Alipay 手机和电脑端支付的方法
- thinkphp6使用jwt
- 6.0session cookie cache
- tp6笔记
- TP6(thinkphp6)队列与延时队列
- thinkphp6 command(自定义指令)
- command(自定义指令)
- 本地文件上传
- 缓存
- 响应
- 公共函数配置
- 七牛云+文件上传
- thinkphp6:访问多个redis数据源(thinkphp6.0.5 / php 7.4.9)
- 富文本编辑器wangEditor3
- IP黑名单
- 增删改查 +文件上传
- workerman 定时器操作控制器的方法
- 上传文件到阿里云oss
- 短信或者邮箱验证码防刷代码
- thinkphp6:访问redis6(thinkphp 6.0.9/php 8.0.14)
- 实现关联多个id以逗号分开查询数据
- thinkphp6实现邮箱注册功能的细节和代码(点击链接激活方式)
- 用mpdf生成pdf文件(php 8.1.1 / thinkphp v6.0.10LTS )
- 生成带logo的二维码(php 8.1.1 / thinkphp v6.0.10LTS )
- mysql数据库使用事务(php 8.1.1 / thinkphp v6.0.10LTS)
- 一,创建过滤IP的中间件
- 源码解析请求流程
- 验证码生成
- 权限管理
- 自定义异常类
- 事件监听event-listene
- 安装与使用think-addons
- 事件与多应用
- Workerman 基本使用
- 查询用户列表按拼音字母排序
- 扩展包合集
- 查询用户数据,但是可以通过输入用户昵称来搜索用户同时还要统计用户的文章和粉丝数
- 根据图片的minetype类型获取文件真实拓展名思路
- 到处excel
- 用imagemagick库生成缩略图
- 生成zip压缩包并下载
- API 多版本控制
- 用redis+lua做限流(php 8.1.1 / thinkphp v6.0.10LTS )
- 【thinkphp6源码分析三】 APP类之父, 容器Container类
- thinkphp6表单重复提交解决办法
- 小程序授权
- 最简单的thinkphp6导出Excel
- 根据访问设备不同访问不同模块
- 服务系统
- 前置/后置中间件
- 给接口api做签名验证(php 8.1.1 / thinkphp v6.0.10LTS )
- 6实现邮箱注册功能的细节和代码(点击链接激活方式)
- 使用前后端分离的验证码(thinkphp 6.0.9/php 8.0.14/vue 3.2.26)
- 前后端分离:用jwt+middleware做用户登录验证(php 8.1.1 / thinkphp v6.0.10LTS )
- vue前后端分离多图上传
- thinkphp 分组、页面跳转与ajax
- thinkphp6 常用方法文档
- 手册里没有的一些用法
- Swagger 3 API 注释
- PHP 秒级定时任务
- thinkphp6集成gatewayWorker(workerman)实现实时监听
- thinkphp6按月新增数据表
- 使用redis 实现消息队列
- api接口 统一结果返回处理类
- 使用swoole+thinkphp6.0+redis 结合开发的登录模块
- 给接口api做签名验证
- ThinkPHP6.0 + UniApp 实现小程序的 微信登录
- ThinkPHP6.0 + Vue + ElementUI + axios 的环境安装到实现 CURD 操作!
- 异常$e
- 参数请求验证自定义和异常错误自定义