# ElasticSearch7.x单机版安装
## 1.前置准备
相关文档:
* 官网:[传送门](https://www.elastic.co/)
* 官网文档:[传送门](https://www.elastic.co/guide/index.html)
* 中文手册:[传送门](https://www.elastic.co/guide/cn/elasticsearch/guide/current/index.html)
* 中文社区:[传送门](https://elasticsearch.cn/)
* Jave-Client :[传送门](https://www.elastic.co/guide/en/elasticsearch/client/java-rest/7.x/java-rest-high-create-index.html)
## 2.下载安装包
官方下载地址:[传送门](https://www.elastic.co/cn/downloads/elasticsearch)
历史版本下载:[传送门](https://www.elastic.co/cn/downloads/past-releases#elasticsearch)
本文以7.4.0为例:[7.4.0下载地址](https://www.elastic.co/cn/downloads/past-releases/elasticsearch-7-2-0)
命令下载
~~~bash
wget https://artifacts.elastic.co/downloads/elasticsearch/elasticsearch-7.4.0-linux-x86_64.tar.gz
~~~
## 3.解压
~~~perl
#解压到自定义目录tar -zxvf elasticsearch-7.4.0-linux-x86_64.tar.gz -C /usr/local
~~~
标题
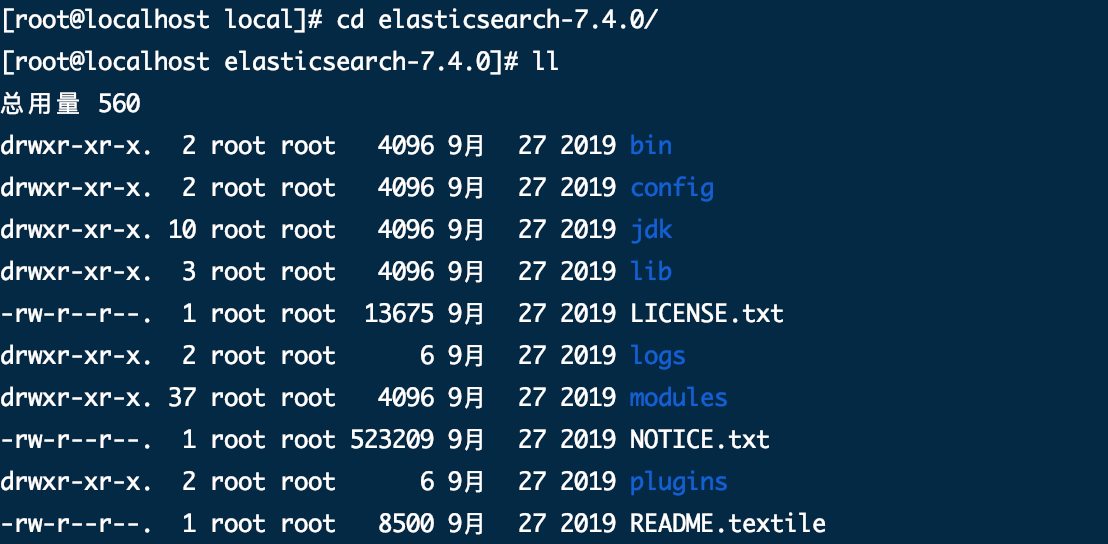
Elasticsearch 7.x 目录结构如下:
* bin :脚本文件,包括 ES 启动 & 安装插件等等
* config : elasticsearch.yml(ES 配置文件)、jvm.options(JVM 配置文件)、日志配置文件等等
* JDK : 内置的 JDK,JAVA\_VERSION="13"
* lib : 类库
* logs : 日志文件
* modules : ES 所有模块,包括 X-pack 等
* plugins : ES 已经安装的插件。默认没有插件
## 4.创建数据存储目录与日志存储目录
~~~bash
# 创建数据存储目录mkdir -p /usr/local/elasticsearch-7.4.0/data# 创建日志存储目录mkdir -p /usr/local/elasticsearch-7.4.0/logs
~~~
## 5.修改配置
进入到es安装目录下的config文件夹中,修改elasticsearch.yml 文件
~~~bash
#配置es的集群名称,同一个集群中的多个节点使用相同的标识(单机版可不配置)#如果在同一网段下有多个集群,就可以用这个属性来区分不同的集群。cluster.name: my-es #节点名称node.name: node-1 #初始化,master节点名cluster.initial_master_nodes: node-1 #数据存储路径path.data: /usr/local/elasticsearch-7.4.0/data#日志存储路径path.logs: /usr/local/elasticsearch-7.4.0/logs #节点所绑定的IP地址,并且该节点会被通知到集群中的其他节点#通过指定相同网段的其他节点会加入该集群中 0.0.0.0任意IP都可以访问elasticsearchnetwork.host: 0.0.0.0 #对外提供服务的http端口,默认为9200http.port: 9200#设置集群中master节点的初始列表,可以通过这些节点来自动发现新加入集群的节点discovery.seed_hosts: ["127.0.0.1:9200"] #ES默认开启了内存地址锁定,为了避免内存交换提高性能。但是Centos6不支持SecComp功能,启动会报错,所以需要将其设置为falsebootstrap.memory_lock: false # 是否支持跨域http.cors.enabled: true # *表示支持所有域名http.cors.allow-origin: "*"
~~~
修改启动内存(可选配置)
切换到 conf/
打开 vim jvm.options

## 6.启动与关闭
### 启动
切换到 elasticsearch-7.4.0/bin/ 目录下
~~~bash
# -d参数表示以后台进程启动,默认情况下会在控制台输出日志。./elasticsearch -d
~~~
注:启动时若出现报错,请到文末处,查看常见启动问题。
### 关闭
~~~perl
# 查找ES进程ps -ef | grep elastic#杀掉ES进程kill -9 xxx(进程号)
~~~
验证是否启动成功
除了查看进程外还可以在浏览器输入 IP:9210
可以看到返回了一个JSON信息
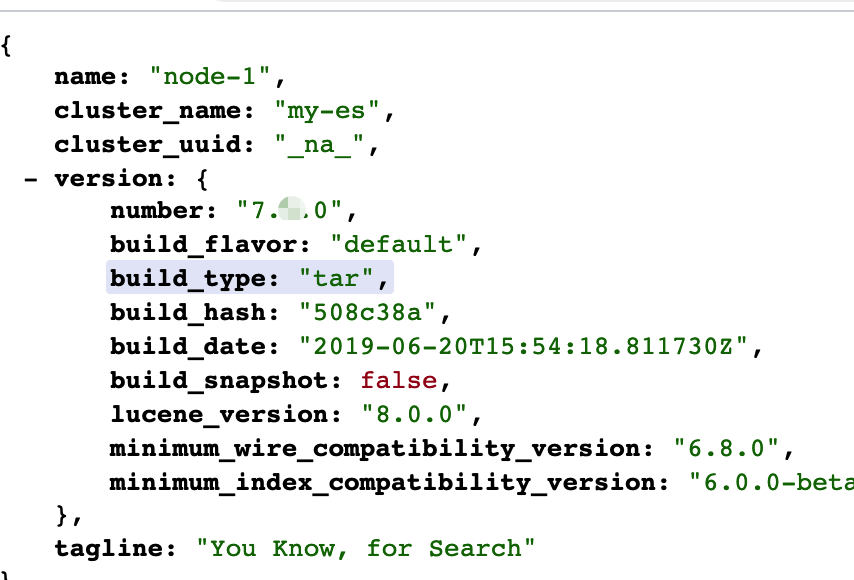
重点几个关注下即可:
name : 默认启动的时候指定了 ES 实例名称,name 为 BYSocketdeMacBook-Pro-2.local
cluster\_name : 默认名为 elasticsearch
version :版本信息
## 7.设置开机自启
### 7.1.创建启动脚本
在/etc/init.d目录下新建elastisearch启动脚本文件
~~~csharp
vim /etc/init.d/elasticsearch
~~~
脚本加入如下内容
~~~bash
#!/bin/bash#chkconfig: 2345 80 90#description: elasticsearch#processname: elasticsearch-7.4.0 #服务名称export SERVER_NAME=elasticsearch#ES启动用户名export ES_USER=elasticsearch#ES目录export ES_HOME=/usr/local/elasticsearch-7.4.0 function help() { echo "$0 |start|stop|restart|status|"} #查看服务状态function status(){ count=`ps -ef | grep "$SERVER_NAME" | grep -v "$0\|grep\|su $ES_USER" | awk '{print $2}' | wc -l` if [ 0 == $count ];then echo "$SERVER_NAME not exists" else ps -ef | grep "$SERVER_NAME" | grep -v "$0\|grep\|su $ES_USER" fi} #启动服务function start(){ #检查服务是否已经存在 count=`ps -ef | grep "$SERVER_NAME" | grep -v "$0\|grep\|su $ES_USER" | awk '{print $2}' | wc -l` if [ $count \> 0 ];then echo "$SERVER_NAME exists run restart" stop; fi; cd "$ES_HOME" echo "ES HOME IN $ES_HOME" echo "$SERVER_NAME start begin ........." su - $ES_USER -c "$ES_HOME/bin/elasticsearch -d" sleep 1 echo "$SERVER_NAME start end ......... home in $ES_HOME"} # 停止服务function stop(){ count=`ps -ef | grep "$SERVER_NAME" | grep -v "$0\|grep\|su $ES_USER" | awk '{print $2}' | wc -l` if [ 0 == $count ];then echo "$SERVER_NAME not exists" else echo "$SERVER_NAME stop begin ........." threads=$(ps -ef | grep "$SERVER_NAME" | grep -v "$0\|grep\|su $ES_USER" | awk '{print $2 }') for id in $threads do kill -9 $id echo "kill success $id " done echo "$SERVER_NAME stop success ........." fi} # 重启服务function restart(){ stop; sleep 1; start;} if [ "$1" == "" ]; then helpelif [ "$1" == "stop" ];then stopelif [ "$1" == "start" ];then startelif [ "$1" == "restart" ];then restartelif [ "$1" == "status" ];then statuselse helpfi
~~~
### 7.2.修改脚本权限
~~~bash
# 为脚本赋可执行权限chmod 777 /etc/init.d/elasticsearch
~~~
### 7.3.启动和关闭服务
~~~javascript
service elasticsearch status // 查看服务状态service elasticsearch start // 启动服务service elasticsearch stop // 关闭服务service elasticsearch restart // 重启服务
~~~
### 7.4添加到启动服务
~~~csharp
chkconfig --add elastisearch
~~~
### 7.5服务启动方式配置
~~~csharp
chkconfig --list //显示服务列表 chkconfig elastisearch on // 设置开机启动chkconfig elastisearch off // 关闭开机启动
~~~
## 附录: 常见问题
### 1.启动账户问题
注意:默认不允许使用root账户启动。
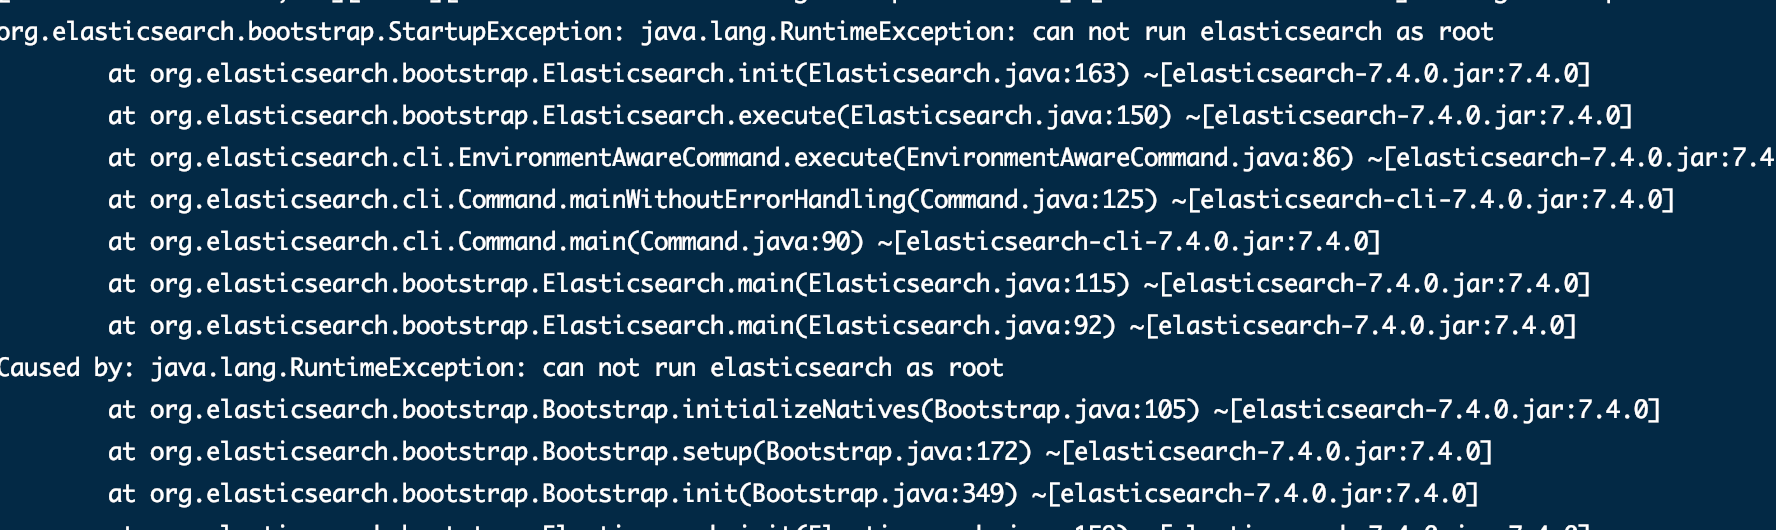
**解决方案:**
创建用户:elasticsearch
~~~undefined
adduser elasticsearch
~~~
设置用户密码,需要输入两次
~~~undefined
passwd elasticsearch
~~~
将对应的文件夹权限赋给该用户
~~~perl
chown -R elasticsearch /usr/local/elasticsearch-7.4.0
~~~
切换至elasticsearch用户
~~~undefined
su elasticsearch
~~~
~~~html
进入启动目录启动
~~~
~~~bash
cd /usr/local/elasticsearch-7.4.0/bin ./elasticsearch # 后台启动# ./elasticsearch -d
~~~
### 2.内存与进程相关
2.1 max virtual memory areas vm.max\_map\_count \[65530\] likely too low, increase to at least \[262144\]

**解决方案:**切换到root用户修改配置sysctl.conf
~~~bash
vi /etc/sysctl.conf
~~~
~~~html
添加下面配置:
~~~
~~~undefined
vm.max_map_count=262144
~~~
保存退出,并执行命令:
~~~css
sysctl -p
~~~
然后,重新启动elasticsearch
2.2 max file descriptors \[4096\] for elasticsearch process likely too low, increase to at least \[65536\]
**解决方案:**
~~~html
#切换到root 用户修改
~~~
~~~bash
vim /etc/security/limits.conf
~~~
~~~r
#在文件末尾添加如下内容:* soft nofile 65536* hard nofile 65536
~~~
2.3max number of threads \[1024\] for user \[lish\] likely too low, increase to at least \[2048\]
解决方案:切换到root用户,进入limits.d目录下修改配置文件。
~~~groovy
vi /etc/security/limits.d/90-nproc.conf
~~~
修改如下内容:
~~~bash
* soft nproc 1024
~~~
#修改为
~~~bash
soft nproc 2048
~~~
### 3.JDK问题

关于JDK
elasticsearch需要JDK环境,7.x版本后自带JDK,可以使用以下命令查看版本
~~~groovy
/usr/local/elasticsearch-7.4.0/jdk/bin/java -version
~~~
7.4.0自带的JDK版本是 openjdk 13

4.启动后常见错误
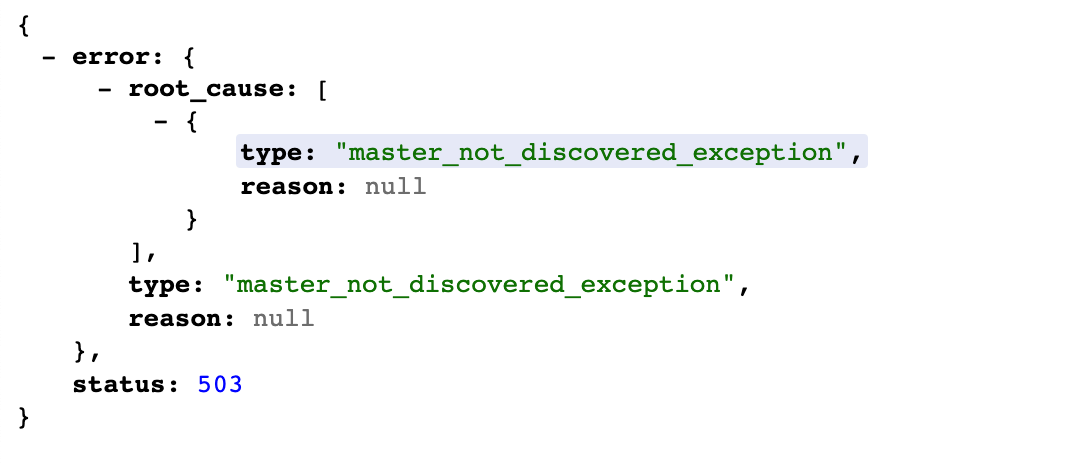

解决方案:
在每个配置文件指定初始节点:
~~~undefined
cluster.initial_master_nodes: node-1
~~~
### 4.修改启动内存
官网也介绍了如何[**设置堆大小**](https://www.elastic.co/guide/en/elasticsearch/reference/current/jvm-options.html)。
默认情况,ES 告诉 JVM 使用一个最小和最大都为 1GB 的堆。但是到了生产环境,这个配置就比较重要了,确保 ES 有足够堆空间可用。
ES 使用`Xms(minimum heap size)`和`Xmx(maxmimum heap size)`设置堆大小。你应该将这两个值设为同样的大小。
**`Xms`和`Xmx`不能大于你物理机内存的 50%。**
设置的示例:
切换到 conf/
打开 vim jvm.options

- 第一章 ElasticSearch基本概念
- 第二章 ElasticSearch7.x单机版安装
- 第三章 ElasticSearch7.x高可用集群版搭建
- 第四章 Elasticsearch7.x配置文件详解
- 第五章 Elasticsearch客户端工具之kibana
- 第六章 Elasticsearch客户端工具之ES-Head
- 6.1 es-head工具使用介绍
- 第七章 ElasticSearch7.x安全性之访问密码设置
- 第八章 Elasticsearch7.xDSL语法之索引管理
- 第九章 Elasticsearch7.xDSL语法之文档管理
- 第十章 Elasticsearch7.xDSL语法之查询
- 第十一章 Elasticsearch7.xDSL语法之分页查询
- 第十二章 Elasticsearch7.xDSL语法之聚合查询
- 第十三章 Elasticsearch7.xDSL语法实践手册
- 第十四章 Elasticsearch7.xSQL语法查询支持
- 第十五章 Elasticsearch插件之分词器
- 15.1 ElasticSearch之IK中文分词
- 第十六章 SpringBoot-starter-data整合Elasticsearch
- 第十七章 SpringBoot整合Elasticsearch(官方client)