
# Frps服务端一键安装脚本
参考网址:
[https://blog.csdn.net/Inke88/article/details/76677956](https://blog.csdn.net/Inke88/article/details/76677956)
### **注意事项:记得给使用的端口开放防火墙,开放防火墙,开放防火墙**
案例:
放开的端口号:6443、5334、9980
Frps服务端一键配置脚本地址:[https://github.com/MvsCode/frps\-onekey](https://github.com/MvsCode/frps-onekey)
脚本有两个源,国外VPS可以用Github的源,国内的VPS建议使用Aliyun的源,要不可能很慢。本教程使用的就是Aliyun的源
~~~bash
#下载脚本
wget https://code.aliyun.com/MvsCode/frps-onekey/raw/master/install-frps.sh -O ./install-frps.sh
#设置脚本运行权限
chmod 700 ./install-frps.sh
#执行脚本
./install-frps.sh install
#卸载
./install-frps.sh uninstall
#管理
/etc/init.d/frps start
/etc/init.d/frps stop
/etc/init.d/frps restart
/etc/init.d/frps status
/etc/init.d/frps config
/etc/init.d/frps version
~~~
github地址:
### https://github.com/fatedier/frp
客户端下载地址:
[Releases · fatedier/frp · GitHub](https://github.com/fatedier/frp/releases)
1、选择源,1是Aliyun,2是Github。我们选1

2、选择服务端口。默认是5443。这个端口的作用是在客户端连接服务端时是通过这个端口连接的。可以不用修改

3、设置http连接的端口。默认80,没有被占用就默认

4、设置https连接的端口。默认443,没有被占用就默认

5、设置面板的端口。直接用默认端口6443

6、设置登录面板的用户名和密码,根据个人喜好设置


7、设置token。客户端需要填写的

8、设置域名,如果有就填写,没有就默认IP

**其他的配置就默认就好**
安装好之后可以通过 frps config 指令修改或者查看配置。所以忘记了不怕
9、启动服务
~~~text
frps start
~~~
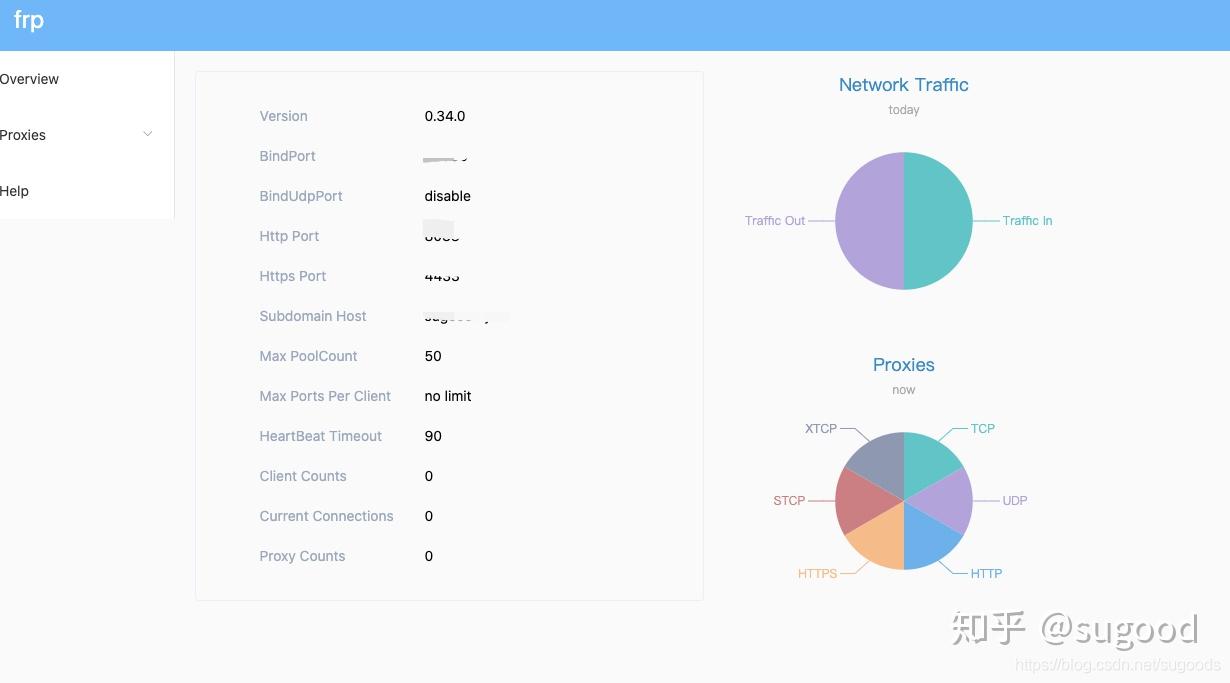
最后,在浏览器中输入[http://ip:6443](http://ip:6443/)。如果打不开,请看看是不是VPS的防火墙没有开放6443端口。
如果成功就能看到如下的界面
### 启动服务端 frps:
~~~
./frps -c ./frps.ini
~~~
查看`frp`进程
~~~
ps -aux | grep frp
~~~
### **客户端配置文件:**
**frpc.ini**
~~~
[common]
# 服务器地址
server_addr =192.168.0.0
# 服务器端口
server_port = 5443
# 服务器连接凭证
token = otkentiejsdlfasdl;f
[web01]
type = http
local_port = 80
remote_port = 9980
custom_domains = a.frp.baidu.com
host_header_rewrite = bd.cc
[web02]
type = http
local_port = 80
remote_port = 9980
custom_domains = b.frp.baidu.com
host_header_rewrite = localhost
[web02_port]
type = http
local_ip = 127.0.0.1
local_port = 8686
remote_port = 9980
custom_domains = ha.frp.aaa.com
~~~
**Nginx端口映射:**
修改服务器的nginx配置:
~~~
map $http_x_forwarded_for $clientRealip {
"" $remote_addr;
~^(?P<firstAddr>[0-9\.]+),?.*$ $firstAddr;
}
server {
listen 80;
server_name frp.baidu.com *.frp.baidu.com;
location / {
proxy_pass http://127.0.0.1:9980; #此处的9980就是你安装frp时设置的vhost_http_port端口
proxy_set_header Host $host;
proxy_set_header X-Real-IP $clientRealip; # $remote_addr;
proxy_set_header X-Forwarded-For $proxy_add_x_forwarded_for;
}
}
~~~
- thinkphp
- thinkphp笔记
- 后台登陆退出
- config配置
- 隐藏后台模块
- 单独调用腾讯云行为验证码
- api接口跨域问题
- api接口创建案例代码
- 使用gateway worker
- 使用swoole代码笔记
- 使用队列 think-queue笔记
- 后台布局
- MySQL
- 1、关于lnmp mysql的一个坑
- 2、mysql实现group by后取各分组的最新一条
- 其他
- 搞笑的注释代码
- 分页类
- nodejs 打包网址为exe
- 免费天气预报API接口
- Ajax
- 简单的ajax分页1
- 通用ajax-post提交
- 引用的类库文件
- Auth.php
- Auth.php权限控制对应的数据库表结构
- Layui.php
- Pinyin.php
- Random.php
- Tree.php
- Tree2.php
- Js-Jq
- Git的使用
- 3、bootstrap-datetimepicker实现两个时间范围输入
- CentOS安装SSR做梯子
- Python爬虫
- 1、安装Gerapy
- 2、安装Scrapy
- 3、Scrapy使用
- 4、Scrapy框架,爬取网站返回json数据(spider源码)
- 0、Python pip更换国内源(一句命令换源)
- 服务器运维
- 1、宝塔使用webhook更新服务器代码
- 2、搭建内网穿透
- 3、数据库主从同步
- 4、数据库复制
- hui-Shop问题
- 1、前端模板的注意事项
- 2、模板标签