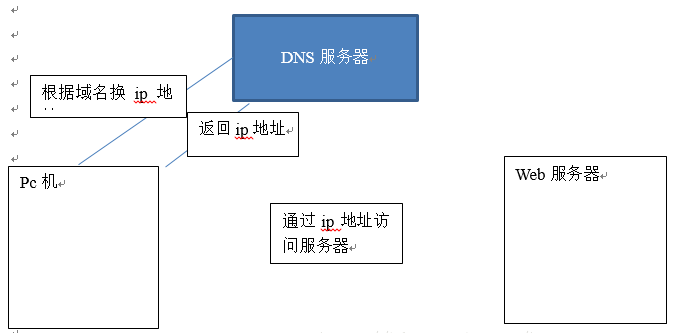
1,需要修改nginx.conf配置文件,修改配置后需要重新加载配置文件:
server {
listen 80;
server\_name test1.whsxt.com;
location / {
root test1;
index index.html index.htm;
}
}
server {
listen 80;
server\_name test2.whsxt.com;
location / {
root test2;
index index.html index.htm;
}
}
2,在nginx目录下创建两个文件夹并把html里面的index.html复制进去
cd /usr/nginx
mkdir test1 test2
cp html/index.html test1
cp html/index.html test1
3,刷新nginx的配置
./sbin/nginx -s reload
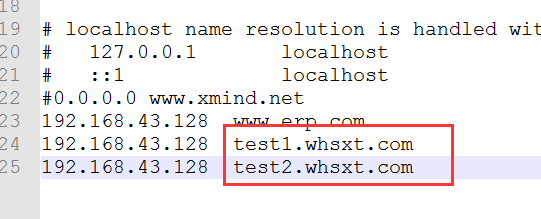
可以通过修改windows 的host文件指定域名的ip地址
修改windows
C:\\Windows\\System32\\drivers\\etc
在后面加上
192.168.15.131 test1.whsxt.com
192.168.15.131 test2.whsxt.com
然后可以通过访问test1.whsxt.com或者test2.whsx.com进行访问nginx。
需要注意的是host文件的名字要和nginx.conf文件的server\_name相同。

- 01【熟悉】服务器概述
- 02【熟悉】Nginx概述
- 1、前言
- 2、为什么使用Nginx?
- 3、什么是Nginx?
- 3.1 Nginx的应用场景
- 4、小结
- 03【掌握】在Cento7系统下安装Nginx
- 1、下载Nginx
- 2、安装
- 2.1 环境要求
- 2.2 先安装nginx依赖的包
- 2.3 把nginx的源码上传到linux系统,并解压
- 2.4 安装
- 2.5 Nginx的目录说明
- 2.6 Nginx的启动、停止
- 04【掌握】Nginx基础配置详解
- 1、Nginx的配置
- 1.1 端口和目录的配置
- 1.2 通过域名虚拟机
- 05【掌握】反向代理+负载均衡
- 1.1.正向代理
- 1.2.反向代理
- 2,负载均衡
- 3,反向代理+负载均衡的配置
- 4,其它配置
- 5, 登陆session的配置问题
- 06【掌握】动静分离
- 1,概述
- 2,动静分离的配置
- 3,动静分离的配置正则说明
