```
容器:
<div style="width: 800px;margin:0 auto">
<canvas id="test" width="700" height="1200"></canvas>
</div>
```
```
获取canvas
const cnv = document.getElementById('test')
const cxt = cnv.getContext('2d')
```
1.绘制横线(实线或虚线)
```
// 横线
cxt.moveTo(20, 100)//起点
cxt.lineTo(200, 100)//终点
cxt.lineWidth = 10//线宽
cxt.strokeStyle = 'red'//描边填充颜色
cxt.lineCap = "round" //两端样式
// cxt.setLineDash([5,10,...])//设置虚线:数组:对应 实线-空白的距离
cxt.stroke()//连接起点和终点
```
2.设置拐角样式
```
cxt.beginPath()// 重新开启一个路径
cxt.moveTo(20, 120)//起点
cxt.lineTo(120, 120)
cxt.lineTo(120, 150)//终点
cxt.lineJoin = 'round'//拐角样式,可选:bevel(尖角),round(圆角),miter(默认)
cxt.lineWidth = 5//线宽
cxt.strokeStyle = 'green'//描边填充颜色
cxt.lineCap = "square" //两端样式
cxt.stroke()//连接起点和终点
```

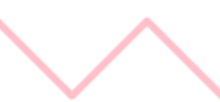
3.折线
```
// 折线,通过每个点的坐标连接
cxt.beginPath()// 重新开启一个路径
cxt.strokeStyle = 'pink'//描边填充颜色
cxt.moveTo(250, 200)
cxt.lineTo(300, 250)
cxt.lineTo(350, 200)
cxt.lineTo(400, 250)
cxt.stroke()//连接起点和终点
```

4.矩形
```
// 矩形
// strokeRect(x, y, width, height) 方法
cxt.strokeStyle = 'pink'
cxt.strokeRect(50, 50, 200, 100)//长方形
cxt.strokeStyle = 'blue'
cxt.strokeRect(150, 200, 50, 50)//正方形
//颜色填充
cxt.fillStyle = 'pink'
cxt.fillRect(50, 250, 200, 100)
// cxt.clearRect(50, 50, 200, 100) // 清空矩形
```
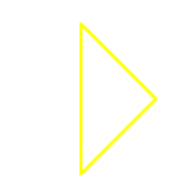
5.多边形
```
// 多边形:cxt.closePath()闭合起始点,如:绘制一个三角形
cxt.beginPath()// 重新开启一个路径
cxt.strokeStyle = 'yellow'//描边填充颜色
cxt.lineWidth = 2
cxt.moveTo(50, 400)
cxt.lineTo(100, 450)
cxt.lineTo(50, 500)
cxt.closePath()
cxt.stroke()//连接起点和终点
```

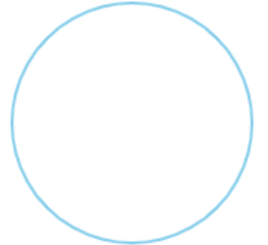
6.圆
```
// 圆:
//方法:arc(x, y, r, sAngle, eAngle,counterclockwise)
// x 和 y: 圆心坐标
// r: 半径
// sAngle: 开始角度:都是以弧度为单位。例如 180°就写成 Math.PI ,360°写成 Math.PI * 2
// eAngle: 结束角度
// counterclockwise: 绘制方向(true: 逆时针; false: 顺时针),默认 false
cxt.beginPath();//绘制圆之前必须调用重新开始方法
cxt.strokeStyle = 'skyBlue'//描边填充颜色
cxt.arc(200, 450, 80, 0, 360 * Math.PI / 180)
// cxt.arc(200, 450, 80, 0, 180 * Math.PI / 180 ,true)//半圆且朝上
cxt.closePath();//结束必须调用闭合
cxt.stroke()
```

7.圆弧
```
// 圆弧:就是圆不闭合
cxt.beginPath();//绘制圆之前必须调用重新开始方法
cxt.strokeStyle = 'skyBlue'//描边填充颜色
cxt.arc(260, 450, 80, 0, 30 * Math.PI / 180)//绘制一个30°的圆弧
cxt.stroke()
```

8.设置字体
```
// cxt.font = 'font-style font-variant font-weight font-size/line-height font-family'
cxt.font = '60px Arial'
cxt.strokeStyle = "orange"
cxt.strokeText('hello111', 500, 90)//描边方法:设置文本,位置:x,y
cxt.textAlign = 'center'//文本水平对齐方式
cxt.textBaseline = 'middle'//文本垂直对齐方式
cxt.fillStyle = 'yellow'//填充颜色
cxt.fillText('hello', 400, 90)//填充方法:设置文本
```

9.图片渲染
```
// 渲染图片的方式有两种,一种是在JS里加载图片再渲染,另一种是把DOM里的图片拿到 canvas 里渲染。
// JS渲染方式:1.创建 Image 对象 2.引入图片 3.等待图片加载完成 4.使用 drawImage() 方法渲染图片
const image = new Image()//实例化图片对象
image.src = './favicon .png'//引入图片
// 加载完成
image.onload = () => {
cxt.drawImage(image, 10, 20, 50, 50)//drawImage():三个参数:图片对象,左上角x坐标,左上角y坐标,宽,高
}
// dom渲染
window.onload = () => {
const image1 = document.getElementById('img')//获取图片对象
cxt.drawImage(image1, 400, 170, 50, 80)
}
```

10.截取图片
```
// 截取图片:drawImage(image, sx, sy, sw, sh, dx, dy, dw, dh)
// image: 图片对象 sx: 开始截取的横坐标 sy: 开始截取的纵坐标 sw: 截取的宽度 sh: 截取的高度
// dx: 图片左上角的横坐标位置 dy: 图片左上角的纵坐标位置 dw: 图片宽度 dh: 图片高度
// 截取时:参数缺一不可
// image.onload = () => {
// cxt.drawImage(image, 10, 10, 10, 10, 30, 30, 20, 20)
// }
```
