[TOC]
> 使用源码安装方式的主要目的在于可以灵活的控制软件的版本以及更新。在这里我们都选择最新的版本来进行测试。
> NGINX:http://nginx.org/en/download.html 下载[nginx-1.13.3.tar.gz](http://nginx.org/download/nginx-1.13.3.tar.gz)
> PHP:http://php.net/downloads.php 下载[php-7.1.2.tar.gz](http://cn2.php.net/get/php-7.1.2.tar.gz/from/this/mirror)
> MySQL:http://dev.mysql.com/downloads/mysql/ 下载[mysql-5.7.17-linux-glibc2.5-x86_64.tar.gz](https://dev.mysql.com/get/Downloads/MySQL-5.7/mysql-5.7.17-linux-glibc2.5-x86_64.tar.gz)
> 下载至/www/software,而软件统一安装到/opt下,这个纯属根据自己喜好进行定义!
### 一、安装前的准备
~~~
# 安装依赖包
yum -y install ntp make openssl openssl-devel pcre pcre-devel libpng libpng-devel libjpeg-6b libjpeg-devel-6b freetype freetype-devel gd gd-devel zlib zlib-devel gcc gcc-c++ libXpm libXpm-devel ncurses ncurses-devel libmcrypt libmcrypt-devel libxml2 libxml2-devel imake autoconf automake screen sysstat compat-libstdc++-33 curl curl-devel cmake libxslt libxslt-devel libicu-devel libaio*
#创建mysql用户组和用户
groupadd mysql
useradd -r -g mysql mysql
#创建www用户组和用户,供Nginx和Php
groupadd www
useradd -r -g www www
#关闭iptables,主要是担心有了防火墙后,访问层会多加了一层,影响最终网站的访问速率。
chkconfig iptables off
#更改ssh的默认端口 22-> 64522
cp /etc/ssh/ssh_config /etc/ssh/ssh_config.bak
cp /etc/ssh/sshd_config /etc/ssh/sshd_config.bak
vi /etc/ssh/sshd_config
vi /etc/ssh/ssh_config
在#Port 22下面添加
Port 64522
~~~
### 二、安装Nginx
#### 1.安装
~~~
tar -zxvf nginx-1.13.3.tar.gz
cd nginx-1.13.3
./configure --user=www --group=www --prefix=/opt/nginx --with-http_ssl_module
make && make install
chown -R www:www /opt/nginx/ #修改用户组归属
~~~
#### 2.设置开机启动
> vim /etc/init.d/nginx #修改成以下内容
> chmod 777 nginx #修改nginx命令权限
> chkconfig nginx on #设置开机启动
~~~
#!/bin/bash
# nginx Startup script for the Nginx HTTP Server
# chkconfig: - 85 15
# description: nginx is a World Wide Web server. It is used to serve
# this script create it by ruijie. at 2014.02.26
# if you find any errors on this scripts,please contact ruijie.
# and send mail to ruijie at gmail dot com.
# ruijie.qiao@gmail.com
nginxd=/opt/nginx/sbin/nginx
nginx_config=/opt/nginx/conf/nginx.conf
nginx_pid=/opt/nginx/logs/nginx.pid
RETVAL=0
prog="nginx"
[ -x $nginxd ] || exit 0
# Start nginx daemons functions.
start() {
if [ -e $nginx_pid ] && netstat -tunpl | grep nginx &> /dev/null;then
echo "nginx already running...."
exit 1
fi
echo -n $"Starting $prog!"
$nginxd -c ${nginx_config}
RETVAL=$?
echo
[ $RETVAL = 0 ] && touch /var/lock/nginx
return $RETVAL
}
# Stop nginx daemons functions.
stop() {
echo -n $"Stopping $prog!"
$nginxd -s stop
RETVAL=$?
echo
[ $RETVAL = 0 ] && rm -f /var/lock/nginx
}
# reload nginx service functions.
reload() {
echo -n $"Reloading $prog!"
#kill -HUP `cat ${nginx_pid}`
$nginxd -s reload
RETVAL=$?
echo
}
# See how we were called.
case "$1" in
start)
start
;;
stop)
stop
;;
reload)
reload
;;
restart)
stop
start
;;
*)
echo $"Usage: $prog {start|stop|restart|reload|help}"
exit 1
esac
exit $RETVAL
~~~
#### 3.修改配置,支持php
> vim /opt/nginx/conf/nginx.conf
~~~
user www www;
worker_processes auto;
#error_log logs/error.log;
#error_log logs/error.log notice;
#error_log logs/error.log info;
#pid logs/nginx.pid;
#Specifies the value for maximum file descriptors that can be opened by this process.
worker_rlimit_nofile 65535;
events
{
use epoll;
worker_connections 65535;
}
http {
include mime.types;
default_type application/octet-stream;
#charset gb2312;
server_names_hash_bucket_size 128;
client_header_buffer_size 32k;
large_client_header_buffers 4 32k;
client_max_body_size 16m;
sendfile on;
tcp_nopush on;
keepalive_timeout 15;
tcp_nodelay on;
fastcgi_connect_timeout 300;
fastcgi_send_timeout 300;
fastcgi_read_timeout 300;
fastcgi_buffer_size 64k;
fastcgi_buffers 4 64k;
fastcgi_busy_buffers_size 128k;
fastcgi_temp_file_write_size 128k;
gzip on;
gzip_min_length 1k;
gzip_buffers 4 16k;
gzip_http_version 1.0;
gzip_comp_level 2;
gzip_types text/plain application/x-javascript text/css application/xml;
gzip_vary on;
gzip_disable msie6;
#limit_zone crawler $binary_remote_addr 10m;
log_format '$remote_addr - $remote_user [$time_local] "$request" '
'$status $body_bytes_sent "$http_referer" '
'"$http_user_agent" "$http_x_forwarded_for"';
include /opt/nginx/conf/vhosts/*.conf;
}
~~~
> vim /opt/nginx/conf/vhosts/zhuifanba.conf
~~~
server {
listen 80;
server_name www.zhuifanba.com;
index index.html index.htm index.php;
root /var/www/zhuifanba/frontend/web;
location / {
root /var/www/zhuifanba/frontend/web;
index index.html index.htm index.php;
if (!-e $request_filename){
rewrite ^/(.*) /index.php last;
}
}
location ~* ^/upload/.*.(php|php5)$ {
deny all;
}
location ~ .*\.(php|php5)?$
{
fastcgi_pass 127.0.0.1:9000;
fastcgi_index index.php;
fastcgi_param SCRIPT_FILENAME /var/www/zhuifanba/frontend/web$fastcgi_script_name;
include fastcgi.conf;
}
location ~ .*\.(gif|jpg|jpeg|png|bmp|swf)$
{
expires 30d;
}
location ~ .*\.(js|css)?$
{
expires 1h;
}
error_log /var/log/zhuifanba.error.log;
access_log /var/log/zhuifanba.access.log;
}
server {
listen 80;
server_name admin.zhuifanba.com;
index index.html index.htm index.php;
root /var/www/zhuifanba/backend/web;
location / {
root /var/www/zhuifanba/backend/web;
index index.html index.htm index.php;
if (!-e $request_filename){
rewrite ^/(.*) /index.php last;
}
}
location ~ .*\.(php|php5)?$
{
fastcgi_pass 127.0.0.1:9000;
fastcgi_index index.php;
fastcgi_param SCRIPT_FILENAME /var/www/zhuifanba/backend/web$fastcgi_script_name;
include fastcgi.conf;
}
location ~ .*\.(gif|jpg|jpeg|png|bmp|swf)$
{
expires 30d;
}
location ~ .*\.(js|css)?$
{
expires 1h;
}
error_log /var/log/zhuifanba.admin.error.log;
access_log /var/log/zhuifanba.admin.access.log;
}
~~~
#### 4. 命令的执行
~~~
service nginx start
service nginx stop
service nginx restart
~~~
#### 5. 安装和使用https
> https://freessl.cn/ 上进行申请,一年的使用期,可续期
```
server
{
listen 80;
listen 443 ssl;
server_name www.test.com;
index index.html index.php;
ssl_certificate /servers/nginx/mycret/full_chain.pem;
ssl_certificate_key /servers/nginx/mycret/private.key;
ssl_session_timeout 5m;
ssl_protocols TLSv1 TLSv1.1 TLSv1.2; #按照这个协议配置
ssl_ciphers ECDHE-RSA-AES128-GCM-SHA256:HIGH:!aNULL:!MD5:!RC4:!DHE;#按照这个套件配置
ssl_prefer_server_ciphers on;
location / {
if (!-e $request_filename) {
rewrite ^/index.php(.*)$ /index.php?s=$1 last;
rewrite ^(.*)$ /index.php?s=$1 last;
break;
}
}
location ~ \.php {
fastcgi_pass 127.0.0.1:9000;
fastcgi_index index.php;
include fastcgi_params;
fastcgi_param SCRIPT_FILENAME /var/www/html/myproject/index.php;
include fastcgi_params;
}
}
```
### 三、安装Mysql
#### 1.安装
~~~
tar -zxvf mysql-5.7.17-linux-glibc2.5-x86_64.tar.gz
mv mysql-5.7.17-linux-glibc2.5-x86_64 /opt/mysql
cd /opt/
chown -R mysql:mysql mysql/ #修改用户组归属
chown -R mysql:mysql /tmp/ #修改用户组归属
/mysql/bin/mysqld --initialize --user=mysql --basedir=/opt/mysql/ --datadir=/opt/mysql/data/mysql3306 #安装
~~~
> 成功会生成一个临时的密码,A temporary password is generated for root@localhost: )vyd3aXj8hhC
~~~
~~~
#### 2.编辑配置文件
> 端口改为13306,这个根据自己喜好。程序端由于使用的是本地连接,所以程序端端口可以不用加。
>vim /opt/mysql/bin/mysqld_safe #将“/usr/local/mysql” 改为 “/opt/mysql”
>cp support-files/my-default.cnf /etc/my.cnf
>chown -R mysql:mysql /etc/my.cnf
>vim /etc/my.cnf
~~~
basedir = /opt/mysql
datadir = /opt/mysql/data/mysql3306
port = 13306
server_id = 100
socket = /tmp/mysql.sock
~~~
#### 3.设置开机启动
~~~
cp /opt/mysql/support-files/mysql.server /etc/init.d/mysqld #将里面的文件相对路径修改正确!!!!!
chmod 777 /etc/init.d/mysqld
chkconfig mysqld on
~~~

#### 4.设置mysql命令
~~~
cp /opt/mysql/bin/mysql /usr/bin/
//以后就可以直接使用mysql命令了,如mysql -uroot -p
~~~
#### 5.修改初始密码
~~~
mysqladmin -uroot password -p
~~~
### 四、安装Php
#### 1.安装
~~~
tar -zxvf php-7.1.2.tar.gz
cd php-7.1.2
./configure --prefix=/opt/php7.1 \
--with-curl \
--with-freetype-dir \
--with-gd \
--with-gettext \
--with-iconv-dir \
--with-kerberos \
--with-libdir=lib64 \
--with-libxml-dir \
--with-mysqli \
--with-openssl \
--with-pcre-regex \
--with-pdo-mysql \
--with-pdo-sqlite \
--with-pear \
--with-png-dir \
--with-jpeg-dir \
--with-xmlrpc \
--with-xsl \
--with-zlib \
--enable-fpm \
--enable-bcmath \
--enable-libxml \
--enable-inline-optimization \
--enable-gd-native-ttf \
--enable-mbregex \
--enable-mbstring \
--enable-opcache \
--enable-pcntl \
--enable-shmop \
--enable-soap \
--enable-sockets \
--enable-sysvsem \
--enable-xml \
--enable-zip \
--enable-intl
make && make install
~~~
#### 2. 配置文件
~~~
cp /www/software/php-7.1.2/php.ini-development /opt/php7.1/lib/php.ini
cp /opt/php7.1/etc/php-fpm.conf.default /opt/php7.1/etc/php-fpm.conf
cp /opt/php7.1/etc/php-fpm.d/www.conf.default /opt/php7.1/etc/php-fpm.d/www.conf
chown -R www:www /opt/php7.1/ #修改用户组归属
~~~
#### 3.设置开机启动
~~~
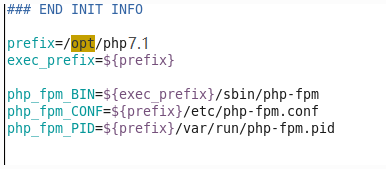
cp -R /www/software/php-7.1.2/sapi/fpm/init.d.php-fpm /etc/init.d/php-fpm #将里面的文件相对路径修改正确!!!!!
chmod 777 /etc/init.d/php-fpm
chkconfig php-fpm on
~~~
#### 4.设置php命令
~~~
cp /opt/php7.1/bin/php /usr/bin/
//以后就可以直接使用php命令了,如php -v
~~~
#### 5.php环境配置
~~~
vim /opt/php7.1/lib/php.ini
//如下~~
date.timezone = PRC #将时区设置为PRC
error_reporting = E_ALL & ~E_NOTICE & ~E_DEPRECATED & ~E_WARNING #关闭notice错误提示
memory_limit=1024M #把允许的内存改大一点
mysql.default_socket = /tmp/mysql.sock
pdo_mysql.default_socket= /tmp/mysql.sock
mysqli.default_socket = /tmp/mysql.sock
~~~
#### 6.进行代码测试
> vim /var/www/mysql.php
~~~
<?php
$mysqli = new mysqli("localhost", "root", "密码", "mysql",0,'/data/mysql_data_3306/mysql.sock');
/* check connection */
if (mysqli_connect_errno()) {
printf("Connect failed: %s\n", mysqli_connect_error());
exit();
}
/* return name of current default database */
if ($result = $mysqli->query("SELECT DATABASE()")) {
$row = $result->fetch_row();
printf("Default database is %s.\n", $row[0]);
$result->close();
}
/* change db to world db */
$mysqli->select_db("mysql");
/* return name of current default database */
if ($result = $mysqli->query("SELECT DATABASE()")) {
$row = $result->fetch_row();
printf("Default database is %s.\n", $row[0]);
$result->close();
}
$mysqli->close();
?>
~~~
文献参考:
1. Linux环境Nginx安装与调试以及PHP安装 http://blog.csdn.net/unix21/article/details/8544922
2. Linux环境Nginx安装多版本PHP http://blog.csdn.net/21aspnet/article/details/47658127/
一键安装包推荐:
1. Oneinstack
2. 宝塔linux面板 (https://www.bt.cn/download/linux.html)
> 附: 安装LNMP还有一种更简单一键式的方式,就是使用oneinstack。
