# [php composer 开发自己的包](https://www.cnblogs.com/kinwing/p/11136330.html)
* https://www.cnblogs.com/kinwing/archive/2004/01/13/11136330.html
一,在github和packagist分别注册自己的账号,这里就省略了
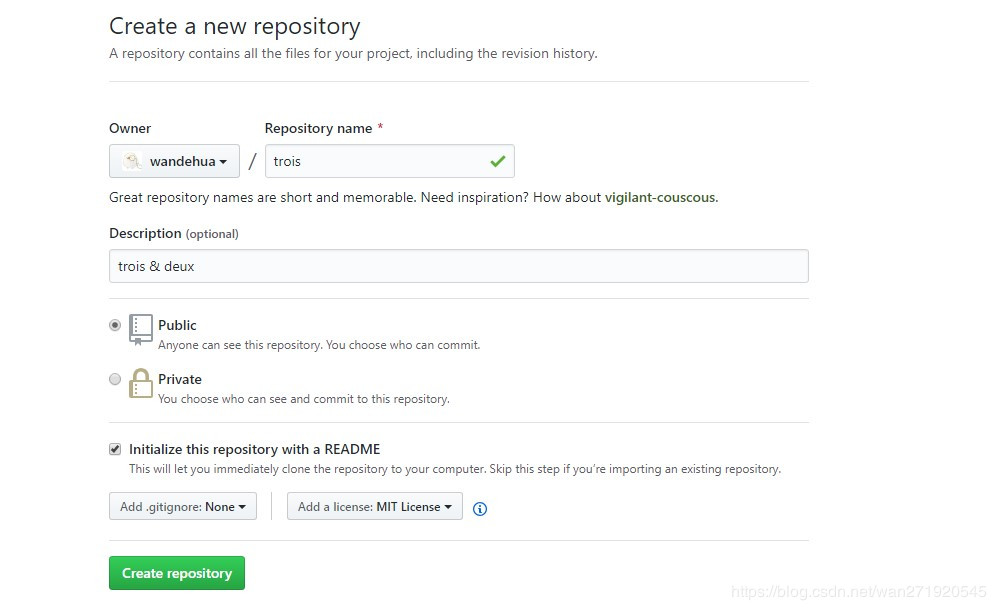
二,创建github项目:trois
2.1 new repository
![https://img2018.cnblogs.com/blog/1726543/201907/1726543-20190705090622143-1111293150.png](https://img.kancloud.cn/5c/79/5c79de176aa488b54fbd8e802640b0e9_996x610.png)
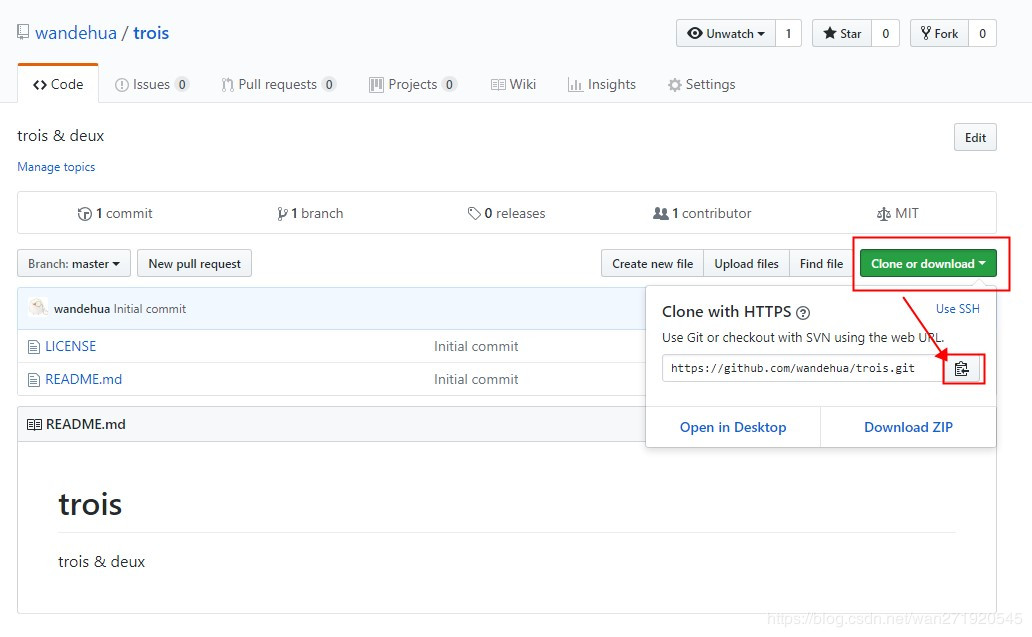
2.2 拿到git地址
![https://img2018.cnblogs.com/blog/1726543/201907/1726543-20190705090633600-1904789615.png](https://img.kancloud.cn/a2/ee/a2ee1b5a145a25d65de705c559e7f07a_1032x637.png)
三,本地获取github项目:trois
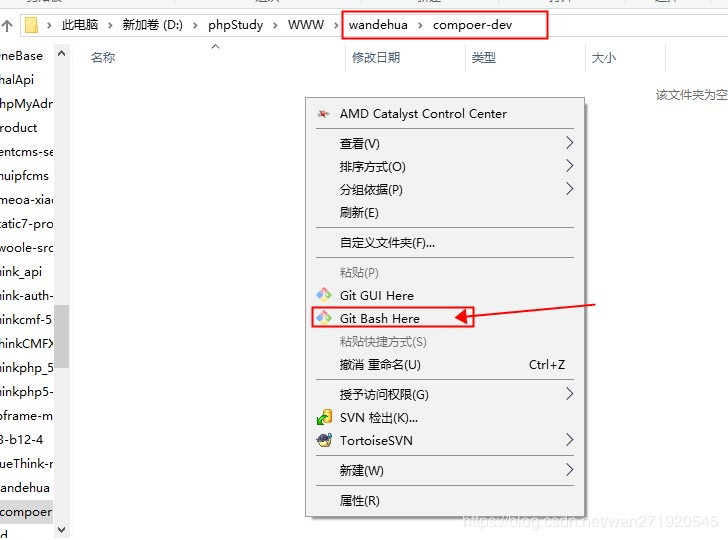
这是我本地随便创建一个文件夹 D:\\phpStudy\\WWW\\wandehua\\compoer-dev
3.1 在composer-dev文件内右键, 选择Git Bash Here
![](https://img.kancloud.cn/51/4b/514b8602a286c4df635f17a76d5710ff_728x540.png)
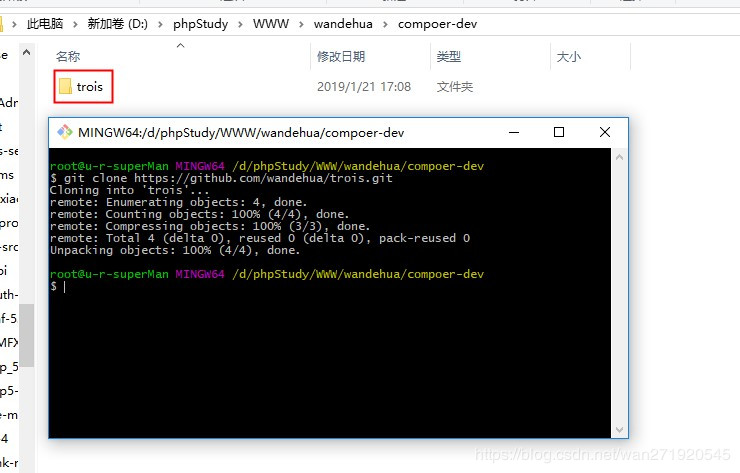
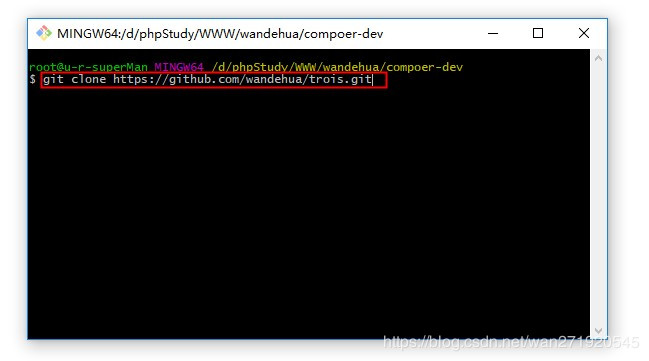
3.2 在git窗口里输入:git clone https://github.com/wandehua/trois.git (2.2中拿到的地址)
![](https://img.kancloud.cn/11/80/11801746ce485901b93b022f9c84f960_649x361.png)
3.3 这样我们就得到了我们在github的项目:trois
![](https://img.kancloud.cn/70/e5/70e5cd8897a0f386853e3c78331c54cb_740x473.png)
四,composer 创建我们的包文件
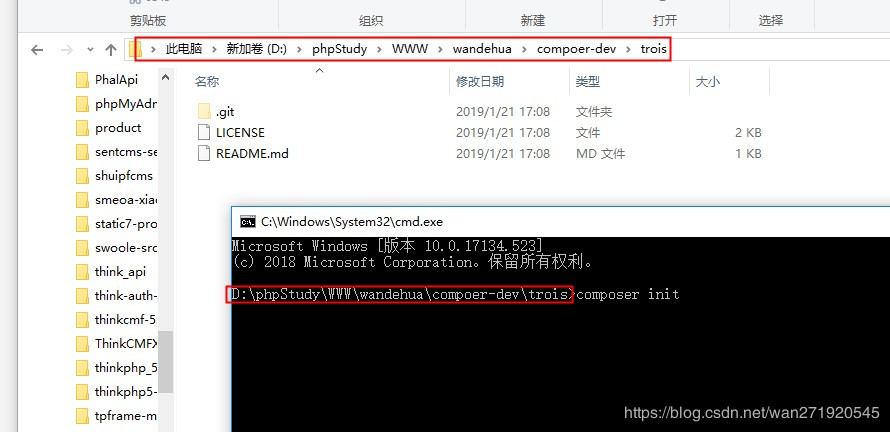
进入我们刚刚得到的github项目文件夹,
地址栏上输入cmd就可以快速进入cmd窗口了,
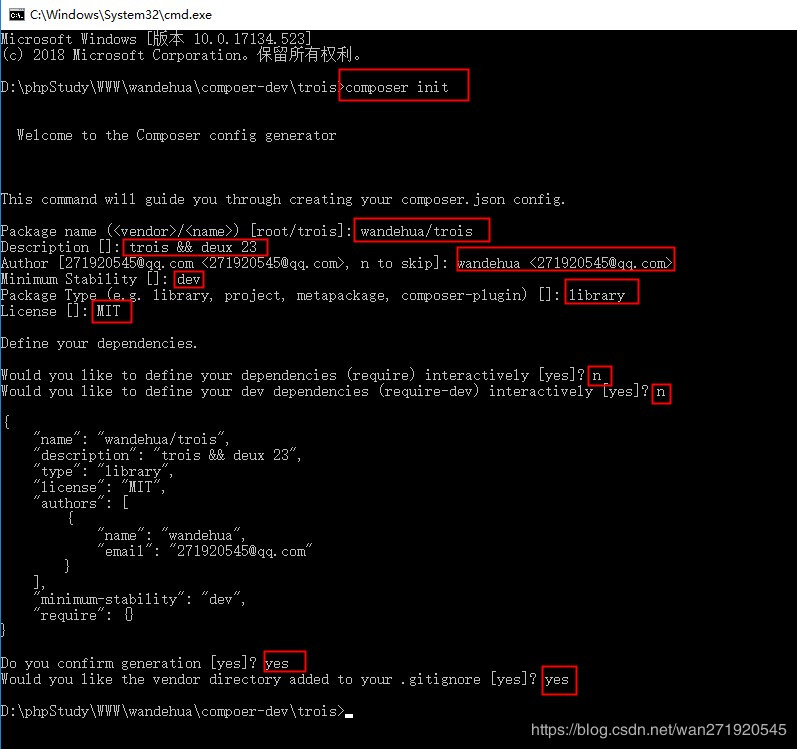
4.1 并初始化componser包
![](https://img.kancloud.cn/fc/c4/fcc41351fcf3dac27d052b961682f1c0_769x204.png)
![](https://img.kancloud.cn/b7/52/b7523b29f93aab0c2dd4c94553aeec95_890x432.png)
![](https://img.kancloud.cn/22/f9/22f97cd7dbe292d192b2f3a612ed6a23_797x749.png)
![](https://img.kancloud.cn/05/88/05885aee84470fa69afa8041e014a630_752x267.png)
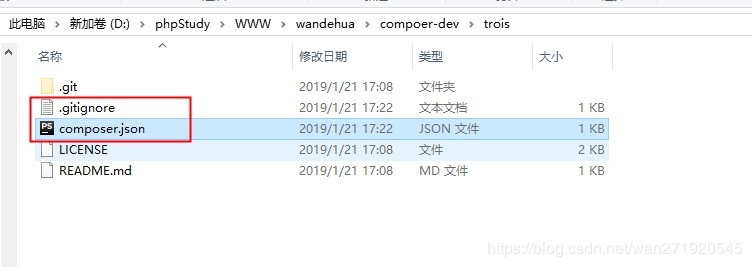
最后得到了composer.json文件(这是我们最想要的)和.getignore文件
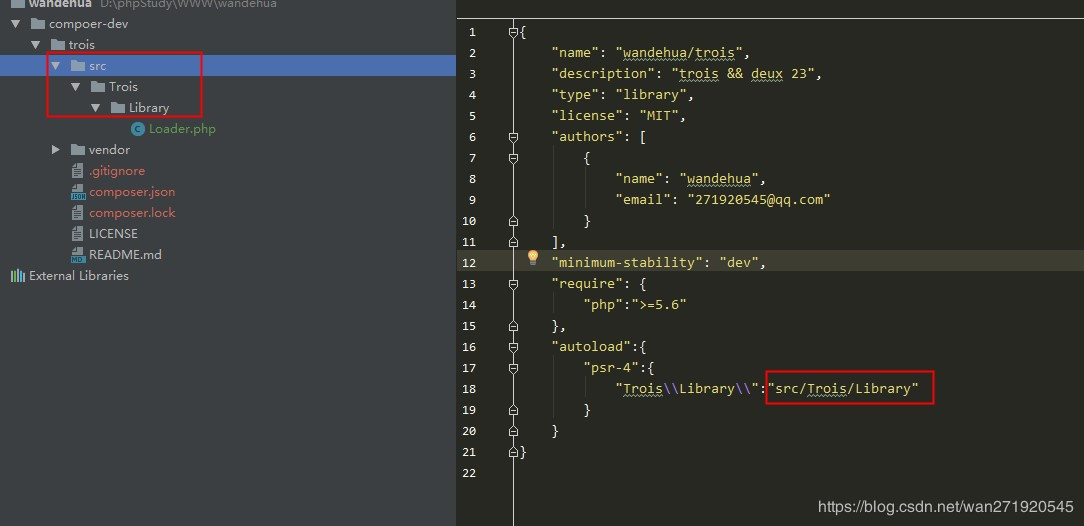
4.2 编辑composer.json文件
```
{
"name": "wandehua/trois",
"description": "trois && deux 23",
"type": "library",
"license": "MIT",
"authors": \[
{
"name": "wandehua",
"email": "271920545@qq.com"
}
\],
"minimum-stability": "dev",
"require": {
"php":">=5.6" //对php环境的要求, 这里说明一下,真实是不能注释的
},
"autoload":{
"psr-4":{ //psr-4 规范
"Trois\\\\Library":"src/Trois/Library" //命名空间 与 文件目录映射, 这里说明一下,真实是不能注释的
}
}
}
```
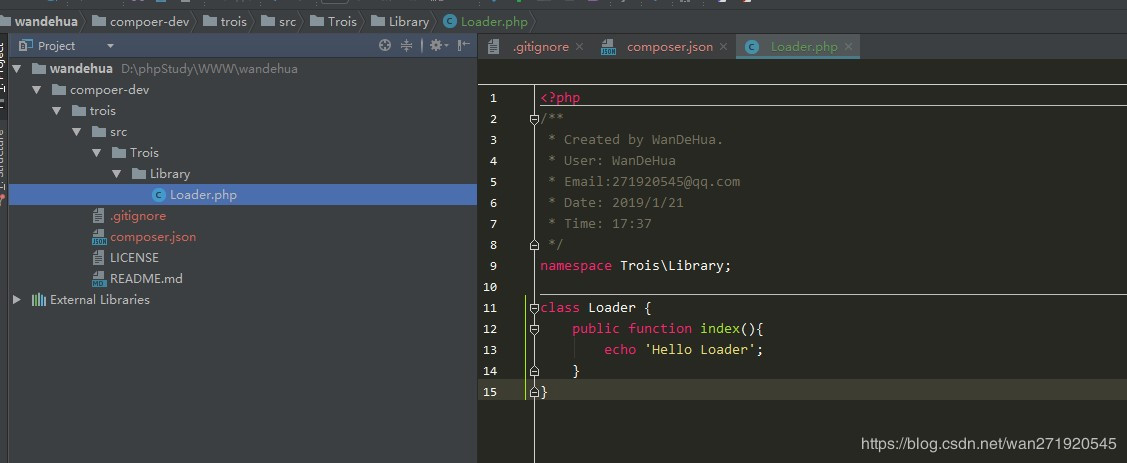
4.3 新建psr-4中配置的类文件夹,并创建一个Loader.php文件
![](https://img.kancloud.cn/9a/51/9a51be5aa5ebcb0a306c6ca83c2e7ccb_1084x526.png)
![](https://img.kancloud.cn/ae/b1/aeb13afe6e6a4abd7cd9fc5ab917eaa9_1127x463.png)
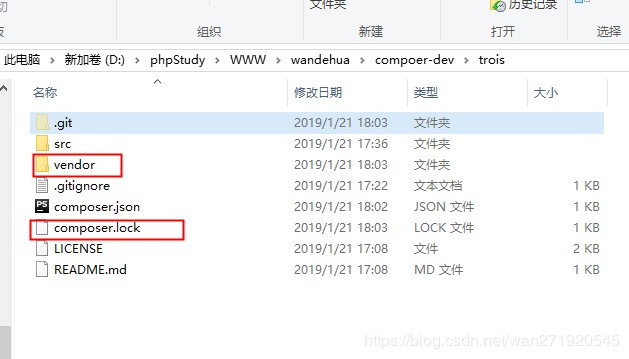
4.4 测试一下, 最终生成了vendor目录和composer.lock文件,
![](https://img.kancloud.cn/09/ad/09adf895d9eb79e1bd8f39a040a639cb_592x181.png)
![](https://img.kancloud.cn/3c/94/3c943cfb82932eb2b3522f2360919f8f_629x359.png)
至此,我们的composer包就算开发完了
五,提交我们的代码到github项目中
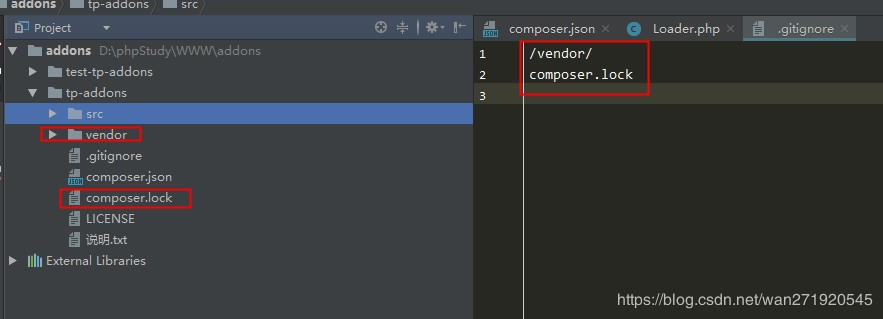
提交之前,编辑.gitignore文件,增加忽略文件(vender和composer.lock文件就不会通过git提交到github上了)
![](https://img.kancloud.cn/16/49/1649598b3c70595fc5cf9dc6a567e73e_883x319.png)
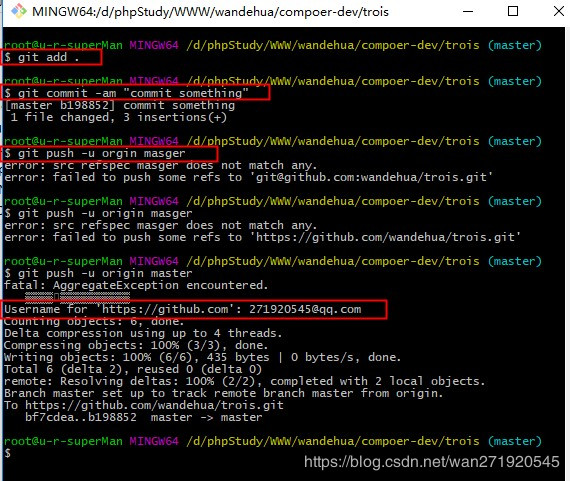
5.1 开始提交
依次输入:
```
git add . (注:别忘记后面的.,此操作是把Test文件夹下面的文件都添加进来)
git commit -m "提交信息" (注:“提交信息”里面换成你需要,如“first commit”)
git push -u origin master (注:此操作目的是把本地仓库push到github上面,此步骤需要你输入帐号和密码)
```
![](https://img.kancloud.cn/df/70/df70fcdca8cb07241e12e9a6431bf644_570x481.png)
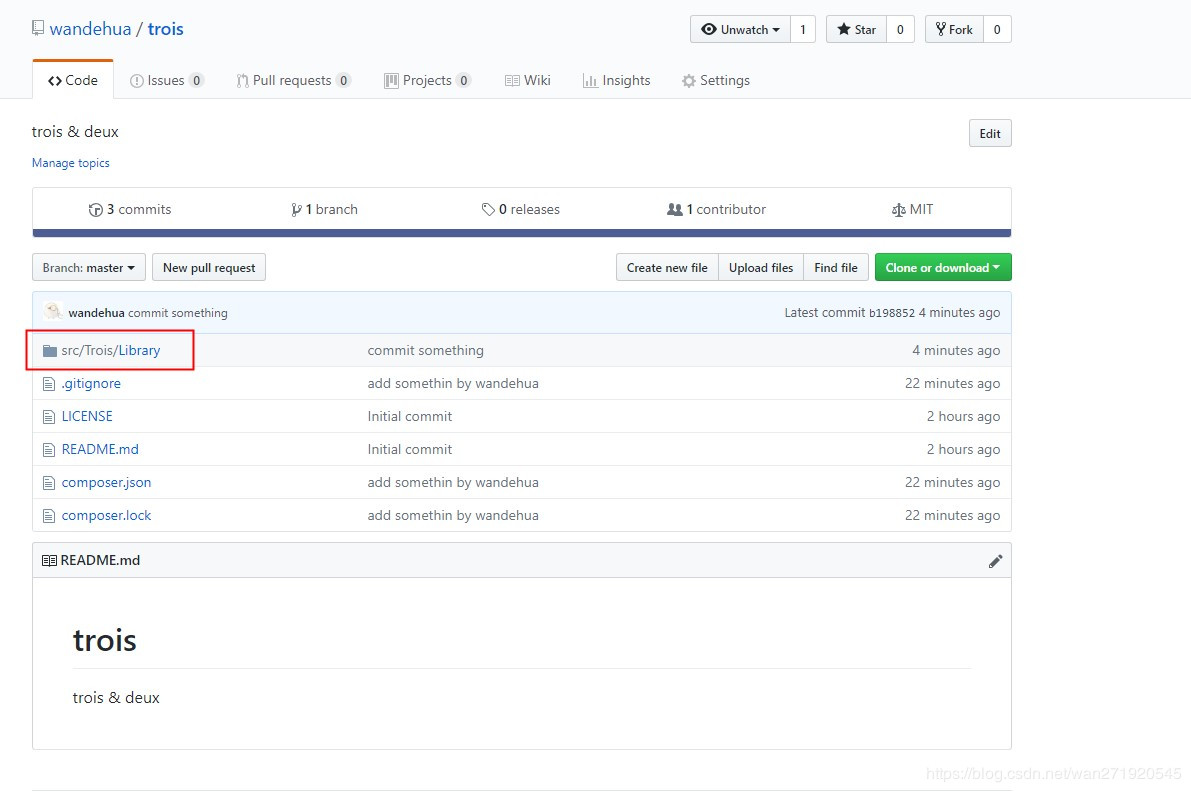
六,在github上验证,
![](https://img.kancloud.cn/83/da/83da4b6c9e6930662cd7b8ba560625ec_1191x792.png)
至此,我们github相关就全部操作完成
如何使用composer使用的我们的包呢,这里就要使用packagist了
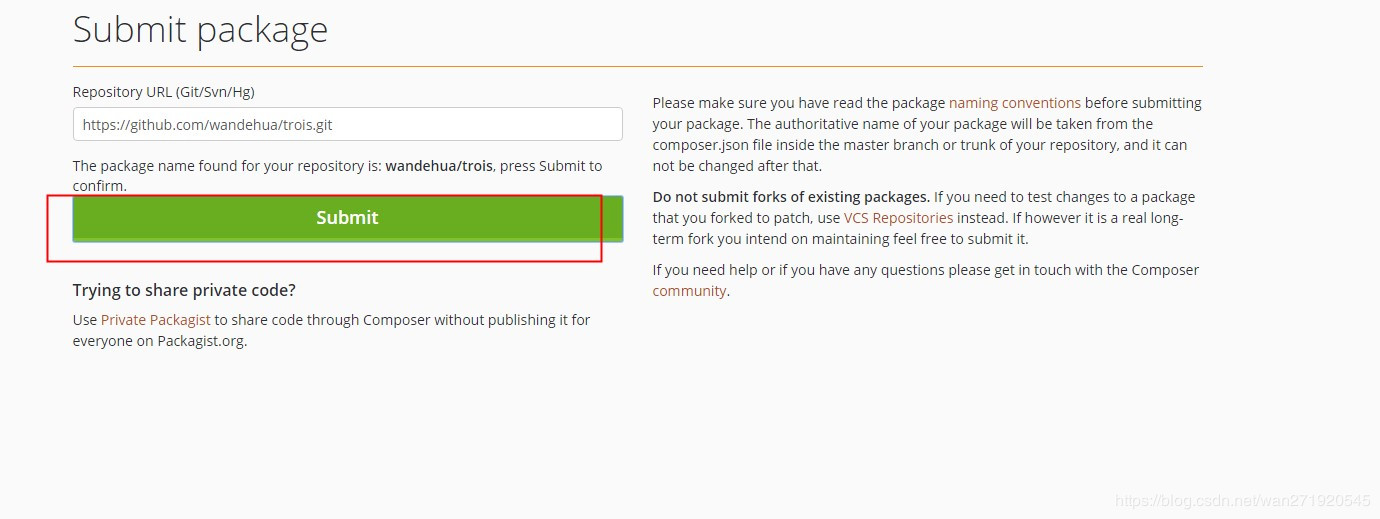
八,提交package
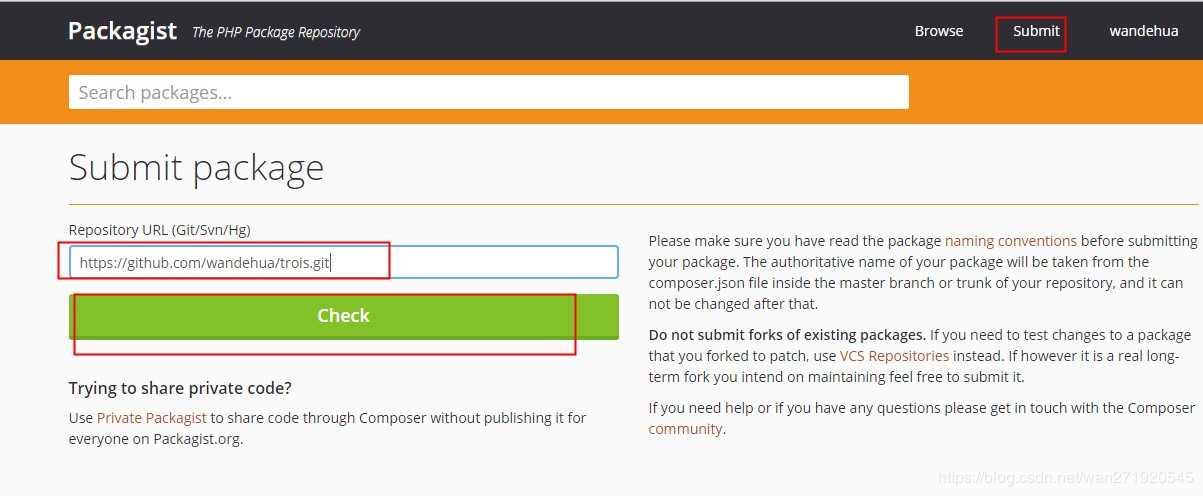
![](https://img.kancloud.cn/cd/a4/cda4644a8262e26e859259e2863f2603_1203x496.png)
![](https://img.kancloud.cn/1a/3c/1a3c9b87549540f557f117115e349b75_1380x519.png)
![](https://img.kancloud.cn/77/36/7736721d6ab4e8735ec4ddbb22f15635_1182x851.png)
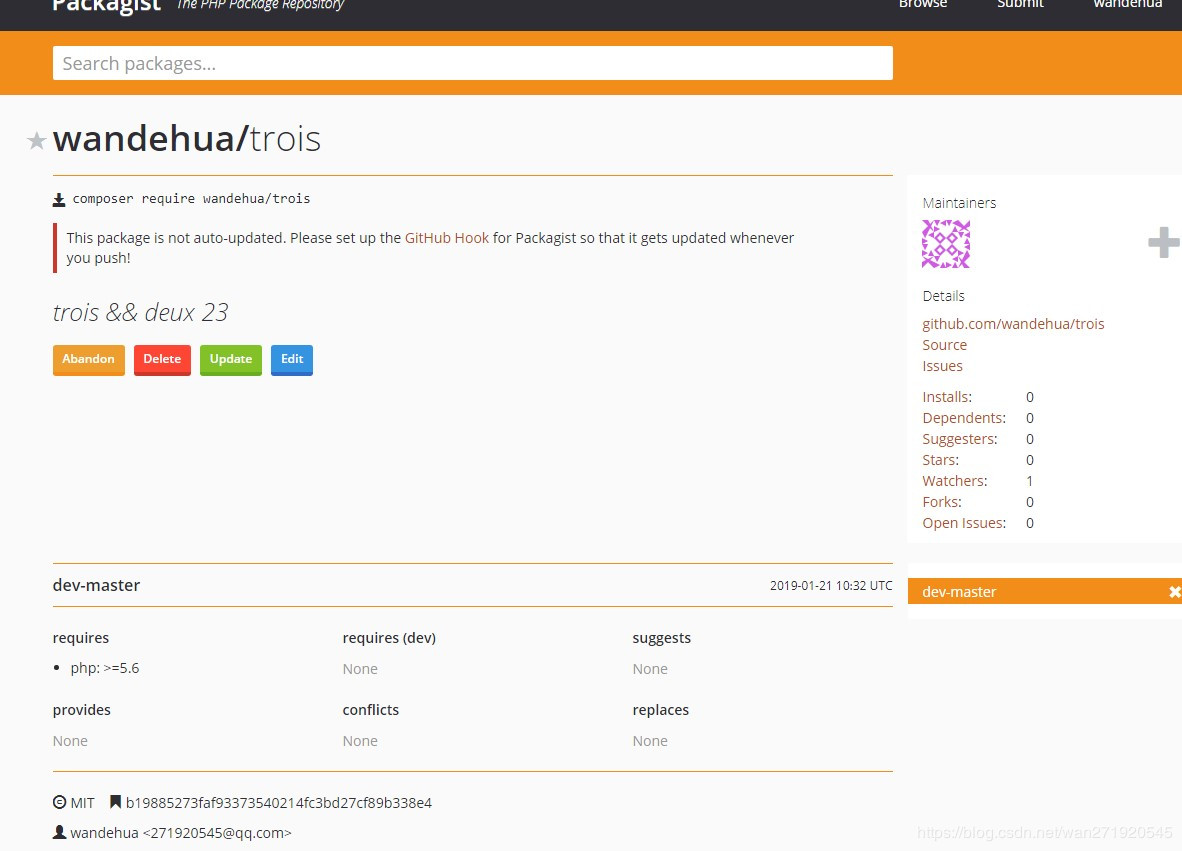
好了,我们项目就放在packagist上面了,这样大家就可以通过composer安装我们的包文件了
十:安装trois包文件
10.1 创建一个文件夹:compoer-test 并且进入,和4.1一样我们进入cmd命令行窗口
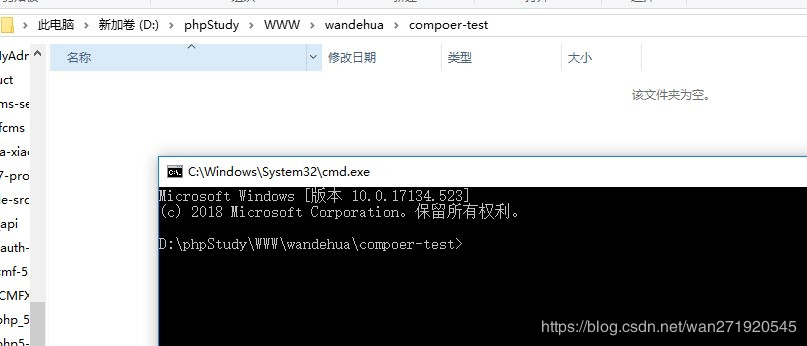
![](https://img.kancloud.cn/f0/ae/f0ae2041aec9001613e59cb6bae884b1_807x346.png)
10.2 执行
composer require wandehua/trois dev-master # 安装我们的trois包
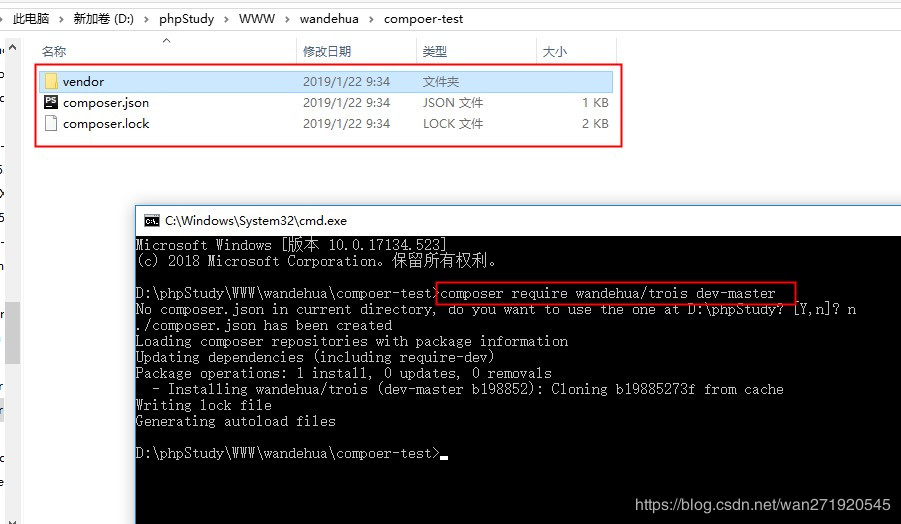
![](https://img.kancloud.cn/27/76/277679527d93483cd815a07fcdc0aaac_901x524.png)
10.3 验证:
创建一个index.php文件,并写入以下代码并执行一下
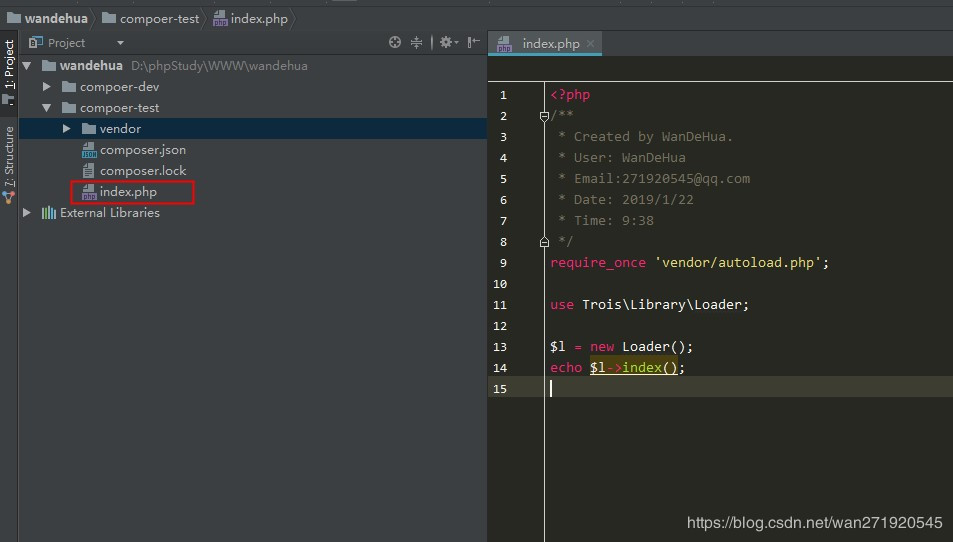
![](https://img.kancloud.cn/0f/0d/0f0d3dd0c174c498e00a73f01018a0e1_953x542.png)
输出了我们在Loader类中index方法的内容
![](https://img.kancloud.cn/27/18/27184ebe74ec3f04b030faf08b684d0f_470x112.png)