# :-: elasticsearch 7.5安装
### 一、下载文件上传到/usr/bnz/elk目录解压
```
tar -zxvf elasticsearch-7.5.0-linux-x86_64.tar.gz
```
### 二、安装
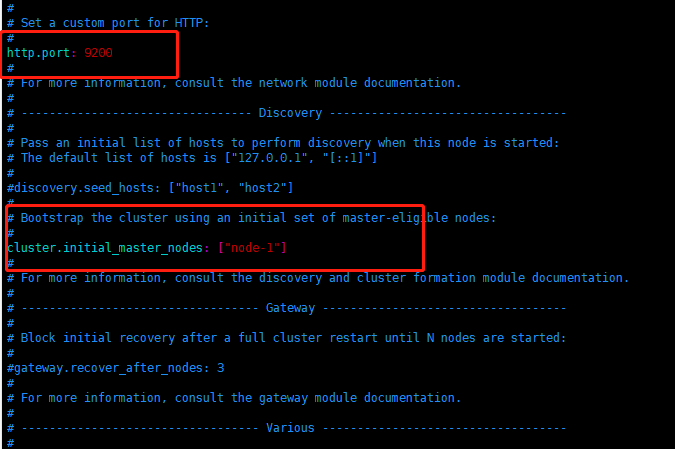
1、修改配置文件
~~~
cd /usr/bnz/elk/elasticsearch-7.5.0/config
vim elasticsearch.yml
cluster.name: ydc-test
node.name: node-1
network.host: 0.0.0.0 #外网访问
path.data: /usr/ydc/elk/data/esdata
path.logs: /usr/ydc/elk/data/eslog
http.port: 9201
cluster.initial_master_nodes: ["node-1"]
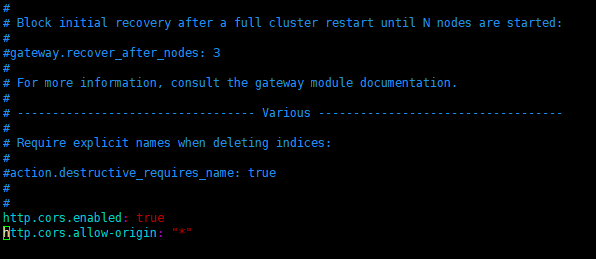
http.cors.enabled: true
http.cors.allow-origin: "*"
http.cors.allow-headers: "Authorization"
~~~


2、配置用户【由于es不建议使用root用户安装部署,所以需要专门为es设置一个用户】
```
useradd elk #创建用户elk
groupadd elk #创建组elk
useradd elk -g elasticsearch #将用户添加到组
# 修改文件所有者
chown elk:elk -R /usr/bnz/elk/data
chown elk:elk -R /usr/bnz/elk/elasticsearch-7.5.0
```

### 3、启动服务器
```
cd /usr/bnz/elk/elasticsearch-7.5.0/bin
sh ./elasticsearch
```
如果你想把 Elasticsearch 作为一个守护进程在后台运行,那么可以在后面添加参数 `-d` 。
~~~undefined
./elasticsearch -d
~~~
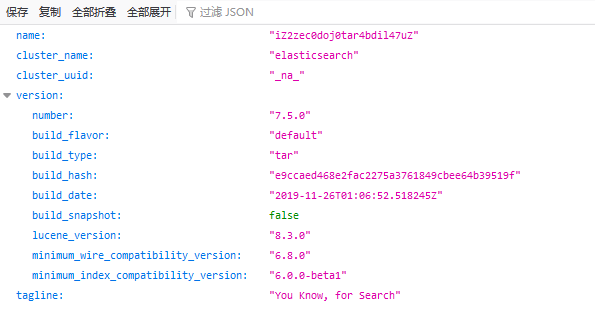
### 4、访问 [http://ip:9200](http://ip:9200)

- 项目介绍
- 项目声明
- 项目简介
- 架构设计
- 项目亮点功能介绍
- 技术栈介绍
- 核心功能
- 运行环境
- 项目更新日志
- 文档更新日志
- F&Q
- 部署教程
- 环境准备
- JDK安装
- JDK1.8,17共存
- maven
- 分布式缓存Redis
- 单机版
- 集群
- 注册&配置中心alibaba/nacos
- 介绍
- Nacos安装
- Nacos配置中心
- Nacos注册发现
- Nacos生产部署方案
- 服务监控-BootAdmin
- 基本介绍
- 如何使用
- 整合Admin-Ui
- 客户端配置
- 链路追踪
- 基本介绍
- SkyWalking-1
- Skywalking-1
- 消息队列
- Kafka
- docker安装kafka
- Linux集群
- Maven私服
- nexus安装部署
- nexus使用介绍
- 全文搜索elasticsearch
- windows集群搭建
- docker安装es
- ElasticHD
- linux集群部署
- 统一日志解决方案
- 日志解决方案设计
- 介绍与相关资料
- ELK安装部署
- elasticsearch 7.5
- logstash-7.5
- kibana-7.5
- filebeat
- 服务监控-Prometheus
- Prometheus安装配置
- Prometheus介绍
- grafana
- 持续集成部署CICD
- 自动化部署Jenkins
- 安装部署win
- 打包发布远程执行
- 安装部署linux
- jenkins+gitlab+docker容器化工程自动化部署
- Git
- CICD说明
- 阿里云效
- CentOS_MYSQL安装
- docker
- 安装
- Docker安装Nginx
- Docker部署启动springboot
- dockerCompose
- harbor
- Docker私有镜像仓库
- Portainer
- Docker远程连接设置
- 打包工程
- 必要启动模块
- 核心模块
- 登录认证
- 缓存功能
- 日志模块
- 分布式锁
- 消息队列
- 异常处理
- 系统接口
- 参数验证
- es检索
- 数据导出
- 系统设计
- 系统总体架构
- 扩展模块(可选)
- 限流熔断alibaba/sentinel
- 使用Sentinel实现gateway网关及服务接口限流
- Sentinel使用Nacos存储规则及同步
- 服务调用Feign
- Feign基本介绍
- 如何使用
- 负载均衡
- 请求超时
- 请求拦截器
- 分布式任务调度
- XXL-JOB
- 分布式事务
- TX-LCN
- Seata
- Seata原理解析
- 数据库分库分表
- swagger文档
- 分布式ID生成器解决方案
- 服务网关CloudGateway
- 基本介绍
- 使用网关
- 路由配置
- 全局过滤器
- 服务认证授权架构设计
- 认证服务流程
- 授权服务流程
- 系统幂等性设计与实践
- 分布式日志链路跟踪
- 实时搜索系统设计
- 应用性能
- 压力测试工具
- Apache JMeter介绍和安装
- ApacheJMeter使用
- JVM
- JVM性能调优
- 常见JVM内存错误及解决方案
- JVM 分析工具详解
- Spring Cloud性能调优
- Linux运维
- Linux 常用命令
- Linux开启端口
