### **域名解析**
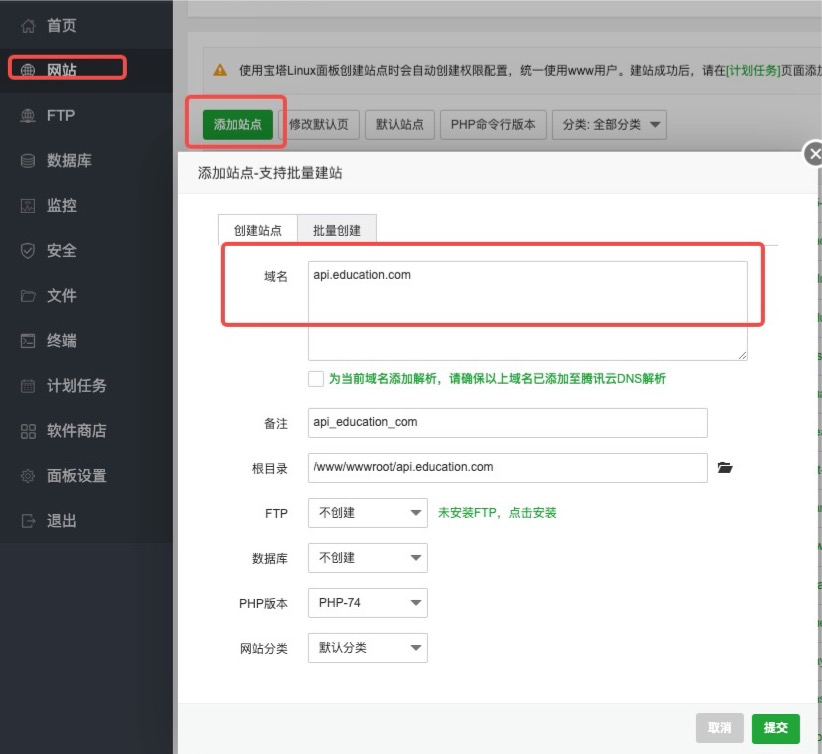
已完成备案的域名解析到服务器的外网ip,这里假设使用的二级域名是:api.education.com。
### **服务器端口**
默认使用**http**,在服务器安全组开放**80端口**,如果使用**https**,则需要配置**ssl证书**,并且服务器安全组开放**443端口**
### **运行环境**
Nginx或者Apache,文档演示使用的是Nginx。
**PHP >= 7.3**,文档演示使用的是7.4。
**MySQL >= 5.6**,文档演示使用的是5.6。
![](https://img.kancloud.cn/92/73/92739ed37820e25f5497071859900a23_2039x435.png)
![](https://img.kancloud.cn/28/02/28022d2980030644163fe8cf61787039_2042x408.png)
## **安装**
### 1、添加站点
![](https://img.kancloud.cn/07/1d/071da8a2ff1e175e78a8bd1d97587f04_822x754.png)
### 2、上传服务端代码
点击目录路径,进入站点根目录。
![](https://img.kancloud.cn/32/c8/32c8fc9b55f3b0ceb6a1a61ef94c25e5_2018x229.png)
点击上传按钮,选择服务端代码上传解压。
![](https://img.kancloud.cn/53/5c/535ca77cd4fc7023fc81ec0211ccb4d4_1776x279.png)
![](https://img.kancloud.cn/cc/46/cc463bf5a54bf2b986ad523382b61c05_2041x204.png)
### 3、设置目录权限
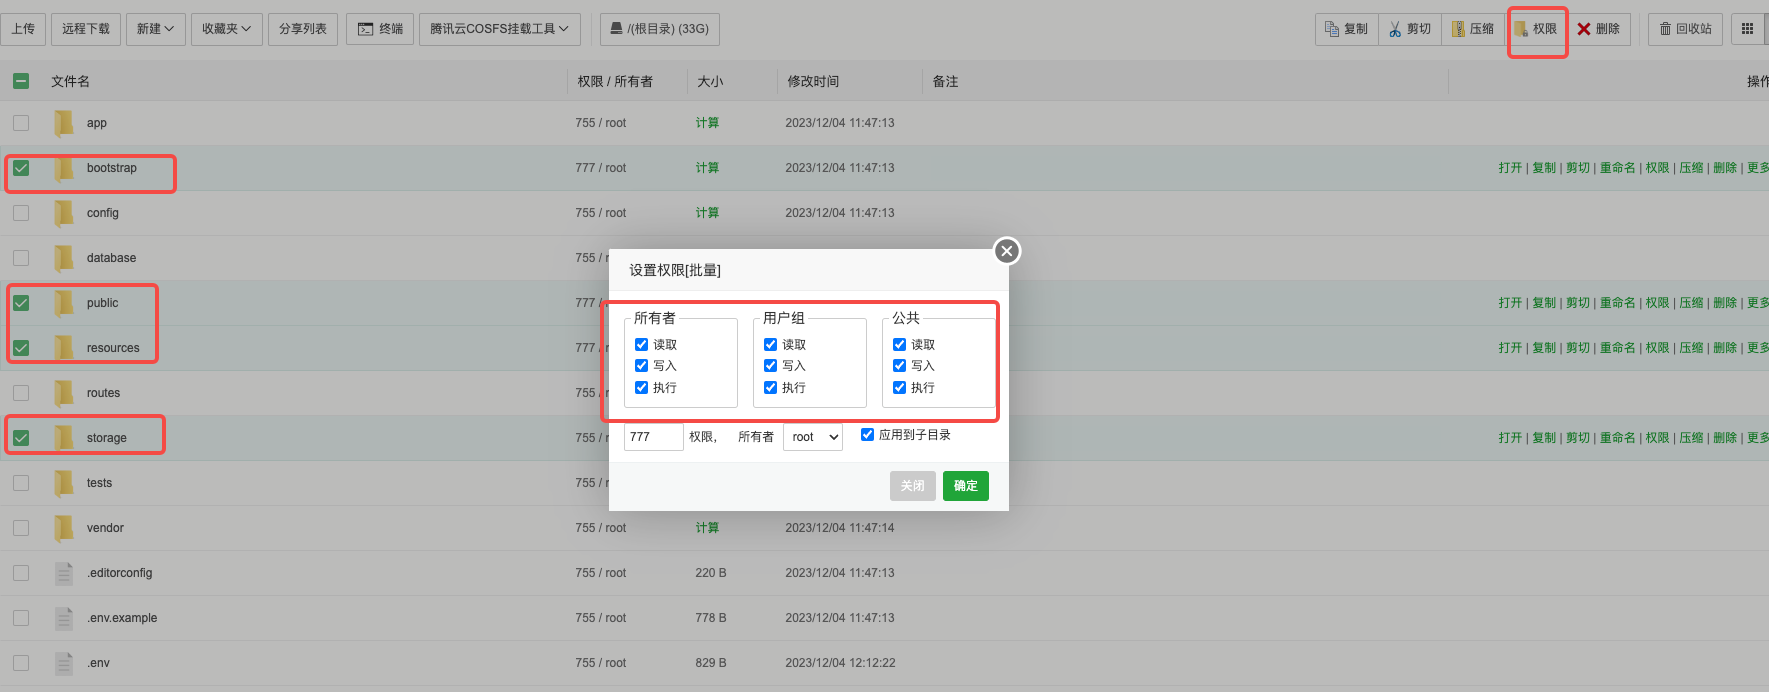
进入backend目录,将 public,storage,bootstrap,resources目录权限设置为777:
![](https://img.kancloud.cn/1a/8d/1a8d47b70fc51d68423eb3ab715f7678_1769x692.png)
### 4、设置站点目录
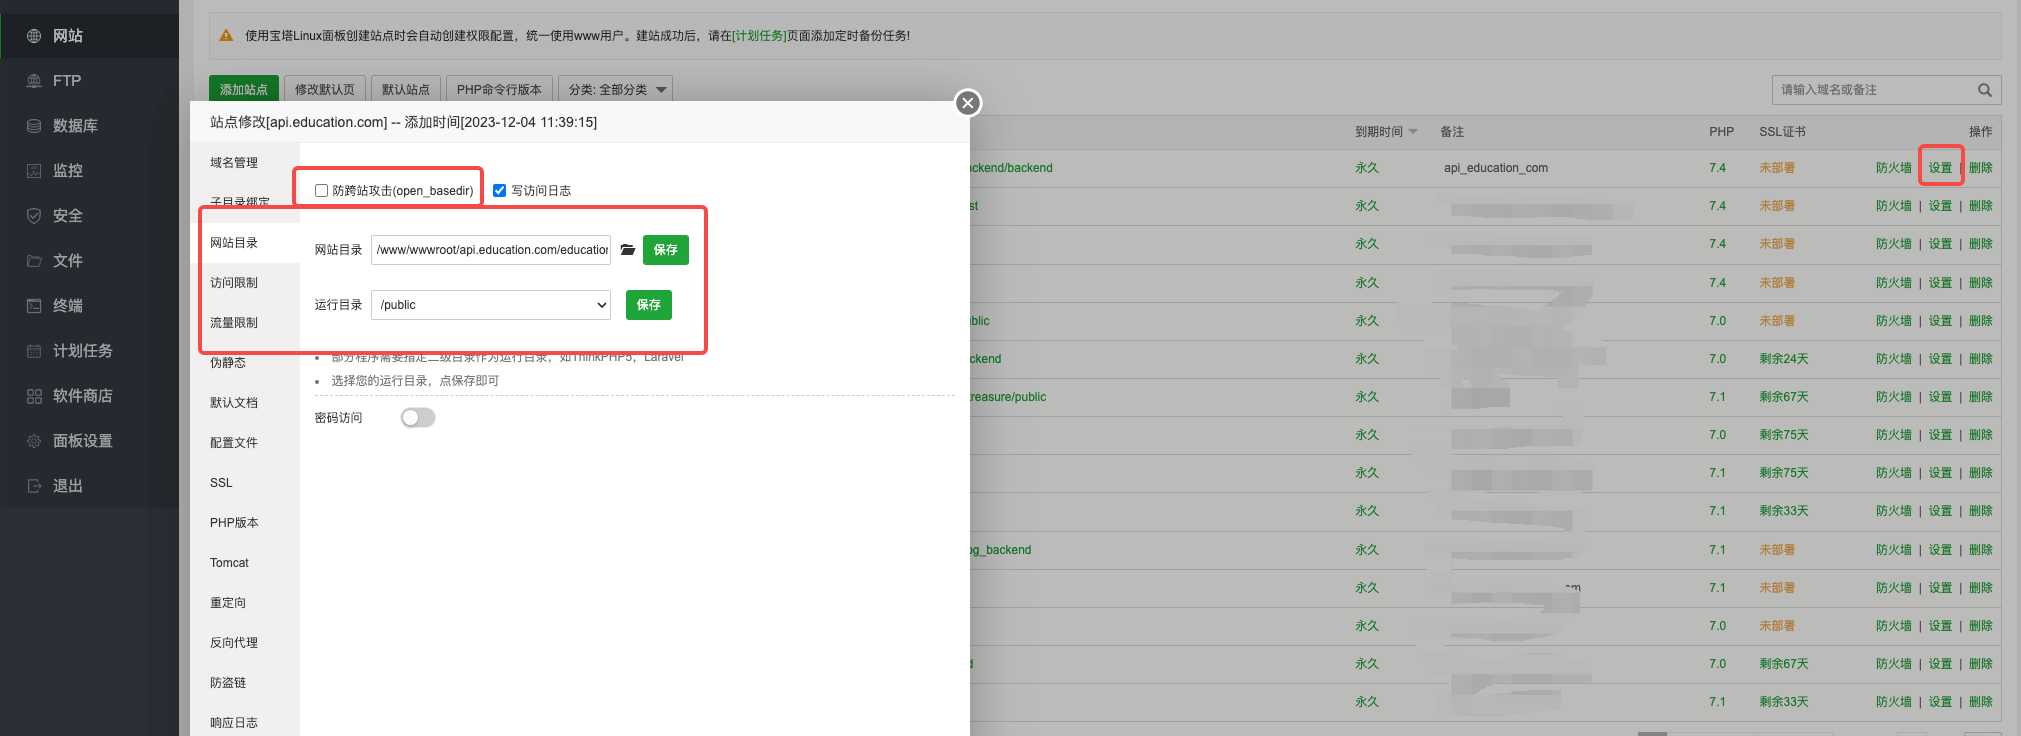
在站点列表点击设置按钮,将防跨站攻击(open\_basedir)按钮勾选去掉,网站目录选择到backend,网站的运行目录选择到public,分别点击保存
![](https://img.kancloud.cn/26/e4/26e49fafe29bda53eeeb5140f630a524_2021x736.png)
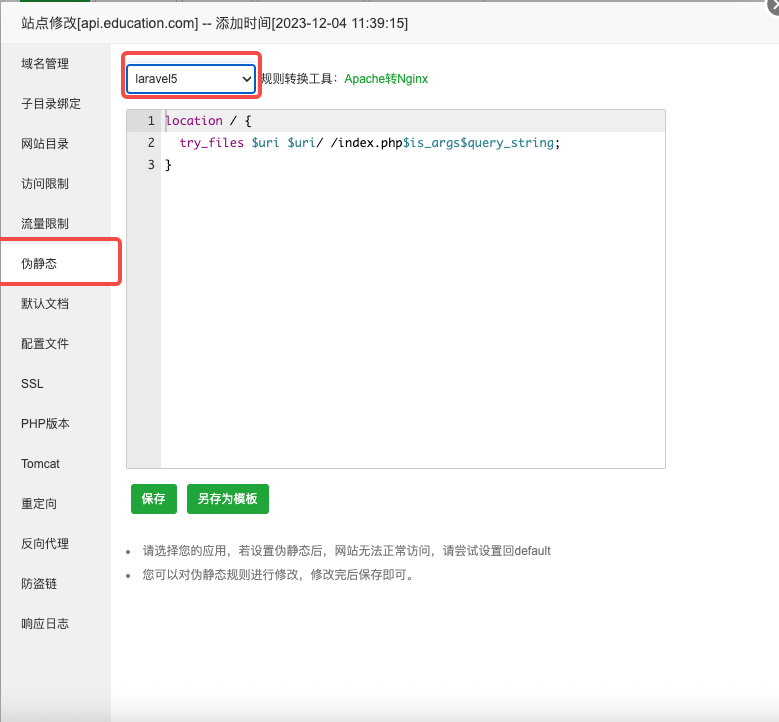
### 5、设置伪静态
点击伪静态,选择laravel,点击保存。
![](https://img.kancloud.cn/20/55/2055a59183a460333adcbe3b7875d37b_779x722.png)
### 6、生成.env文件
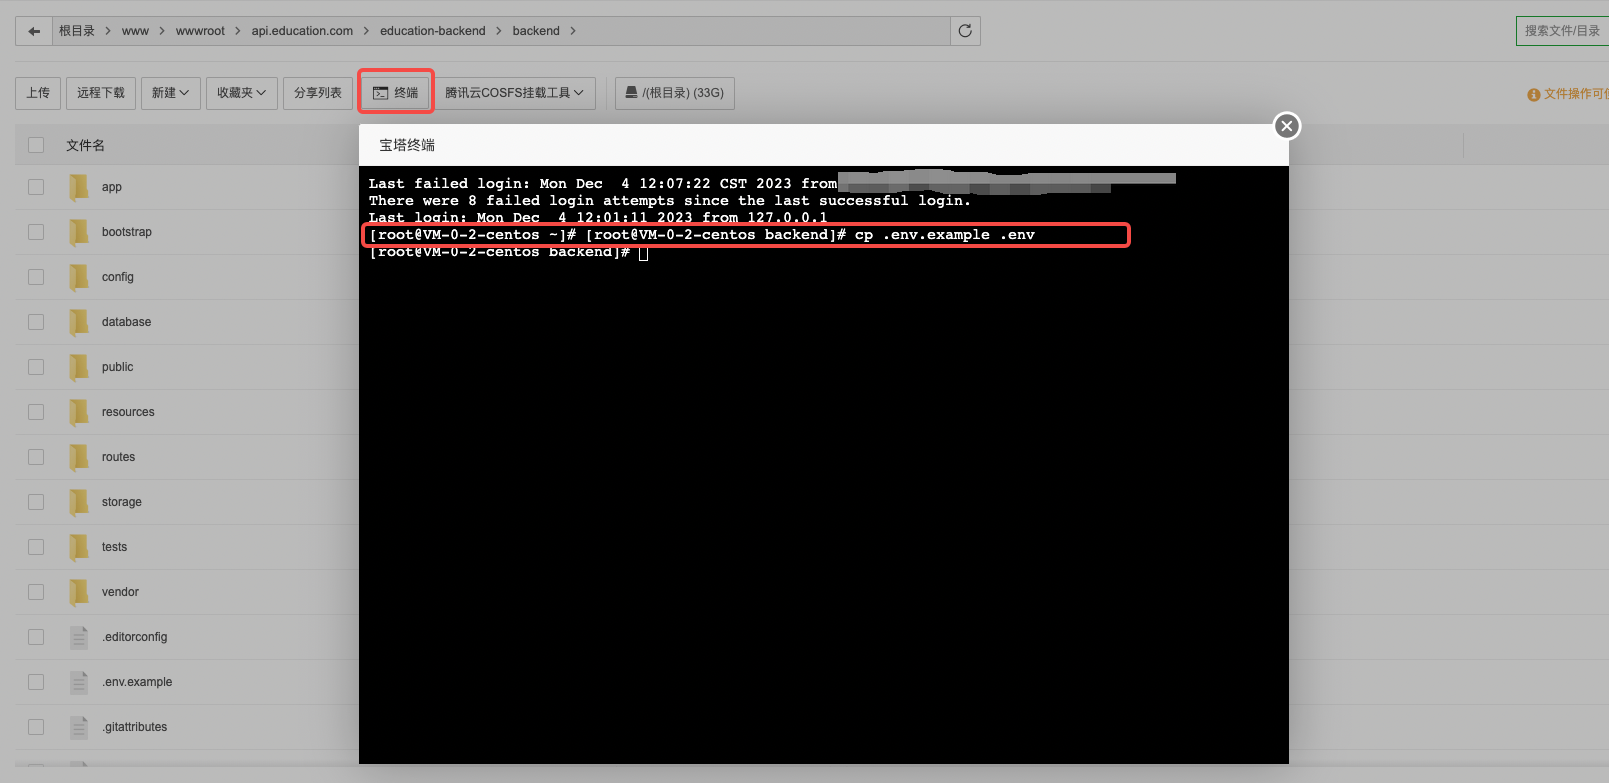
进入backend目录,点击终端,打开命令行窗口,输入:
```
cp .env.example .env
```
运行该命令后会在backend目录下生成.env文件
![](https://img.kancloud.cn/cf/04/cf045ae547bdf1b93e216baba715facc_1609x783.png)
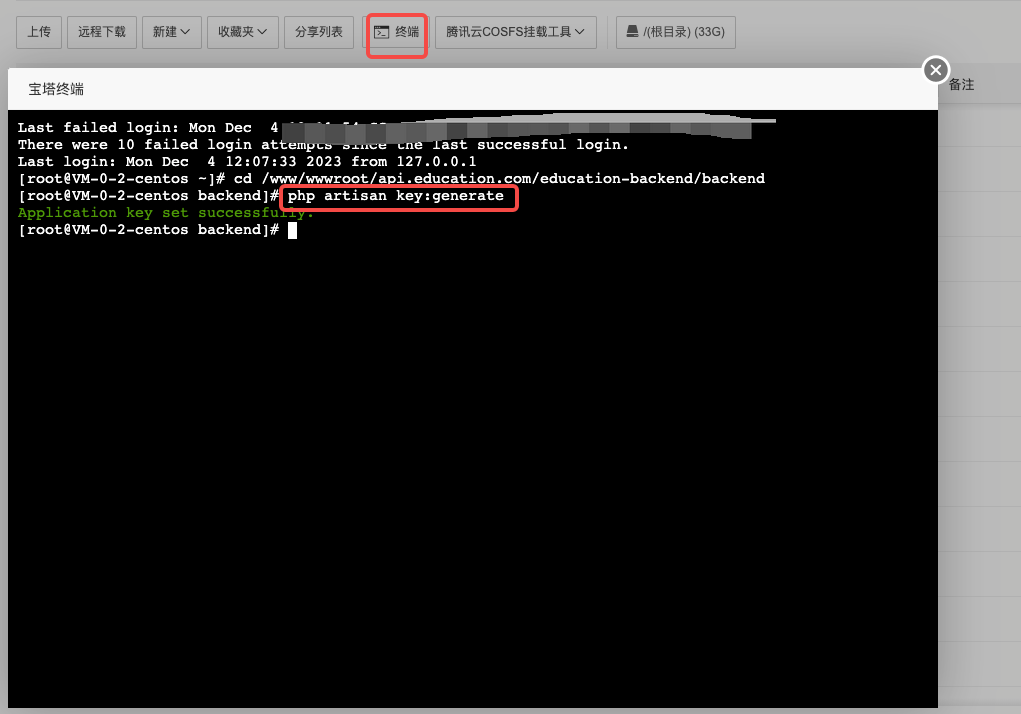
### 7、生成key
继续在终端输入命令:
```
php artisan key:generate
```
运行该命令后会在.env文件中生效APP_KEY
![](https://img.kancloud.cn/a1/1a/a11a1c8902435231d682644f2b9152c8_1021x714.png)
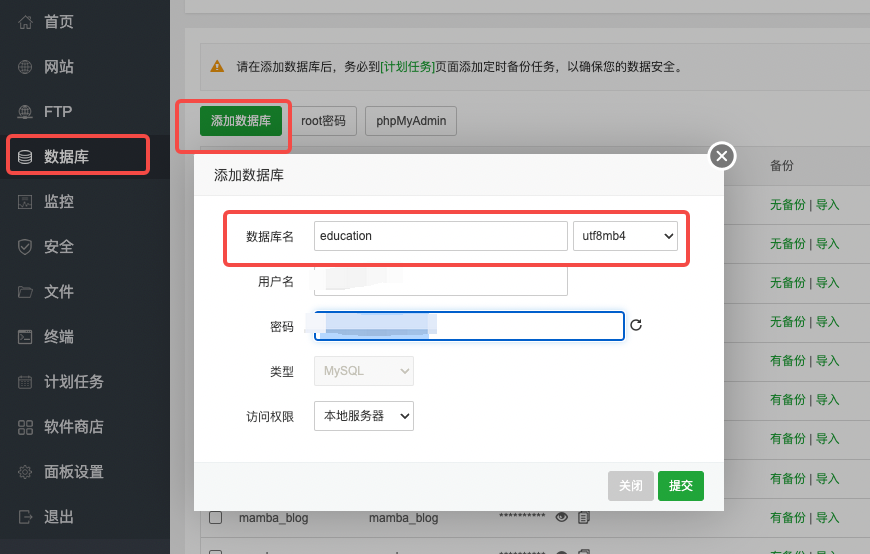
### 8、新建数据库
**输入数据库名,选择编码为utf8mb4**
![](https://img.kancloud.cn/c9/78/c978b00e8e69edd4b42e4dfb8f9062fe_870x554.png)
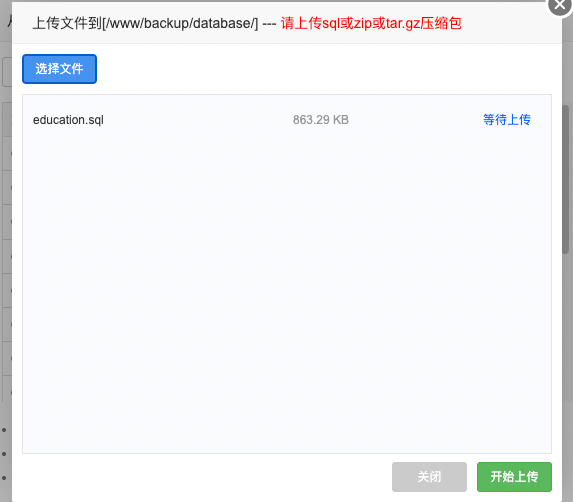
### 9、导入sql文件
上传sql文件后,点击导入按钮
![](https://img.kancloud.cn/8e/70/8e70f20d5672a9173b3f60755d487c34_2046x96.png)
![](https://img.kancloud.cn/29/83/298307dcd43a46c206f062ba34c3315f_679x120.png)
![](https://img.kancloud.cn/4a/fd/4afd66ec40eab1b73012ef2221440353_573x502.png)
![](https://img.kancloud.cn/43/24/4324b8633e1ee68c245984d3c7c394e8_651x192.png)
### 10、修改数据库配置
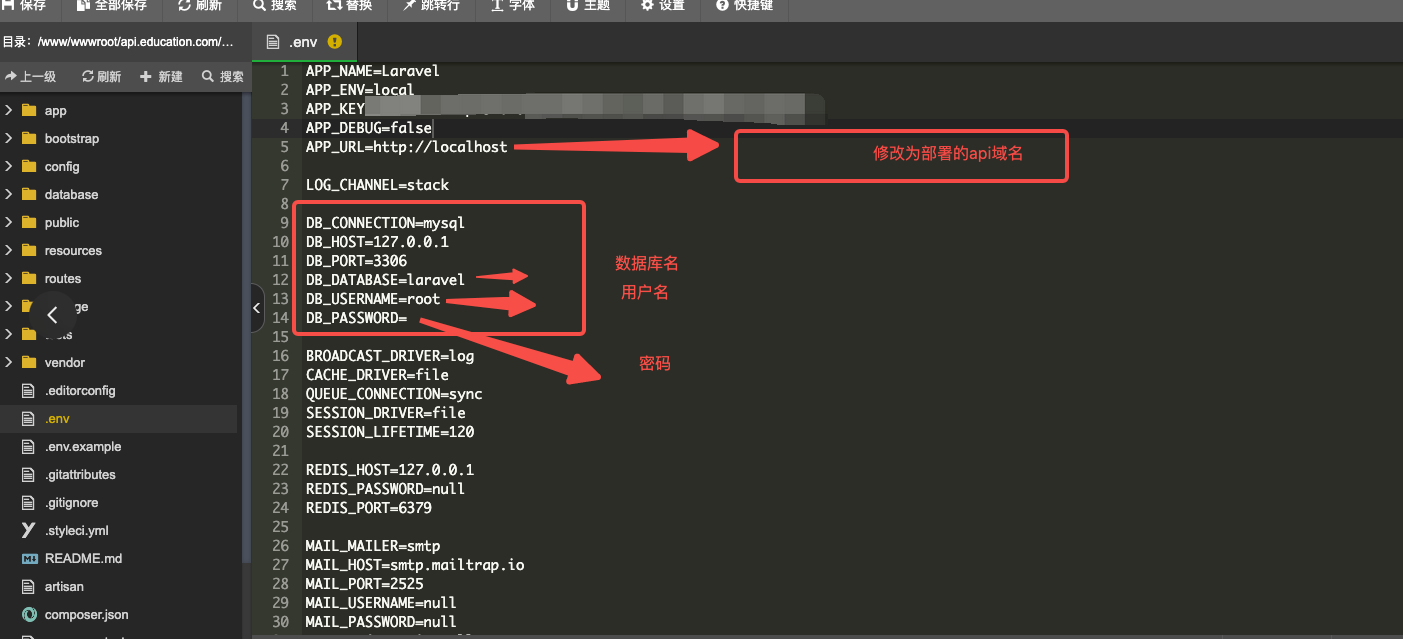
打开.env文件,修改APP_URL为部署的api域名,将新建生成的数据库名,用户名,密码填进去。
![](https://img.kancloud.cn/35/86/358673187da50923b0db1e5010d1a16d_1836x524.png)
![](https://img.kancloud.cn/ff/04/ff0438bb27d2ae7ba88569ef875fd87b_1403x643.png)
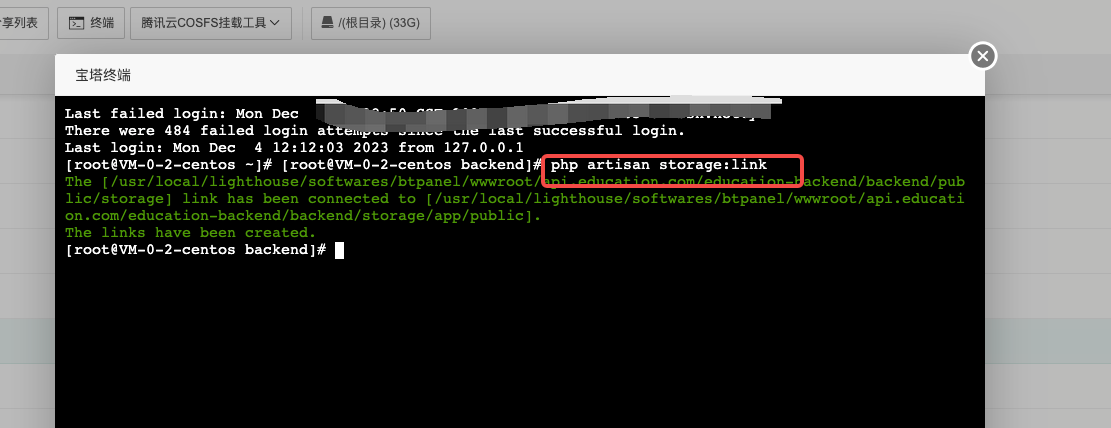
### 11、执行配置命令:
进去backend目录,打开终端命令行窗口,执行:
```
php artisan storage:link
```
![](https://img.kancloud.cn/d9/80/d98061e6d81e0100b7c248226adf46f4_1111x428.png)
```
php artisan jwt:secret
```
![](https://img.kancloud.cn/94/56/945605ca8913408e682e14cb2a638cb3_940x118.png)
### 12、添加定时任务
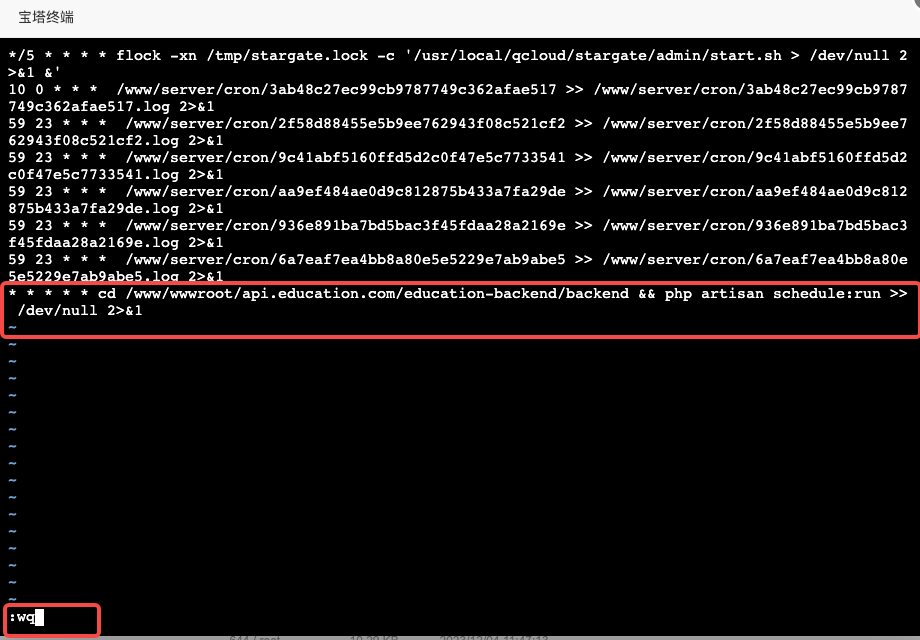
打开终端,在cron表添加laravel定时任务。
```
输入:crontab -e
打开之后输入:i,即可编辑
复制命令:* * * * * cd /www/wwwroot/api.education.com/education-backend/backend && php artisan schedule:run >> /dev/null 2>&1
然后按esc键,输入::wq,保存退出。
// /www/wwwroot/api.education.com/education-backend/backend 这个为api项目的路径
```
![](https://img.kancloud.cn/d7/93/d793e99cdb81f227b65b395b91397e2a_920x640.png)