WAR部署方案
===
>[info] Version: 2.4+ 版本
## 正式环境部署
> 部署方案采用nginx+tomcat部署方案
> 后端服务发布部署到tomcat中
> 前端项目build后dist部署到nginx中
### 一、后台项目jeecg-boot打war包(jeecg-boot-module-system)
#### (1)后台项目jeecg-boot-module-system打war包之前要进行如下改动
1、pom.xml文件中项目打包格式设置为war
<packaging>war</packaging>
具体配置如下:
```
<parent>
<groupId>org.jeecgframework.boot</groupId>
<artifactId>jeecg-boot-parent</artifactId>
<version>2.4.0</version>
</parent>
<modelVersion>4.0.0</modelVersion>
<artifactId>jeecg-boot-module-system</artifactId>
<packaging>war</packaging>
```
2、pom.xml文件删除插件spring-boot-maven-plugin
下面配置删除
```
<build>
<plugins>
<plugin>
<groupId>org.springframework.boot</groupId>
<artifactId>spring-boot-maven-plugin</artifactId>
</plugin>
</plugins>
</build>
```
3、增加项目web容器部署的支持:
修改类 jeecg-boot-module-system/org.jeecg.JeecgSystemApplication
代码如下:
```
package org.jeecg;
import org.springframework.boot.SpringApplication;
import org.springframework.boot.autoconfigure.SpringBootApplication;
import org.springframework.boot.builder.SpringApplicationBuilder;
import org.springframework.boot.web.servlet.support.SpringBootServletInitializer;
@SpringBootApplication
public class JeecgSystemApplication extends SpringBootServletInitializer {
@Override
protected SpringApplicationBuilder configure(SpringApplicationBuilder application) {
return application.sources(JeecgSystemApplication.class);
}
public static void main(String[] args) {
SpringApplication.run(JeecgSystemApplication.class, args);
}
}
```
4、注释掉WebSocket配置
```
将此类注释掉
jeecg-boot-base/jeecg-boot-base-core/org.jeecg.config.WebSocketConfig
```
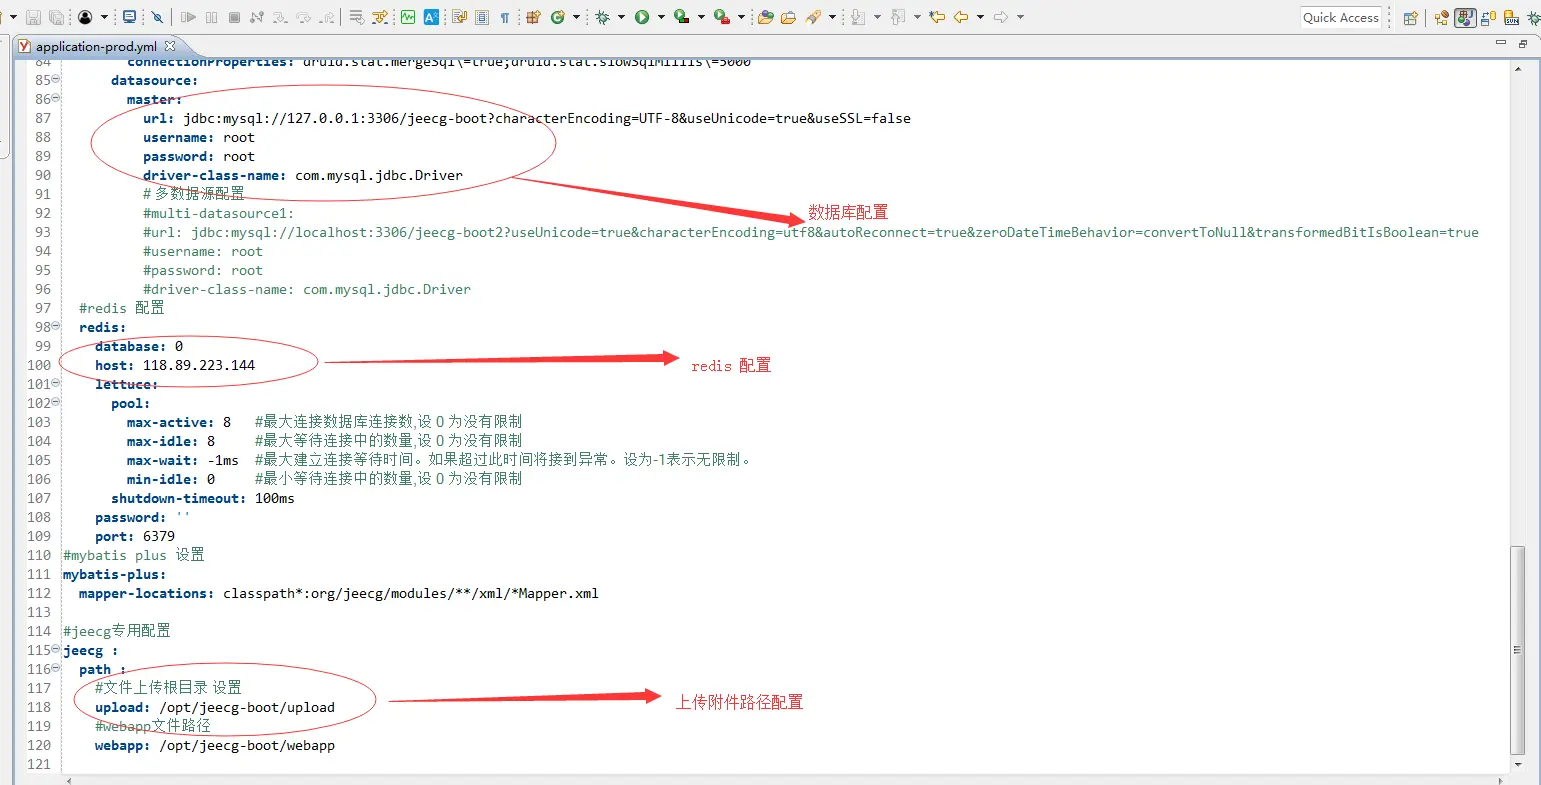
5、修改配置文件(数据库和redis配置)
- a、修改数据库连接 application-prod.yml
- b、修改缓存redis配置 application-prod.yml
- c、修改上传附件配置 application-prod.yml
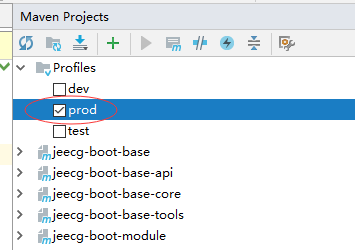
- d、切换生产模式打包
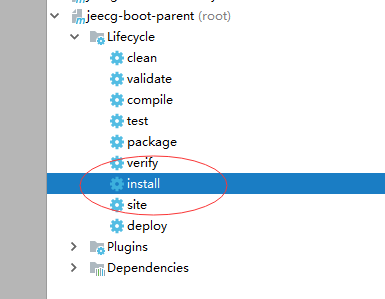
首先执行下jeecg-boot-parent的install 操作
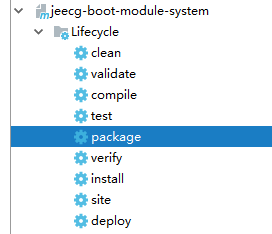
然后 maven package 打war包
### 二、后台项目jeecg-boot部署tomcat
1、设置tomcat端口号 8080,设置tomcat编码 URIEncoding="UTF-8"
2、部署项目到tomcat安装目录webapps/jeecg-boot工程目录下
部署完后通过http://localhost:8080/jeecg-boot 可以访问项目,提示token错误说明部署成功!!
```
注意:
1.tomcat解压war后的目录名称即你访问的根路径,即这里的jeecg-boot
2.新版的swagger需要访问http://localhost:8080/jeecg-boot/doc.html
```
### 三、前台项目build
1、修改 .env.production
```
NODE_ENV=production
VUE_APP_API_BASE_URL=https://bootapi.jeecg.com
VUE_APP_CAS_BASE_URL=http://localhost:8888/cas
VUE_APP_ONLINE_BASE_URL=http://fileview.jeecg.com/onlinePreview
```
2、build项目
使用build命令打包项目
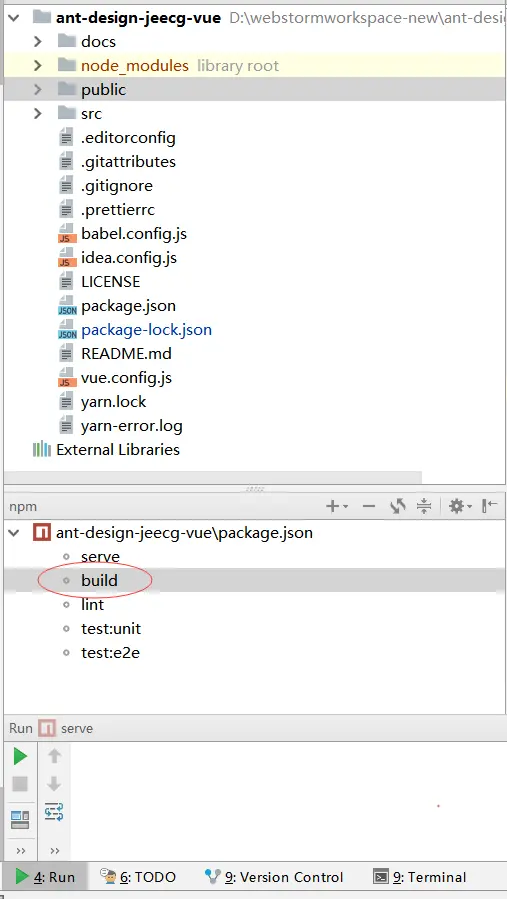
build完成后台会生成一个dist的目录该目录下即为build后的文件。
4、nginx部署前端项目
拷贝dist下的代码到nginx安装目录下html目录中,即可
### 四、nginx配置(conf/nginx.conf)
nginx监听80端口
```
server {
listen 80;
server_name 你的域名;
#后台服务配置,配置了这个location便可以通过http://域名/jeecg-boot/xxxx 访问
location ^~ /jeecg-boot {
proxy_pass http://127.0.0.1:8080/jeecg-boot/;
proxy_set_header Host 127.0.0.1;
proxy_set_header X-Real-IP $remote_addr;
proxy_set_header X-Forwarded-For $proxy_add_x_forwarded_for;
}
#解决Router(mode: 'history')模式下,刷新路由地址不能找到页面的问题
location / {
root html;
index index.html index.htm;
if (!-e $request_filename) {
rewrite ^(.*)$ /index.html?s=$1 last;
break;
}
}
}
```
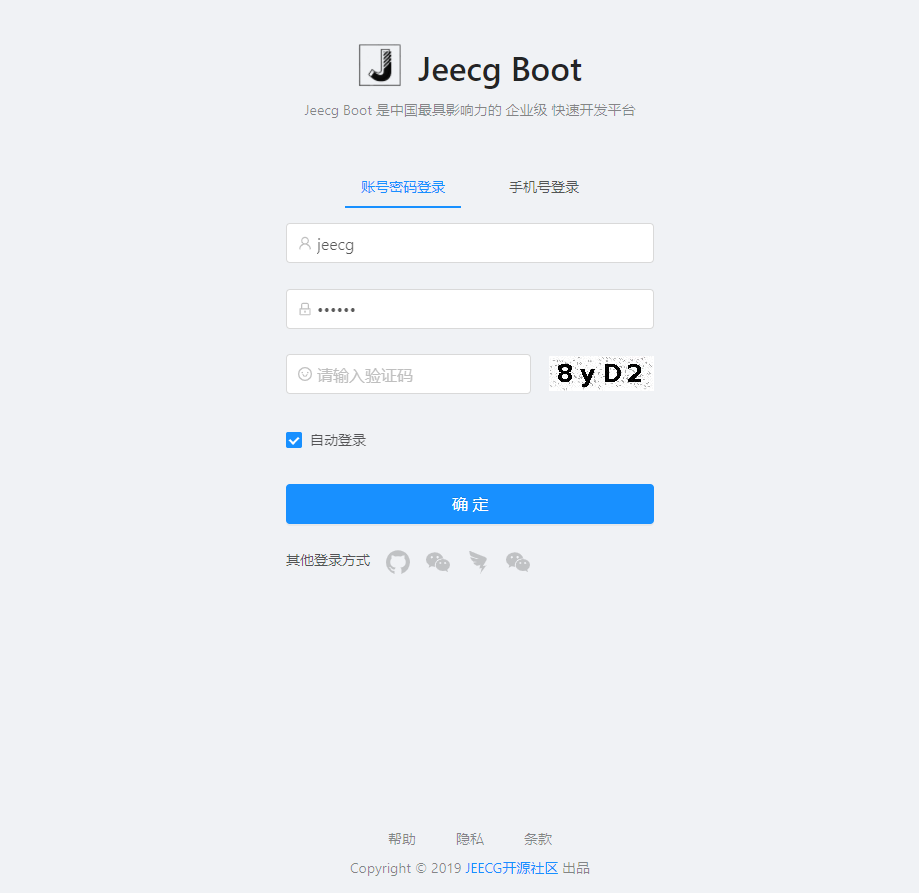
4、访问应用
配置后启动tomcat,启动nginx
通过http://你的域名/ 访问项目,出现如下页面,使用账户/密码:admin/123456 登录成功即可
- 项目介绍
- 新手入门教程
- 开发环境准备
- 基础环境要求
- 开发环境安装
- IDEA导入项目
- 通过IDEA启动项目
- VUE2前端文档
- Vue2前端快速启动
- Docker启动Vue2前端
- Vue2前端多环境
- 切换Vue2路由菜单表
- Docker启动单体后台
- 切换其他数据库
- Maven私服设置
- Docker安装软件
- docker搭建开发环境
- Docker中安装Elasticsearch
- 连接达梦数据库
- 达梦数据库多数据源
- 老版本文档
- 通过IDEA启动项目3.3
- 前端快速启动3.3
- IDEA导入项目3.3
- 快速开始
- HelloWorld
- 上线发布
- JAR部署方案
- JAR分离打包部署
- WAR部署方案
- 开启Nginx压缩
- swagger使用
- 老版本发布文档
- JAR部署方案3.3
- JAR分离打包部署3.3
- Docker单体启动项目3.3
- WAR部署方案2.4
- JAR部署方案3.4.1
- 代码生成器
- 代码生成器简介
- Online代码生成器
- GUI代码生成器
- 代码生成常见问题
- 发布后配置代码生成
- 代码生成器配置
- 代码生成器配置文件
- Online导入表过滤规则
- 自定义开发
- 生成器模板介绍
- 自定义一套模板
- 生成代码优化
- 快速生成模块
- 老版生成器文档
- 微服务开发
- 微服务解决方案
- 单体升级为微服务3.4.1+
- archetype生成微服务模块3.4+
- docker启动微服务项目3.4.1+
- 微服务项目结构说明3.4.1
- jeecg-server-cloud微服务中间件
- Sentinel集成和规则配置用法
- Admin监控用法
- Gateway网关高级配置3.4
- jeecg-boot-starter项目实战
- jeecg-boot-starter目录结构
- xxl-job定时任务集成2.4+
- rabitmq消息队列集成2.4+
- 消息总线用法2.4+
- Redisson分布式锁集成2.4+
- 防止重复提交2.4+
- 分库分表ShardingSphere3.4+
- 分库分表ShardingSphere2.4
- 分布式事务Seata集成
- 上线部署
- 微服务部署文档
- 老版本
- 单体升级为微服务2.4~3.1
- docker-compose部署3.0
- 微服务安装与快速启动
- docker-compose部署3.1
- 老版微服务文档
- 单体升级为微服务3.4
- archetype生成微服务模块3.4
- docker启动微服务项目3.4
- jeecg-cloud-module目录结构3.4
- 单体升级为微服务3.2+
- archetype生成微服务模块3.2+
- Docker启动微服务3.3+
- Gateway网关高级配置3.2
- 实战技巧
- 实战微服务模块分层
- 微服务之间调用免Token方案
- 微服务单独配置数据源3.4+
- 微服务单独配置nacos 3.4+
- 微服务单独配置数据源3.2
- 微服务单独配置nacos 3.2
- 系统日志表跨库问题
- nacos配置实现动态刷新
- 高级应用
- 微服务Feign调用示例
- skywarking链路跟踪
- 微服务和单体定义切换接口
- 安装@Redis集群搭建
- 安装@RabbitMq创建交换机
- 3.2之前限流用法
- 微服务熔断/降级/限流2.4+
- HystrixCommand配置参数详解
- 动态feign客户端
- 常见问题
- gateway接口文档不通
- 访问gateway超时
- 系统监控跨域问题修复
- gateway请求返回400
- 后端开发技巧
- 常用问题汇总
- 数据库支持说明
- 自定义注解用法
- Spring缓存注解@Cacheable
- 字典翻译注解@Dict
- 数据权限注解@PermissionData
- 日志记录注解@AutoLog
- 菜单路由配置
- 菜单配置说明
- 带参数路由菜单
- 路由菜单规则
- 菜单快速SQL
- 聚合路由菜单
- 数据快照功能如何用?
- 快速创建module模块
- 查询过滤器用法
- 系统日志怎么插入?
- 自定义sql分页实现
- redis 如何使用?
- 事务如何使用?
- 动态数据源使用
- 定时任务如何开发?
- 平台消息推送接口
- 接口敏感数据安全
- 批量插入效率建议
- 短信接口配置(阿里大鱼短信)
- 自定义注解限制重复提交
- 邮箱配置文档
- 积木报表设计器数据集使用
- 父子编码使用说明
- 我的文档安全配置
- 文档预览
- 在线多数据源
- 导入校验工具类
- druid数据库密码加密
- 自定义首页的用法
- 系统安全模式
- 数据脱敏注解
- Long类型主键导致精度丢失问题
- sql黑名单配置
- 系统文件上传
- 统一文件上传规则
- MinIO配置
- 阿里云OSS配置
- Minio版本6.0.13升级到8.0.3修改记录
- 文件上传大小限制
- VUE2前端开发
- 如何更改默认主题
- Form表单开发特殊性
- Icon图标扩展方法
- vuex使用详解
- vue路由带参总结
- 全局配置文件
- 列表自定义列实现
- 国际化改造方案
- 常用命令
- 报表开发
- 报表开发技术点
- 自定义报表组件
- 源码解读
- 自定义组件
- 前端技巧
- components包下文件描述
- JDictSelectTag字典标签
- duplicateCheck表单字段重复校验通用JS
- JVxeTable行编辑
- 组件配置文档
- 自定义组件
- 封装自定义组件
- 自定义组件增强
- 多级联动配置
- 使用示例
- 常见问题解答
- JEditableTable帮助文档
- JMultiSelectTag多选组件
- JPopup弹窗选择组件
- JSearchSelectTag字典表的搜索组件
- JSelectDepart部门选择组件
- JSelectMultiUser用户多选组件
- JSelectUserByDep根据部门选择用户
- JTreeDict分类字典树形下拉组件
- JTreeSelect树形下拉框 (异步加载)
- JInput 查询组件
- JCron 帮助文档
- JCategorySelect 帮助文档
- JUpload上传组件
- JImageUpload图片上传组件
- JSuperQuery高级查询组件
- JAreaLinkage省市县三级联动
- JEllipsis超长截取显示
- JDate 日期组件
- JCheckbox组件
- JCodeEditor组件
- JSelectMultiple多选下拉组件
- JTreeSelect树形下拉组件
- JImportModal组件
- JAsyncTreeList异步树表格
- JFormContainer使用文档
- JMarkdownEditor使用文档
- 前端开发坑(一定要注意)
- 按需加载方案
- 按需加载@减小打包
- JeecgBoot实战-按需加载方案
- 表格的换行与不换行
- 旧:表格的换行与不换行
- 主子表子表下拉框、时间框弹框被遮挡优化
- 前端依赖包package.json
- 如何实现多列表单
- 前端字典缓存用法
- 自定义首页
- 门户首页Portal权限控制
- Form升级为FormModel用法
- 动态覆盖env配置文件(新)
- 上传组件使用kkfileview实现文件预览
- 系统权限用法
- JAVA请求权限控制
- 页面按钮权限用法
- 数据表格列字段控制
- 表单权限
- 显示隐藏控制
- 禁用控制用法一
- 禁用控制用法二
- 子表行字段的禁用和隐藏控制
- 数据权限
- 数据权限规则篇
- 数据权限用法篇
- 编码对接数据权限(未用查询过滤器)
- 权限配置自定义SQL
- 子表数据权限
- 二级部门权限管理
- 填值规则(编码生成)
- 校验规则(高级校验)
- 列表列字段导出权限示例
- 备份
- 通过URL方式配置数据权限
- Online表单VUE2版
- Online开发初体验
- Online表单的菜单配置
- Online表单配置
- Online表单配置参数说明
- Online表单一对多表单配置
- Online树列表表单配置
- Online表单查询配置说明
- Online功能如何配置成菜单
- Online表单填值规则配置
- Online表单排版
- Online树列表表单配置(个性化)
- Online表单标准字段说明
- Online表单删除说明
- Online对接积木报表
- Online查询排序配置
- Online联合查询配置
- Online导入导出值转换器
- Online表单视图功能
- Online自定义查询配置
- Online表单控件
- 下拉框@多选框@单选框
- 下拉多选
- 下拉搜索
- Popup控件
- 富文本控件
- 时间控件
- 用户选择器
- 部门选择器
- 自定义树控件
- 分类字典树控件
- Online之popup使用
- 下拉联动组件
- markdown编辑器
- 省市区组件
- 开关控件
- 字段排列顺序调整
- 字段显示隐藏控制
- 控件配置Href
- 字段校验规则使用
- 控件默认值表达式
- 控件扩展参数用法
- Online权限配置
- 字段权限配置与授权
- 按钮权限配置与授权
- 数据权限配置与授权
- 联合查询数据权限规则说明
- 在线开发(增强)
- Online 自定义按钮
- Online自定义按钮基础篇
- Online自定义按钮表达式
- Online基础篇-SQL增强
- Online JS增强
- 基础篇-JS增强
- 基础篇-JS增强(表单渲染)
- 列表JS API
- 表单JS API
- JS增强自定义弹窗
- JS增强 实战示例
- 表单按钮 动态显隐字段
- 表单按钮 改变控件的值
- 修改控件值【单表/主表】
- 表单按钮修改子表数据
- 修改控件值【从表】
- 修改控件值【从改主】
- JS增强实现下拉联动
- 表单前置事件(提交/编辑/删除)
- 初始化表单默认值
- 获取vuex缓存
- Online Java增强
- online基础篇-java增强
- Online java增强 导入
- Online java增强 导出
- Online java增强 查询
- Online Java增强 http-api
- 表单类
- 列表类
- 对接表单设计器后需注意
- Online java增强配置说明
- 备份2.4
- Online java增强 导入2.4
- online java 增强 http-api
- 通过字段Href实现三级联动
- 导入数据库表支持排除表
- edu
- Online表单专题课程1
- Online表单专题课程2
- 备注
- Online权限配置(作废—老版本)
- 列表字段权限(显示与隐藏)
- 表单字段权限(隐藏和禁用)
- 列表按钮权限(隐藏)
- 列表数据权限
- 树形表单数据权限配置
- Online表单权限配置(作废—老版本)
- 功能描述
- 列表权限
- 列表字段的显示或隐藏
- 列表操作按钮的显示或隐藏
- 列表自定义按钮的显示或隐藏
- 表单权限
- 表单字段的显示或隐藏
- 表单字段的禁用或可编辑
- online表单使用常见问题
- online AI自动化测试数据制作
- Online导入开启校验用法
- Online AI模型测试用例功能详情
- Online Al模型智能测试数据制作文档
- online表单API接口
- Online报表VUE2版
- Online报表
- online报表-使用步骤
- online报表-动态参数
- 如何配置报表菜单
- Online报表权限配置
- Online报表系统变量应用
- 参数说明
- Online报表排序
- 字段href
- 字典配置
- online报表-合计
- online报表-配置分组标题
- online报表导出
- 高级实战技巧
- Websocket业务对接
- WebSocket的集成
- SAAS多租户用法
- 如何集成积木报表
- 使用jdk14启动项目【内测】
- 全局监听使用示例
- 微前端高级改造
- 逻辑删除方案
- 升级springboot2.6.3问题汇总
- postgresql数据库兼容问题
- 单体架构集成分库分表
- CAS单点登录
- CAS单点登录服务端准备
- 单点登录流程图
- 单点登录配置说明(2.3.1+)
- 单点登录配置说明(vue3)
- archive
- 2.JeecgBoot后端对接CAS步骤
- 3.JeecgBoot前端项目对接CAS步骤(2.3.0)
- 第三方登录
- 企业微信配置
- 钉钉配置
- 企业微信集成方案
- 微信第三方集成
- 钉钉和企业微信打通
- 配置开关
- 钉钉集成流程
- 企业微信集成流程
- 小技巧
- 同步部门规则
- 同步用户规则
- 同步到本地开关
- OAuth2登录(应用集成)
- 钉钉OAuth2登录
- 企业微信OAuth2登录
- JeecgUniapp开发
- 开发环境搭建
- 项目简介
- 编写Hello World页面
- 打包项目
- APP打包
- 微信小程序打包
- H5打包
- 小程序发布
- APP首页排版设计
- API接口配置
- uniapp推送
- 后台定时unipush推送配置
- websocket消息推送修改
- HBuilderX打包APP
- 1.Build-JeecgBoot项目
- 2.HBuilderX 打包APP
- HBuilder打包APP手机端安装配置教程
- bak_vant
- 小结
- 后台推送消息移动端
- 如何安装新依赖
- 代码生成列表和表单
- AutoPOI(Excel工具)
- 快速文档
- 单表数据导出多表头示例
- 单表数据多表头导入注意bak
- 导出自定义选择列导出
- @excel注解使用
- excel根据模板导出
- 一对多导出needMerge
- 单表数据导出多sheet实例
- autopoi升级到4.0版本修改记录
- 大数据量处理
- 大数据量导出示例
- 编码规范
- 代码规范
- 建表规范
- 代码格式化插件安装
- 代码质量扫描
- 更多商业功能介绍
- 表单设计器
- 仪表盘设计器
- 流程设计器
- 工作流引擎
- 大屏设计器
- 低代码应用
- 门户设计器
- APP移动办公
- APP布局设计
- OA办公
- Online图表