
## 其他特性
### 全局前缀
要忽略一个通过`setGlobalPrefix()`配置的全局前缀, 使用`ignoreGlobalPrefix`:
```TypeScript
const document = SwaggerModule.createDocument(app, options, {
ignoreGlobalPrefix: true,
});
```
### 多重声明
`Swagger`模块提供了一个支持多重声明的方法,也就是说可以在多个终端提供多个界面和多个文档。
要支持多重声明,首先在模块中要进行声明,在`createDocument()`方法中传递第3个参数,`extraOptions`,这是个包含一个叫做`include`名称的属性,该属性提供了一个由模块组成的数组。
可以如下配置多重声明:
```TypeScript
import { NestFactory } from '@nestjs/core';
import { SwaggerModule, DocumentBuilder } from '@nestjs/swagger';
import { AppModule } from './app.module';
async function bootstrap() {
const app = await NestFactory.create(AppModule);
/**
* createDocument(application, configurationOptions, extraOptions);
*
* createDocument method takes an optional 3rd argument "extraOptions"
* which is an object with "include" property where you can pass an Array
* of Modules that you want to include in that Swagger Specification
* E.g: CatsModule and DogsModule will have two separate Swagger Specifications which
* will be exposed on two different SwaggerUI with two different endpoints.
*/
const options = new DocumentBuilder()
.setTitle('Cats example')
.setDescription('The cats API description')
.setVersion('1.0')
.addTag('cats')
.build();
const catDocument = SwaggerModule.createDocument(app, options, {
include: [CatsModule],
});
SwaggerModule.setup('api/cats', app, catDocument);
const secondOptions = new DocumentBuilder()
.setTitle('Dogs example')
.setDescription('The dogs API description')
.setVersion('1.0')
.addTag('dogs')
.build();
const dogDocument = SwaggerModule.createDocument(app, secondOptions, {
include: [DogsModule],
});
SwaggerModule.setup('api/dogs', app, dogDocument);
await app.listen(3000);
}
bootstrap();
```
现在可以使用以下命令启动服务器:
```bash
$ npm run start
```
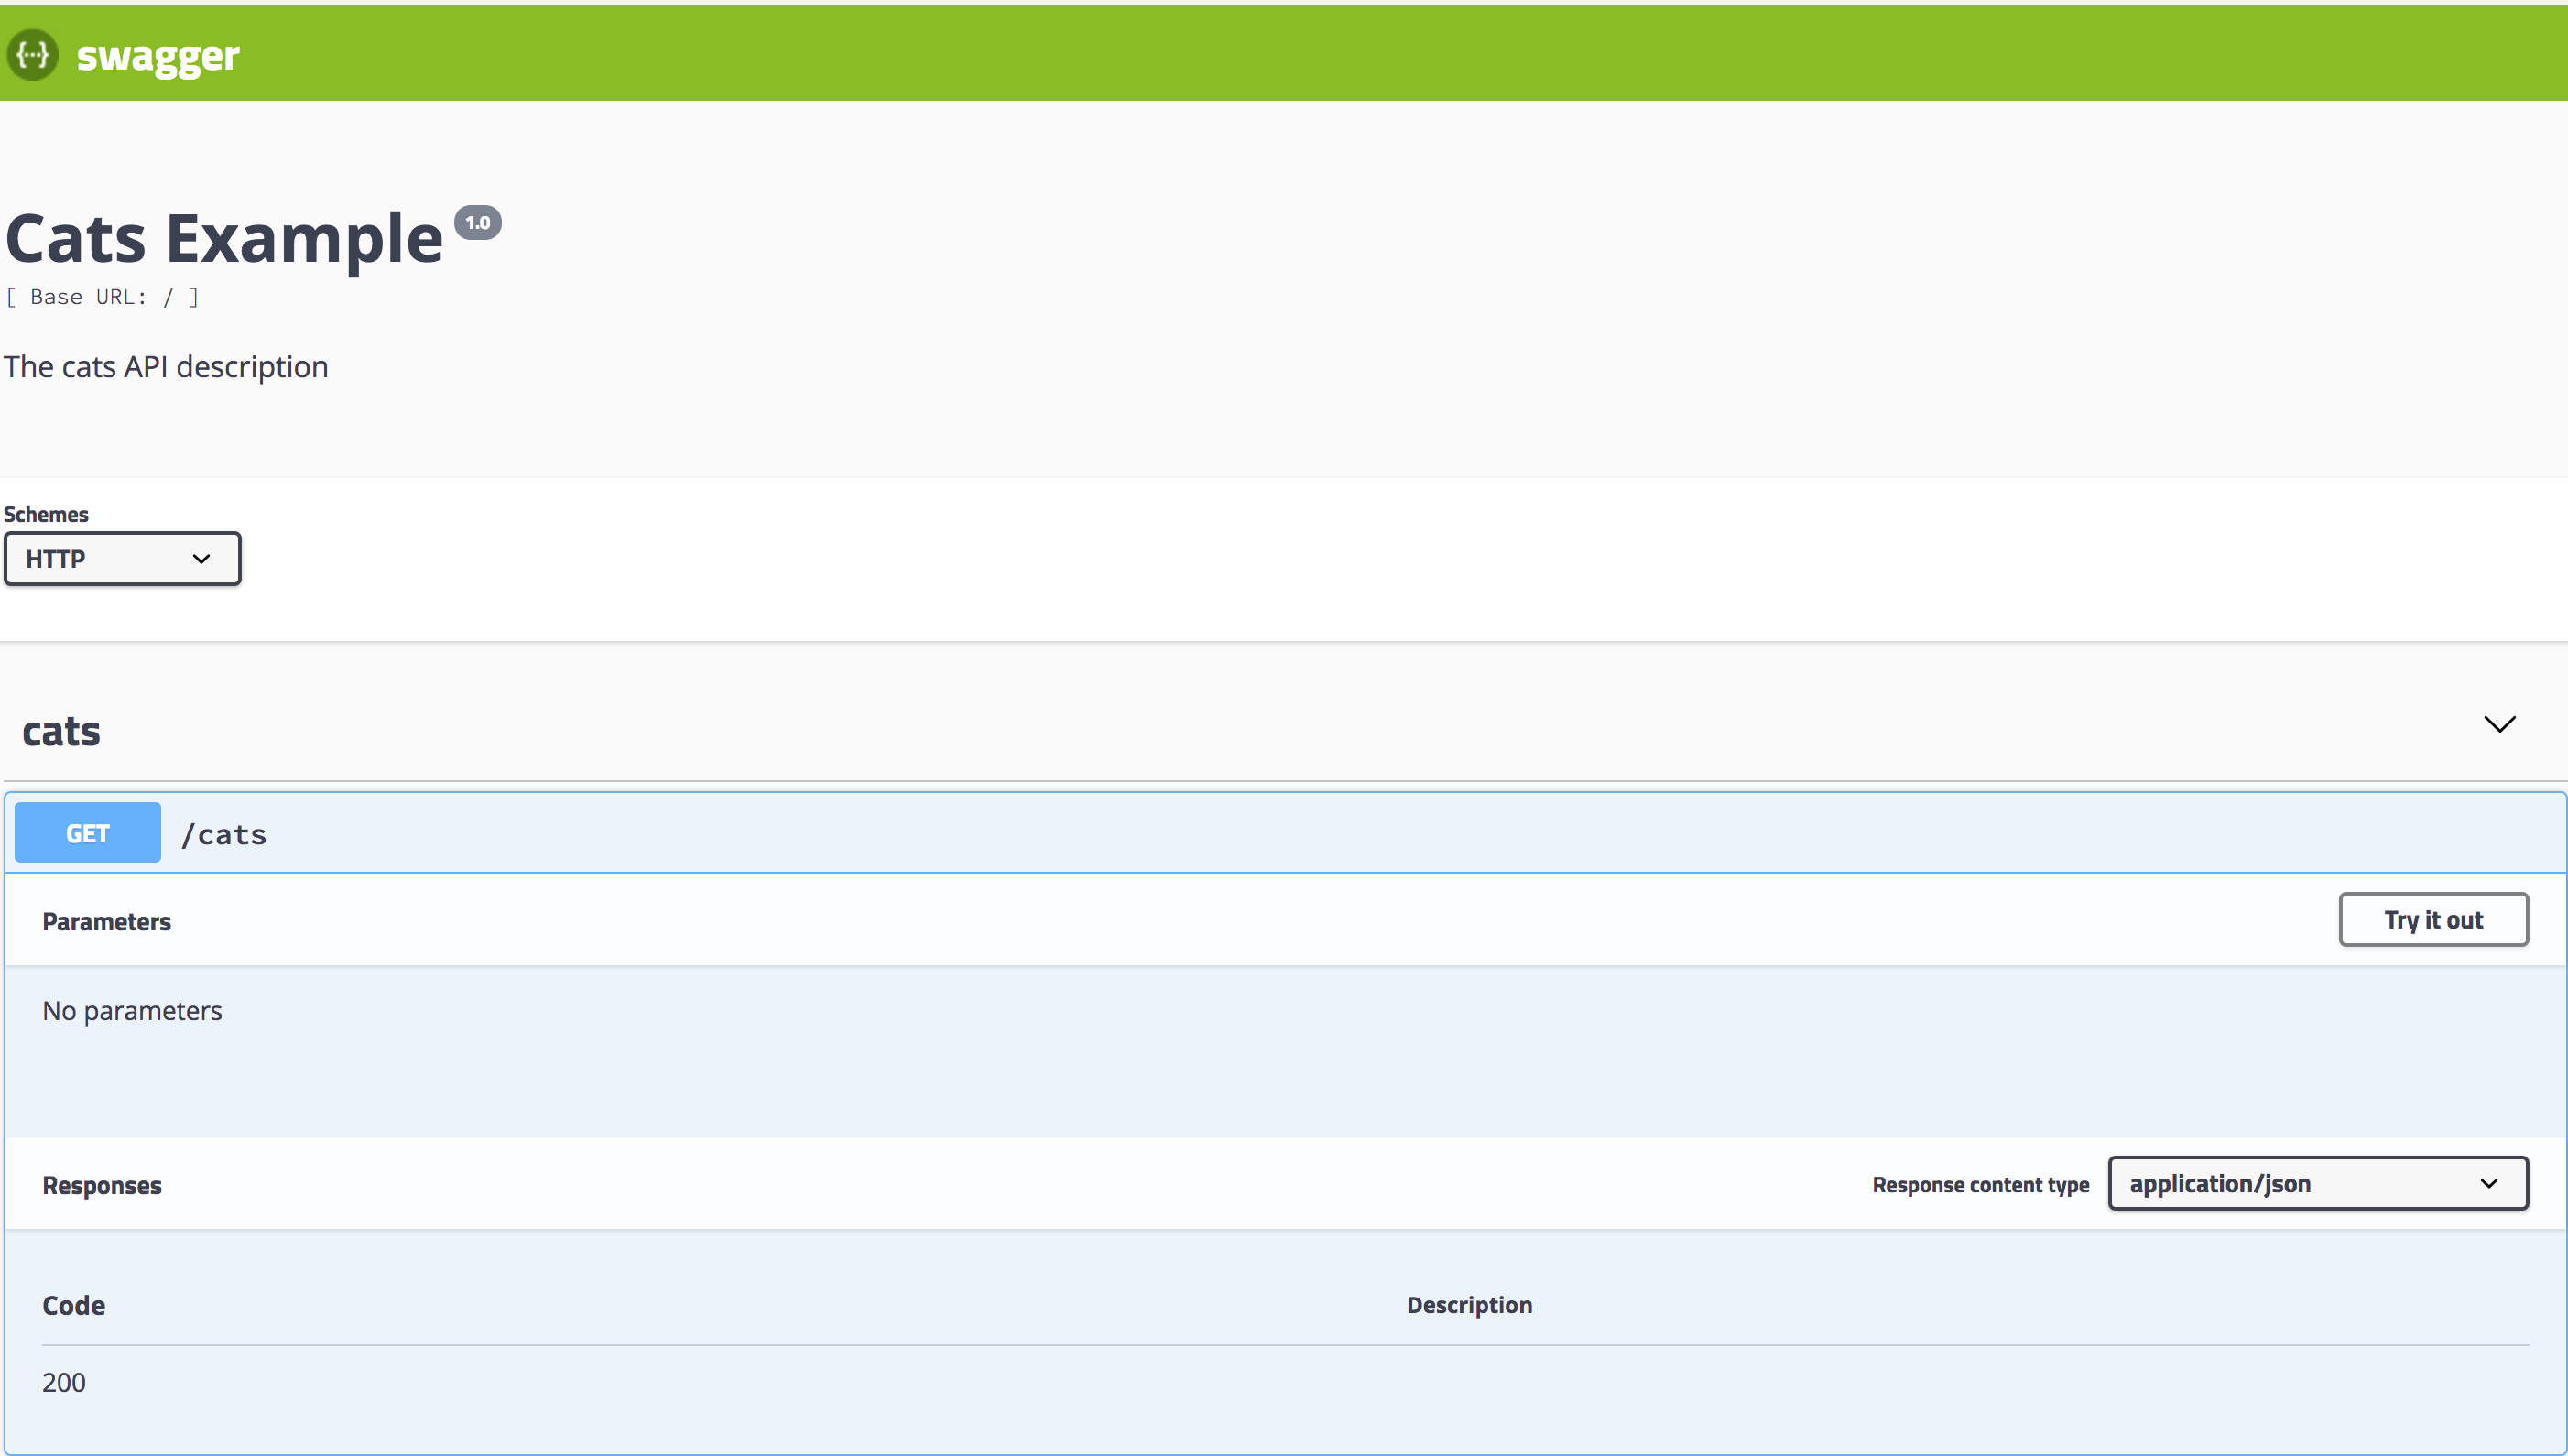
访问`http://localhost:3000/api/cats`以查看`cats`的 Swagger UI:
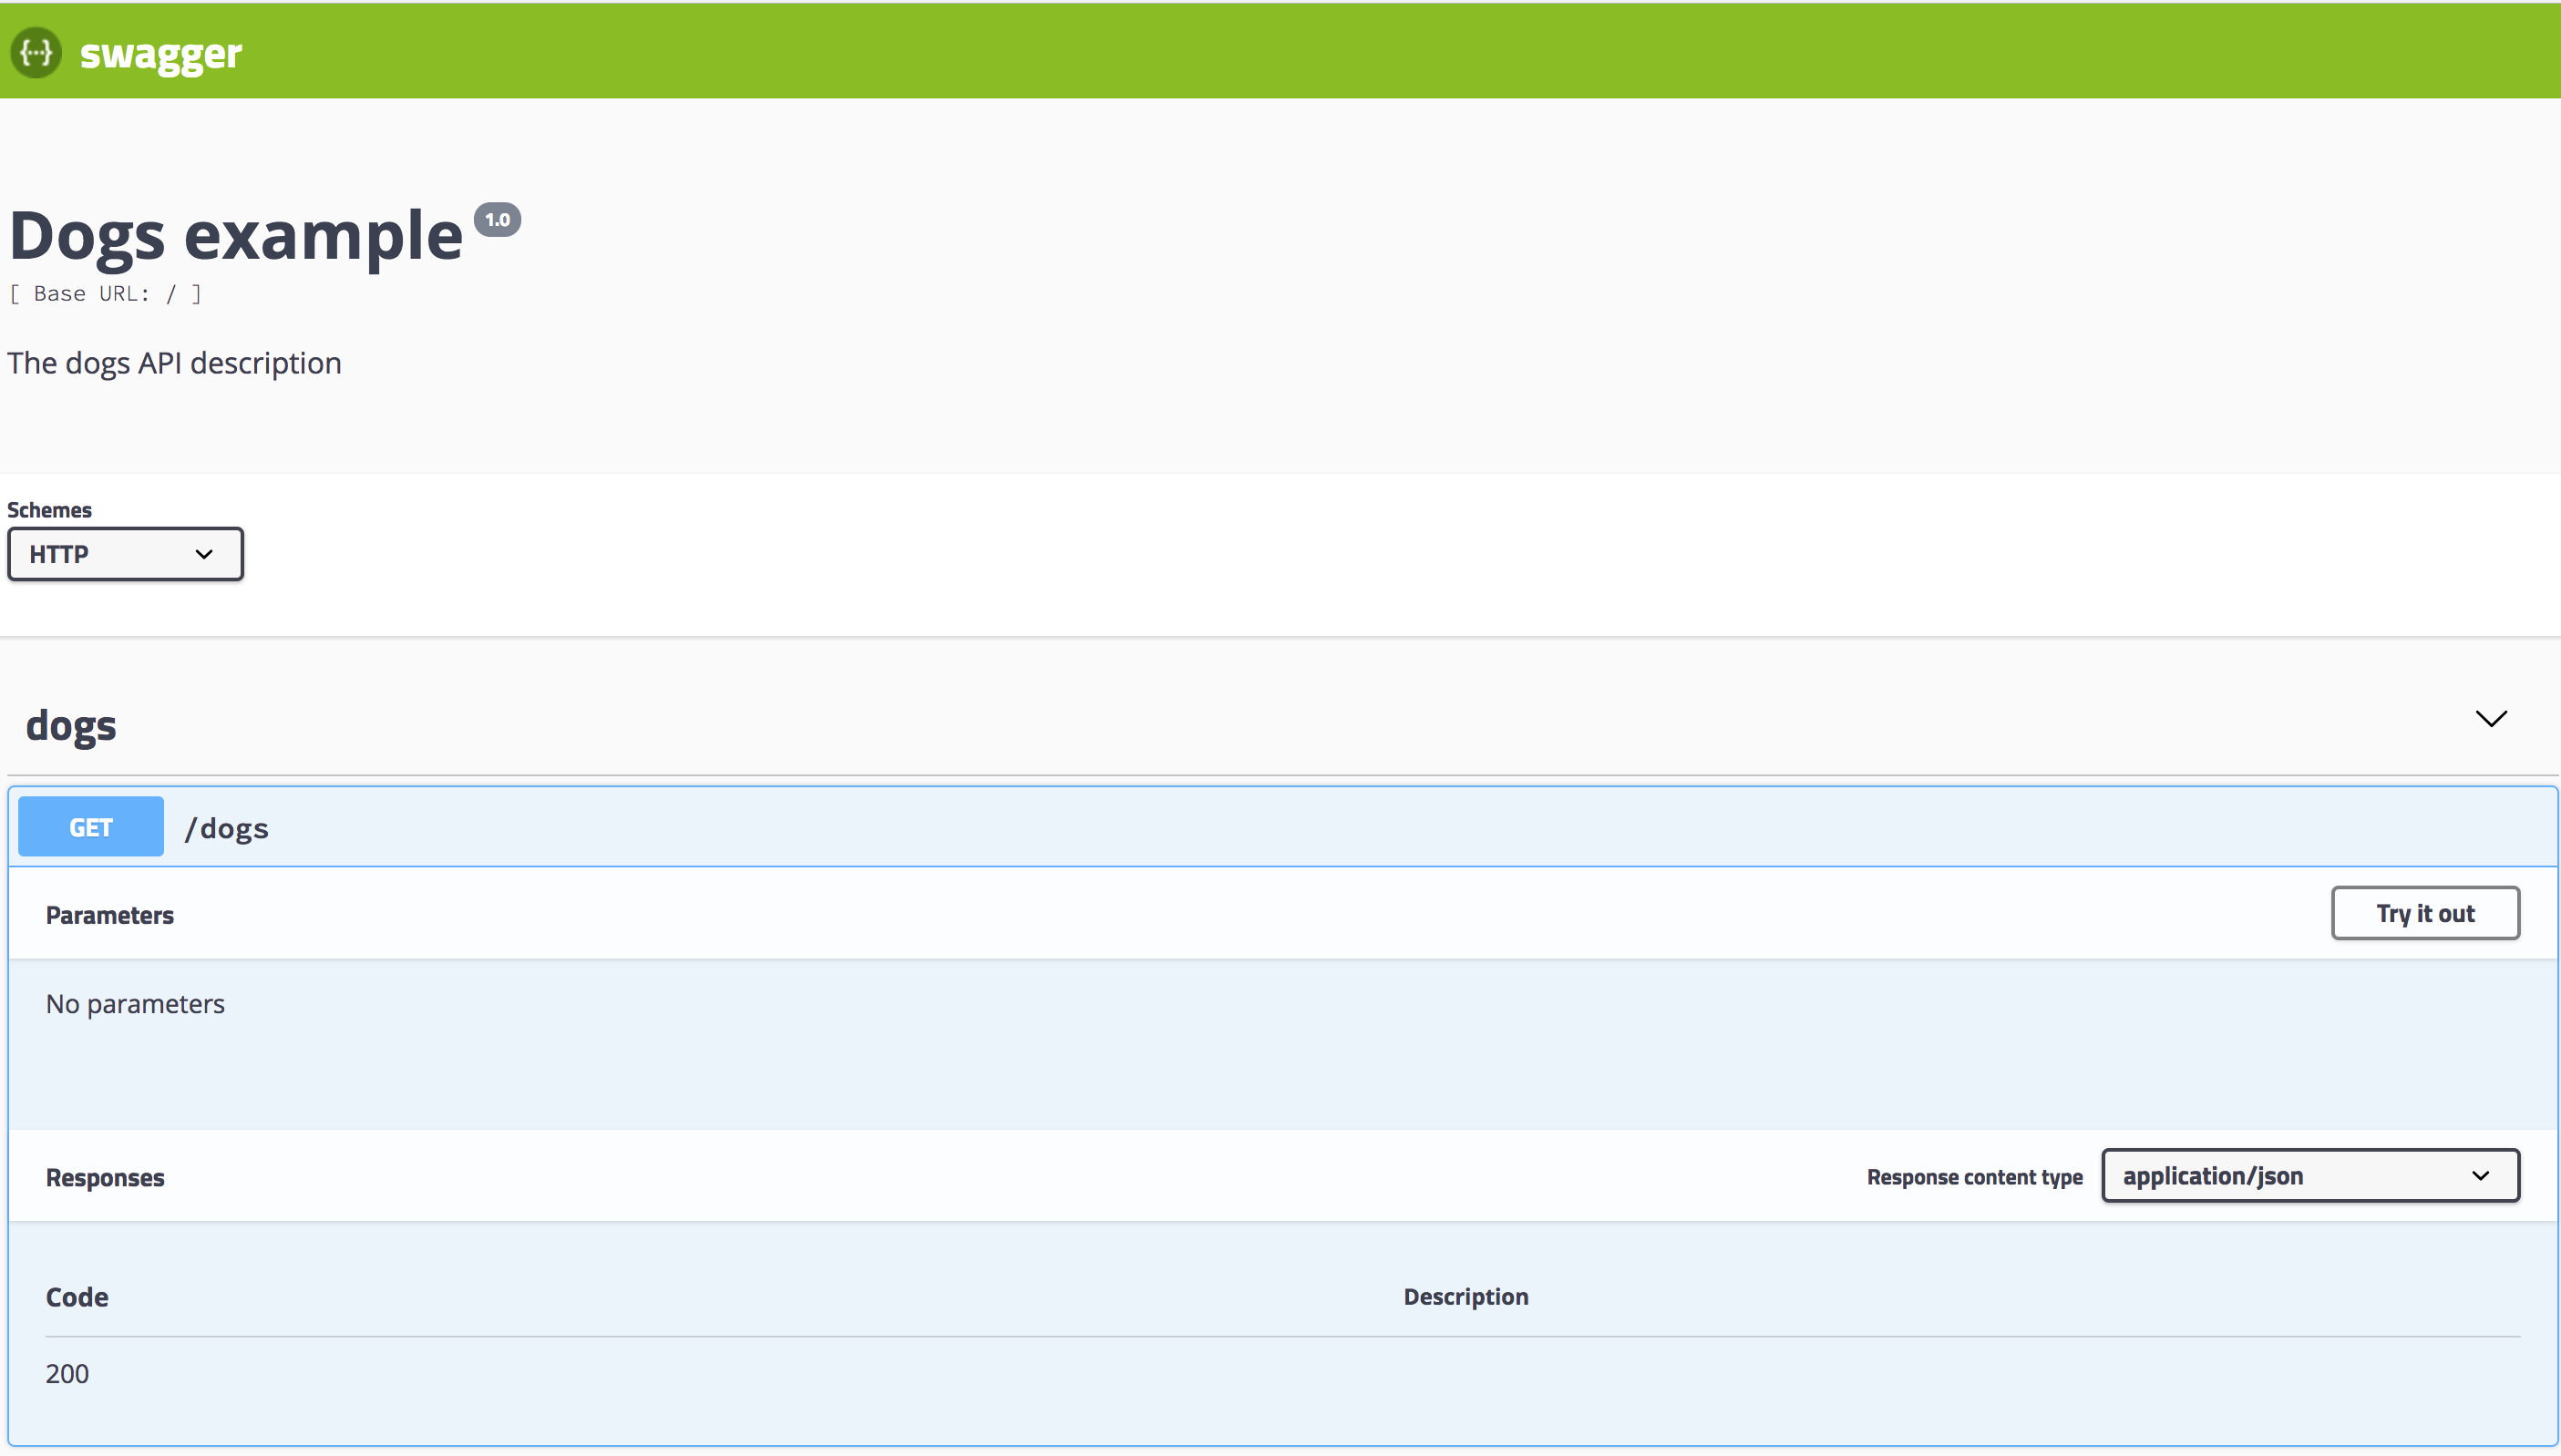
反过来,`http://localhost:3000/api/dogs`将为`dogs`公开 Swagger UI:
- 介绍
- 概述
- 第一步
- 控制器
- 提供者
- 模块
- 中间件
- 异常过滤器
- 管道
- 守卫
- 拦截器
- 自定义装饰器
- 基础知识
- 自定义提供者
- 异步提供者
- 动态模块
- 注入作用域
- 循环依赖
- 模块参考
- 懒加载模块
- 应用上下文
- 生命周期事件
- 跨平台
- 测试
- 技术
- 数据库
- Mongo
- 配置
- 验证
- 缓存
- 序列化
- 版本控制
- 定时任务
- 队列
- 日志
- Cookies
- 事件
- 压缩
- 文件上传
- 流式处理文件
- HTTP模块
- Session(会话)
- MVC
- 性能(Fastify)
- 服务器端事件发送
- 安全
- 认证(Authentication)
- 授权(Authorization)
- 加密和散列
- Helmet
- CORS(跨域请求)
- CSRF保护
- 限速
- GraphQL
- 快速开始
- 解析器(resolvers)
- 变更(Mutations)
- 订阅(Subscriptions)
- 标量(Scalars)
- 指令(directives)
- 接口(Interfaces)
- 联合类型
- 枚举(Enums)
- 字段中间件
- 映射类型
- 插件
- 复杂性
- 扩展
- CLI插件
- 生成SDL
- 其他功能
- 联合服务
- 迁移指南
- Websocket
- 网关
- 异常过滤器
- 管道
- 守卫
- 拦截器
- 适配器
- 微服务
- 概述
- Redis
- MQTT
- NATS
- RabbitMQ
- Kafka
- gRPC
- 自定义传输器
- 异常过滤器
- 管道
- 守卫
- 拦截器
- 独立应用
- Cli
- 概述
- 工作空间
- 库
- 用法
- 脚本
- Openapi
- 介绍
- 类型和参数
- 操作
- 安全
- 映射类型
- 装饰器
- CLI插件
- 其他特性
- 迁移指南
- 秘籍
- CRUD 生成器
- 热重载
- MikroORM
- TypeORM
- Mongoose
- 序列化
- 路由模块
- Swagger
- 健康检查
- CQRS
- 文档
- Prisma
- 静态服务
- Nest Commander
- 问答
- Serverless
- HTTP 适配器
- 全局路由前缀
- 混合应用
- HTTPS 和多服务器
- 请求生命周期
- 常见错误
- 实例
- 迁移指南
- 发现
- 谁在使用Nest?