# 硬件器材
* 树莓派3B+
* [古德微树莓派扩展板]([https://item.taobao.com/item.htm?spm=a1z10.3-c.w4002-22298106374.9.158170c90MOfva&id=578376338324](https://item.taobao.com/item.htm?spm=a1z10.3-c.w4002-22298106374.9.158170c90MOfva&id=578376338324))
* [柔性ws2812贴片led灯带]([https://item.taobao.com/item.htm?spm=a1z10.3-c.w4002-22298106374.9.4cbc70c9a29bu7&id=584515172003](https://item.taobao.com/item.htm?spm=a1z10.3-c.w4002-22298106374.9.4cbc70c9a29bu7&id=584515172003))
链接方式如下图。
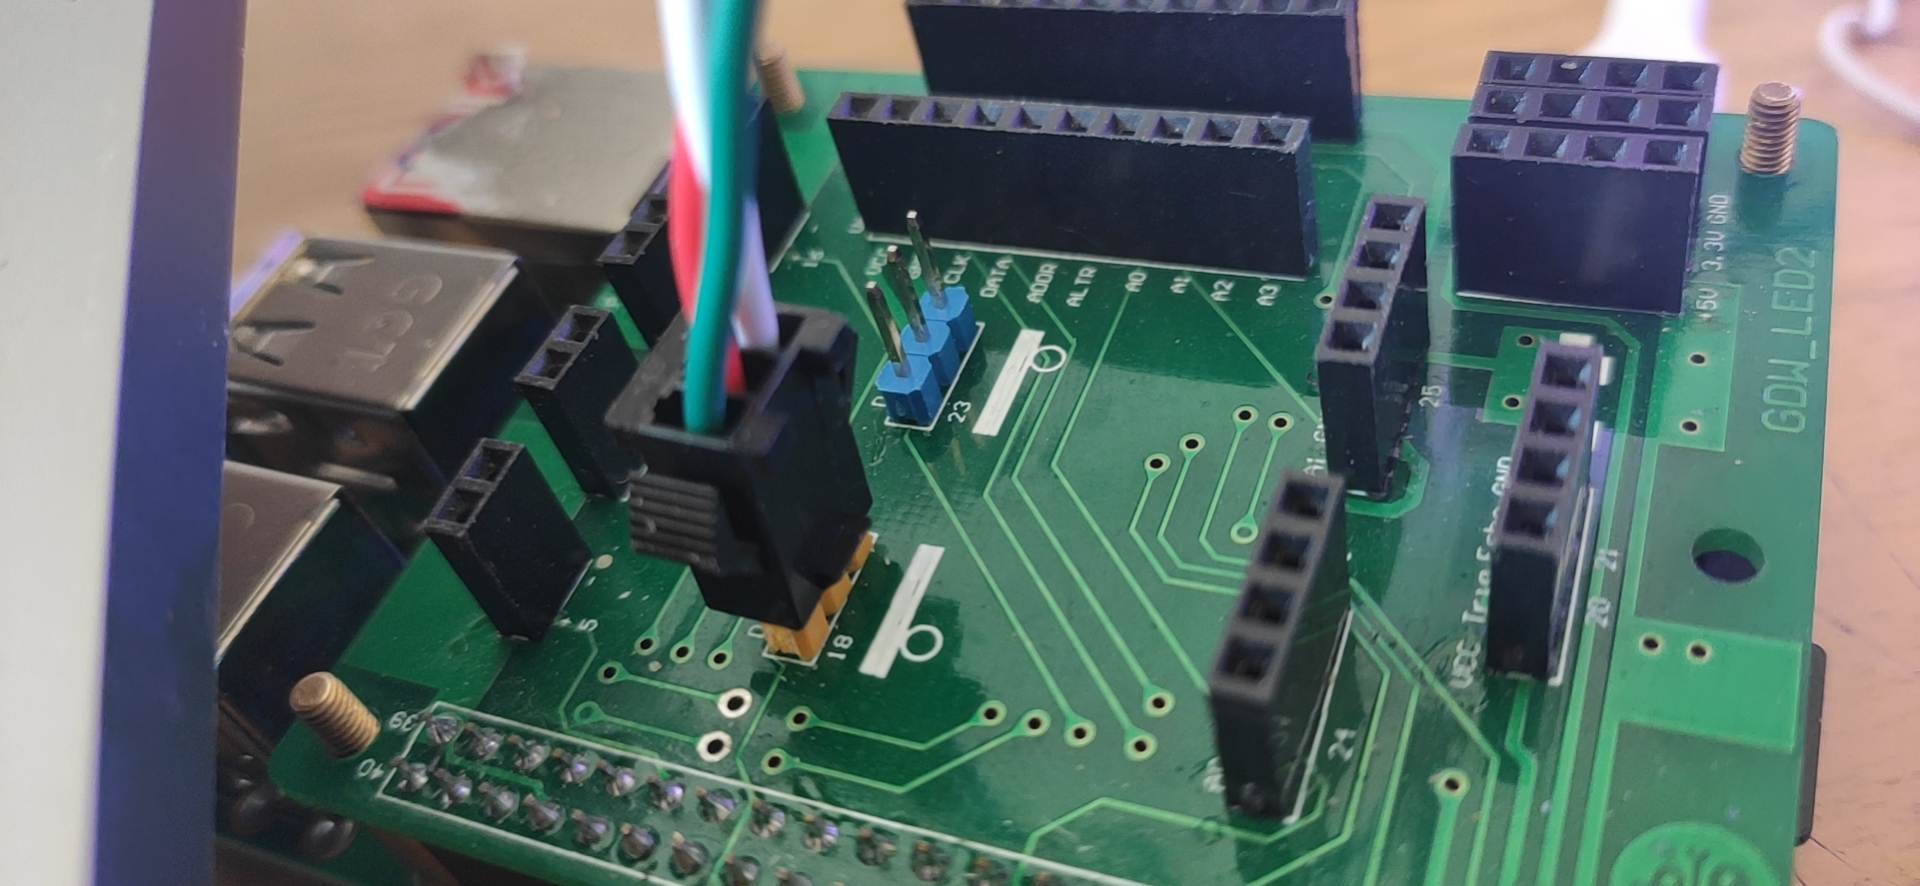
>当然采用古德微扩展板只是为了方便,直接插到板子上就好了,其实只要有树莓派和灯带,灯带正确的连接到树莓派就可以使用本教程。
# 安装灯带相关的python库
树莓派控制led灯带需要用到[rpi-ws281x-python](https://github.com/rpi-ws281x/rpi-ws281x-python)库,具体安装方法如下。
```
sudo pip install rpi-ws281x
```
# 用法简介
控制灯带主要用的是`PixelStrip`类,这个类的方法和属性如下:
```
>>> dir(rpi_ws281x.PixelStrip)
[..., 'begin', 'getBrightness', 'getPixelColor', 'getPixelColorRGB', 'getPixels', 'numPixels', 'setBrightness', 'setGamma', 'setPixelColor', 'setPixelColorRGB', 'show']
```
## 初始化灯带
初始化灯带主要用到如下代码:
```
strip = PixelStrip(LED_COUNT, LED_PIN, LED_FREQ_HZ, LED_DMA, LED_INVERT, LED_BRIGHTNESS, LED_CHANNEL)
```
参数中大写的变量是在测试代码中定义了的,含义如下:
```python
# LED 配置:
LED_COUNT = 10 # 要控制LED的数量.
LED_PIN = 18 # GPIO接口 (PWM编码).
LED_BRIGHTNESS = 255 # 设置LED亮度 (0-255)
#以下LED配置无需修改
LED_FREQ_HZ = 800000 # LED信号频率(以赫兹为单位)(通常为800khz)
LED_DMA = 10 # 用于生成信号的DMA通道(尝试10)
LED_INVERT = False # 反转信号(使用NPN晶体管电平移位时)
```
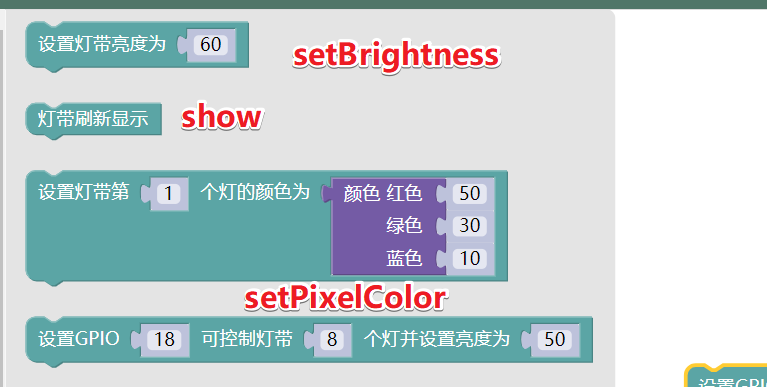
所以你会看到古德微的平台中只需要你设定灯带LED灯的数量,引脚和亮度了。

图片中的这个积木块与`strip = PixelStrip(18 10, 800000, 10, False, 50, 0)`是完全等效的。其中**LED信号频率、DMA通道(不明白没关系)、翻转信号以及信道等参数无需配置**,所以这个库其实还可以继续简化的。
## 颜色设置
`rip_ws281x`库中颜色的设置是通过`Color`类实现的,等效于下列积木块:
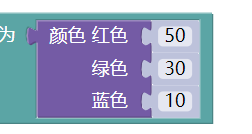
帮助信息如下:
```
Color(red, green, blue, white=0)
根据参数指定的红绿蓝颜色的值合成24位的颜色.。
每种颜色的范围是0到255,最小值是0,最大值255。
```
所以上面积木块等效的代码就是`Color(50, 30, 10)`。
## 设定LED颜色
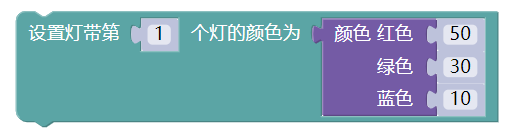
设定颜色是通过`setPixelColor()`方法实现的,上述积木块的等效代码是`strip.setPixelColor(1, Color(50, 30, 10))`
## 其他
实际上每种积木块都有对应的方法,而且代码相比来说更加灵活,比如设定颜色:
```
setPixelColorRGB(self, n, red, green, blue, white=0) unbound rpi_ws281x.rpi_ws281x.PixelStrip method
Set LED at position n to the provided red, green, and blue color.
Each color component should be a value from 0 to 255 (where 0 is the
lowest intensity and 255 is the highest intensity).
```
直接通过颜色指定单个LED灯的颜色,比如`setPixelColorRGB(1, 50, 30, 10)`,也可以根据自己的使用习惯定义自己的函数。
同时`'getBrightness', 'getPixelColor', 'getPixelColorRGB', 'getPixels', 'numPixels'`等用来获取灯带信息的函数,是积木块有待实现的。
# 灯带特效
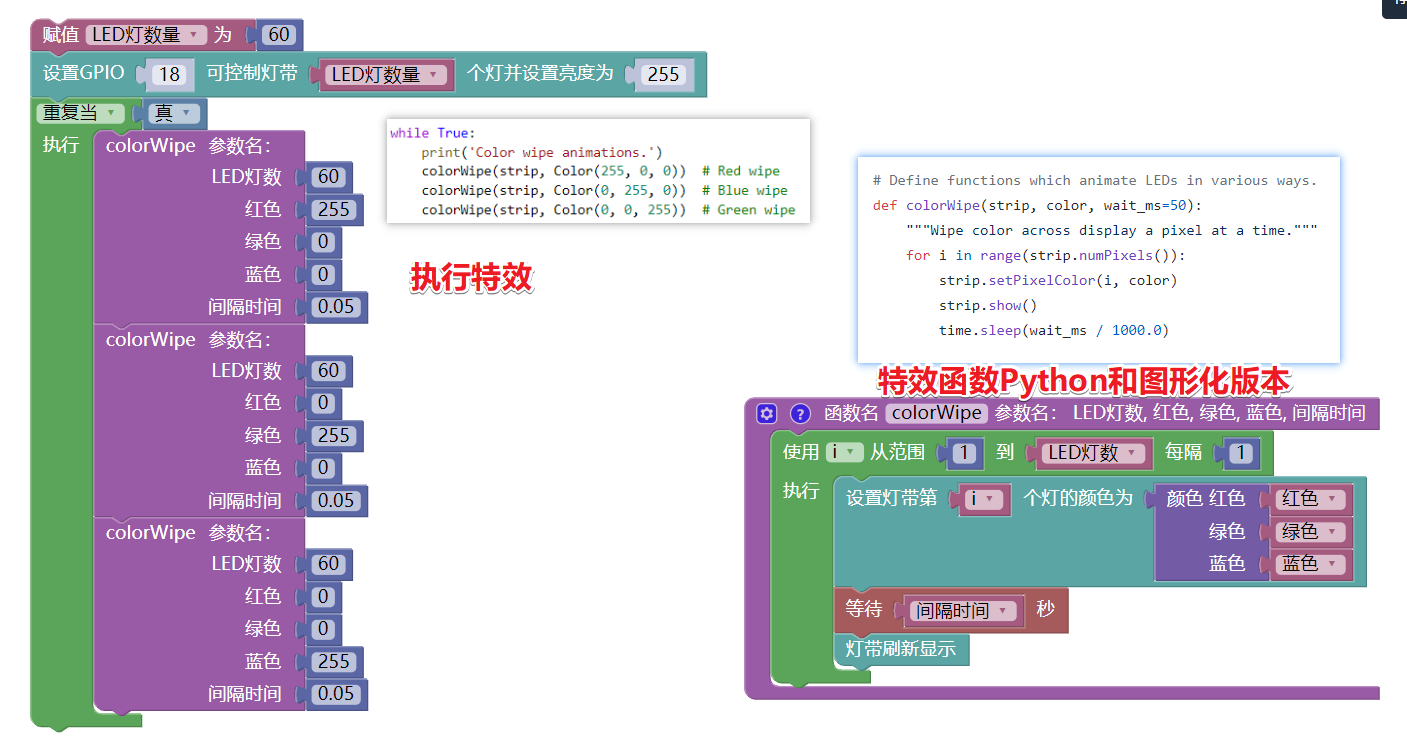
## 颜色刷新

开始的时候灯带没有颜色,一共60个LED灯,从0开始,每隔0.05秒,点亮一共LED灯,这样整个灯带就从不亮,到全亮,颜色可以指定,比如原来是全绿色,就可以用红色依次替代原来的绿色。
# 测试案例代码
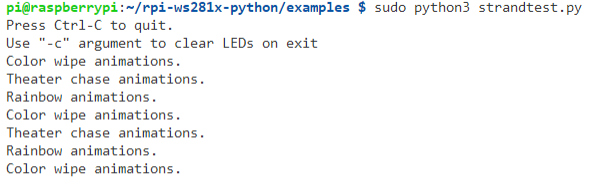
测试案例提供了多种特效,代码也写的很有参考价值。复制下面的代码,并保存为strandtest.py,按照图中的命令执行就可以了。
```
#!/usr/bin/env python3
# NeoPixel library strandtest example
# Author: Tony DiCola (tony@tonydicola.com)
#
# Direct port of the Arduino NeoPixel library strandtest example. Showcases
# various animations on a strip of NeoPixels.
import time
from rpi_ws281x import PixelStrip, Color
import argparse
# LED strip configuration:
LED_COUNT = 16 # Number of LED pixels.
LED_PIN = 18 # GPIO pin connected to the pixels (18 uses PWM!).
# LED_PIN = 10 # GPIO pin connected to the pixels (10 uses SPI /dev/spidev0.0).
LED_FREQ_HZ = 800000 # LED signal frequency in hertz (usually 800khz)
LED_DMA = 10 # DMA channel to use for generating signal (try 10)
LED_BRIGHTNESS = 255 # Set to 0 for darkest and 255 for brightest
LED_INVERT = False # True to invert the signal (when using NPN transistor level shift)
LED_CHANNEL = 0 # set to '1' for GPIOs 13, 19, 41, 45 or 53
# Define functions which animate LEDs in various ways.
def colorWipe(strip, color, wait_ms=50):
"""Wipe color across display a pixel at a time."""
for i in range(strip.numPixels()):
strip.setPixelColor(i, color)
strip.show()
time.sleep(wait_ms / 1000.0)
def theaterChase(strip, color, wait_ms=50, iterations=10):
"""Movie theater light style chaser animation."""
for j in range(iterations):
for q in range(3):
for i in range(0, strip.numPixels(), 3):
strip.setPixelColor(i + q, color)
strip.show()
time.sleep(wait_ms / 1000.0)
for i in range(0, strip.numPixels(), 3):
strip.setPixelColor(i + q, 0)
def wheel(pos):
"""Generate rainbow colors across 0-255 positions."""
if pos < 85:
return Color(pos * 3, 255 - pos * 3, 0)
elif pos < 170:
pos -= 85
return Color(255 - pos * 3, 0, pos * 3)
else:
pos -= 170
return Color(0, pos * 3, 255 - pos * 3)
def rainbow(strip, wait_ms=20, iterations=1):
"""Draw rainbow that fades across all pixels at once."""
for j in range(256 * iterations):
for i in range(strip.numPixels()):
strip.setPixelColor(i, wheel((i + j) & 255))
strip.show()
time.sleep(wait_ms / 1000.0)
def rainbowCycle(strip, wait_ms=20, iterations=5):
"""Draw rainbow that uniformly distributes itself across all pixels."""
for j in range(256 * iterations):
for i in range(strip.numPixels()):
strip.setPixelColor(i, wheel(
(int(i * 256 / strip.numPixels()) + j) & 255))
strip.show()
time.sleep(wait_ms / 1000.0)
def theaterChaseRainbow(strip, wait_ms=50):
"""Rainbow movie theater light style chaser animation."""
for j in range(256):
for q in range(3):
for i in range(0, strip.numPixels(), 3):
strip.setPixelColor(i + q, wheel((i + j) % 255))
strip.show()
time.sleep(wait_ms / 1000.0)
for i in range(0, strip.numPixels(), 3):
strip.setPixelColor(i + q, 0)
# Main program logic follows:
if __name__ == '__main__':
# Process arguments
parser = argparse.ArgumentParser()
parser.add_argument('-c', '--clear', action='store_true', help='clear the display on exit')
args = parser.parse_args()
# Create NeoPixel object with appropriate configuration.
strip = PixelStrip(LED_COUNT, LED_PIN, LED_FREQ_HZ, LED_DMA, LED_INVERT, LED_BRIGHTNESS, LED_CHANNEL)
# Intialize the library (must be called once before other functions).
strip.begin()
print('Press Ctrl-C to quit.')
if not args.clear:
print('Use "-c" argument to clear LEDs on exit')
try:
while True:
print('Color wipe animations.')
colorWipe(strip, Color(255, 0, 0)) # Red wipe
colorWipe(strip, Color(0, 255, 0)) # Blue wipe
colorWipe(strip, Color(0, 0, 255)) # Green wipe
print('Theater chase animations.')
theaterChase(strip, Color(127, 127, 127)) # White theater chase
theaterChase(strip, Color(127, 0, 0)) # Red theater chase
theaterChase(strip, Color(0, 0, 127)) # Blue theater chase
print('Rainbow animations.')
rainbow(strip)
rainbowCycle(strip)
theaterChaseRainbow(strip)
except KeyboardInterrupt:
if args.clear:
colorWipe(strip, Color(0, 0, 0), 10)
```
参考资料
1. 乐鹰计算机工作室[树莓派控制WS2812B灯带 - Python](https://www.dellts.cn/article/88.html)
- 简介
- 更新树莓派源
- GPIO Zero基础案例
- 导入GPIO Zero库
- 引脚编码
- 树莓派代码编辑器
- LED
- 电磁继电器
- 呼吸灯
- LED条形图
- led条
- 交通灯
- 按钮
- 按钮控制LED灯
- 用按钮控制摄像头
- 舵机
- 关机按钮
- 按钮拍照
- 反应速度游戏
- 音乐盒子
- 单个按钮控制多个元件
- 全彩灯
- 人体红外传感器
- 亮度传感器
- 距离传感器
- 马达控制
- 机器人
- 按钮控制机器人
- 键盘控制机器人
- 红外感应机器人
- 电位器
- 用数模转换器测量温度
- 通过3个电位器控制全彩灯
- 时控加热灯
- 联网状态指示
- CPU温度条形图
- 更多
- OLED屏幕
- GPIO Zero基础案例2
- 古德微树莓派案例
- ws2812灯带python案例
- ads1115
- 高级秘籍
- 4 配置远程GPIO
- 5 远程GPIO案例
- 5.1 LED和按钮
- 6 树莓派Zero OTG USB数据线
- 7.数据源和值
- 微信发送疫情
- 8. 命令行工具
- 9. 常见问题
- 10. 从RPi.GPIO库迁移到GPIO Zero
- 公众号文章
- Python绘制疫情图表
- 百度人工智能案例
- vscode配置树莓派远程开发环境
- Jupyter Notebook相关
- 树莓派拍摄定格动画
- oled
- 创客与音乐
- 如何入门Python
- 交通标志