
## 简介
WAF依赖 openresty/tengine、redis(集群使用)
注:**推荐使用centos 7|8.x**
目前是唯一对外地址: https://github.com/op-sec-team/releases-openstar-Enterprise
当前有2个分支,一个是 openresty 版本,一个分支是 tengine 版本
tengine 版本用的少,建议使用 openresty 版本,使用的人多,反馈的问题修复的快一些
## 一键安装脚本
这里介绍使用安装脚本进行快速安装
### 安装 redis
**一组集群就需要安装一台redis!!! 【当然您也可以自行使用 yum / apt-get 安装 redis】**
使用 root 运行
~~~bash
# 下载 安装脚本 rds.sh (该脚本支持 centos / ubuntu )
wget -N --no-check-certificate https://raw.githubusercontent.com/op-sec-team/releases-openstar-Enterprise/master/openstar/bash/rds.sh
# 增加脚本执行权限
chmod +x rds.sh
# 进行 unix 转换
dos2unix rds.sh
# 脚本使用
./rds.sh install # 安装 redis 我们执行这行,开始安装redis(当然你也可以使用yum/docker)
./rds.sh start & # 启动 redis (后台方式)
./rds.sh stop # 关闭 redis
./rds.sh # 连接 配置的 redis
~~~
[📎rds.sh](https://www.yuque.com/attachments/yuque/0/2022/sh/1877304/1669439155233-27a64d21-90d0-4fca-bb51-a4f45741b711.sh) **脚本无法从 github 下载时,从这里下载吧!**
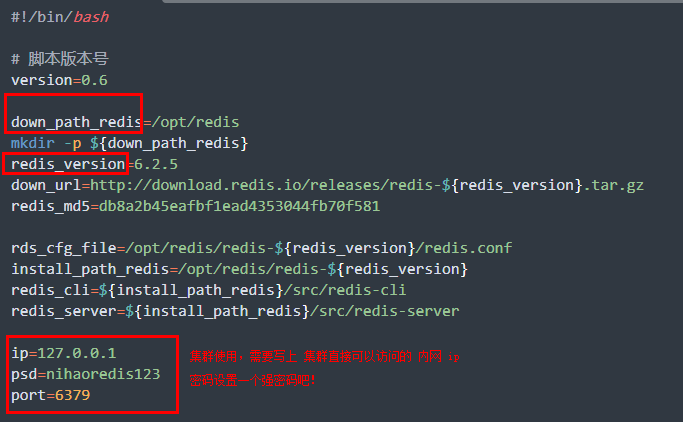
目前rds.sh脚本配置安装的 redis 版本为:6.2.5;可以自行修改脚本,根据自己的需求。在启动之前,请配置好redis的相关配置(监听ip、端口、密码、存放路径、日志路径等)
~~~bash
./rds.sh cfg #使用脚本中的配置进行配置 监听端口、密码配置等...
-- 这里手动修改配置 --
vim /opt/redis/redis-6.2.5/redis.conf # 【注意路径是否正确】
port 6379 # 【配置 监听的 端口】
bind 192.168.25.34 # 【配置redis监听的 ip (集群模式下,使用大家都可以访问的ip,非 127.0.0.1)】
dir /opt/redis/ # 【 配置存放 db文件的路径】
requirepass yourpassword #【配置自己的密码!!!】
logfile /opt/redis/redis.log #【配置 redis 日志文件路径】
~~~
配置好redis后,就可以启动redis了 ./rds.sh start &
还可以修改rds.sh文件中连接redis的IP,端口,密码,然后连接到redis,查看数据。
~~~bash
vim rds.sh
ip=127.0.0.1 #【配置需要连接redis 的 ip】
psd=nihaoredis123 #【配置连接的 密码】
port=6379 #【配置连接redis 的端口】
~~~
### openstar & openresty(tengine) 安装
使用 root 运行
~~~bash
# 下载安装脚本 openstar.sh 该脚本支持 centos / ubuntu ...
openresty版本 下载:
wget -N --no-check-certificate https://raw.githubusercontent.com/op-sec-team/releases-openstar-Enterprise/master/openstar/bash/openstar.sh
tengine版本 下载:
wget -N --no-check-certificate https://raw.githubusercontent.com/op-sec-team/releases-openstar-Enterprise/master/openstar/bash/tengine.sh
# 增加脚本执行权限
chmod +x openstar.sh
chmod +x tengine.sh
tengine.sh
# 进行 unix 转换
dos2unix openstar.sh
dos2unix tengine.sh
# 运行脚本
./openstar.sh(tengine.sh)
~~~
[📎openstar.sh](https://www.yuque.com/attachments/yuque/0/2022/sh/1877304/1669439237686-7cb8a505-6026-4da6-accd-5907e1bb44f6.sh)
[📎tengine.sh](https://www.yuque.com/attachments/yuque/0/2022/sh/1877304/1669439243690-9844df05-dfaf-49a9-99e1-bc29c51a04fd.sh)
**脚本无法从 github 下载时,从这里下载吧!**
根据脚本提示进行选择吧~
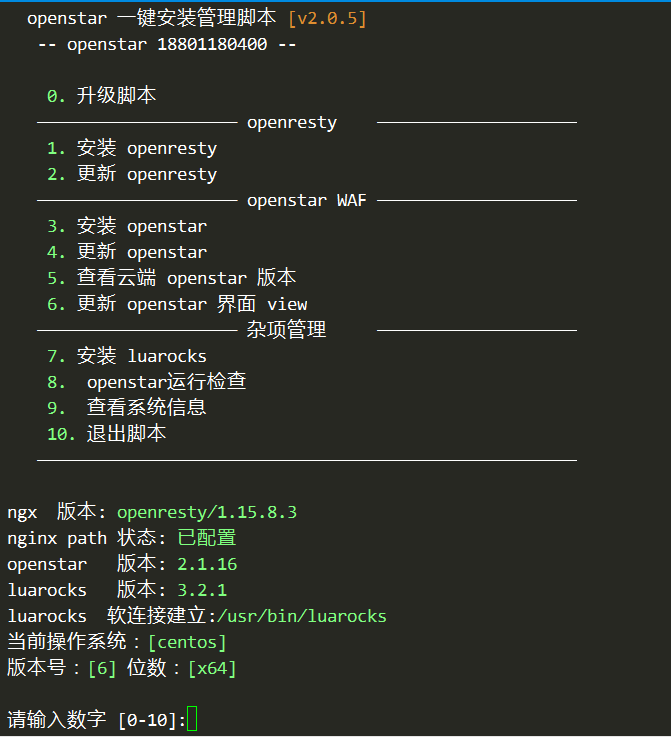
openresty版本
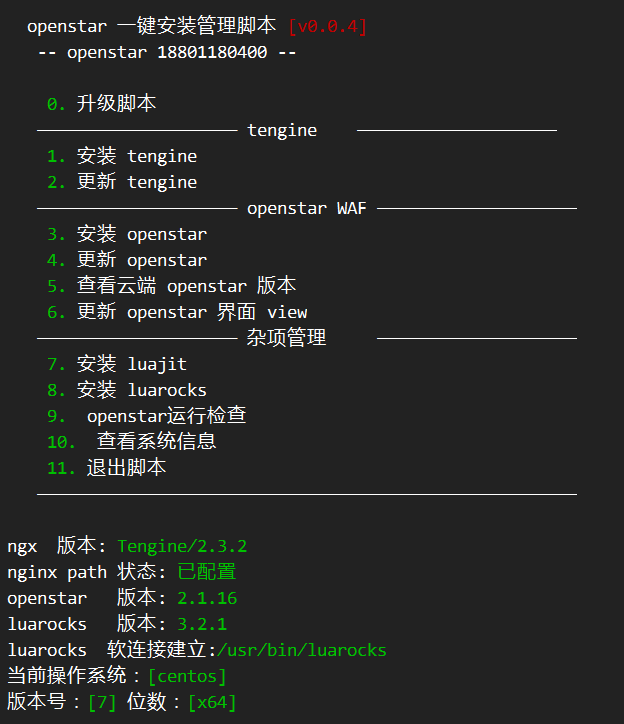
tengine版本
步骤如下:
1 --- 安装 openresty/tengine
3 --- 安装 openstar
7 --- 安装 luarocks (tengine必须安装)
8 -- openstar 运行环境检查(**重要一定要运行**)
其他的选项更具自己的情况选择使用吧
tengine版本 注意!!!:
cjson.so 有时候脚本没有安装成功,需要您自己安装一下/opt/tengine/luarocks/bin/luarocks install lua-cjson,再到目录/opt/tengine/luarocks/lib/lua/5.1 看看有没有cjson.so 这个文件
* * *
完成上面的操作,我们的openstar 、openresty/tengine、redis 就完全安装完成了。
就可以启动我们的 WAF 了 /opt/openresty(tengine)/nginx/sbin/nginx
环境变量已经添加(没有使用在 /usr/bin 创建软连接的方式,而是修改 /etc/profile 添加的环境变量)
但是本连接的shell还不能直接执行 nginx 命令,我们需要重新开启一个 shell,执行 nginx -t 看是否正常
## 手动安装
### 基本依赖安装
~~~bash
# centos
yum install -y wget make gcc readline-devel perl pcre-devel openssl-devel git unzip zip htop dos2unix bzip2
yum install -y sysstat goaccess libmaxminddb-devel
# ubuntu
apt-get install -y libpcre3-dev libssl-dev perl make build-essential curl git unzip zip htop dos2unix bzip2
apt-get install -y sysstat goaccess libmaxminddb-devel
~~~
### redis 安装
这里就不多说明了(yum/apt-get)就不说明了
~~~bash
# 下载 redis 以 6.2.5 为例子
mkdir -p /opt/redis/ && cd /opt/redis/
wget http://download.redis.io/releases/redis-6.2.5.tar.gz
# 解压文件
tar zxvf redis-6.2.5.tar.gz
# 编译安装
cd redis-6.2.5 && make
# edis 编译成功了
~~~
就修改 我们的 rds.sh 脚本
### 安装 jemalloc
~~~bash
# 下载 jemalloc
mkdir -p /opt/down/ && cd /opt/down
wget https://github.com/jemalloc/jemalloc/releases/download/5.2.1/jemalloc-5.2.1.tar.bz2
# 解压
tar -xvf jemalloc-5.2.1.tar.bz2
# 编译安装
cd jemalloc-5.2.1 && ./configure
make && make install
ldconfig
~~~
### 安装 openresty
我们一定要编译安装!
~~~bash
# 下载相关包 以 1.19.9.1
mkdir -p /opt/down/ && cd /opt/down
wget https://openresty.org/download/openresty-1.19.9.1.tar.gz
wget http://luarocks.org/releases/luarocks-3.2.1.tar.gz
wget http://labs.frickle.com/files/ngx_cache_purge-2.3.tar.gz
git clone --depth=1 https://github.com/leev/ngx_http_geoip2_module.git
# 解压文件
tar -xvf openresty-1.19.9.1.tar.gz
tar -xvf luarocks-3.2.1.tar.gz
tar -xvf ngx_cache_purge-2.3.tar.gz
# 编译安装
./configure --prefix=/opt/openresty/ \
--add-module=/opt/down/ngx_http_geoip2_module \
--add-module=/opt/down/ngx_cache_purge-2.3 \
--with-ld-opt='-ljemalloc' \
--with-debug \
--with-threads \
--without-luajit-gc64 \
--with-stream_realip_module \
--with-stream_ssl_module \
--with-stream_ssl_preread_module \
--with-http_realip_module \
--with-http_stub_status_module \
--with-http_slice_module \
--with-http_v2_module
gmake && gmake install
ln -sf /usr/share/zoneinfo/Asia/Shanghai /etc/localtime
chown nobody:nobody -R /opt/openresty/
cd /opt/openresty/
chown root:nobody nginx/sbin/nginx
chmod 751 nginx/sbin/nginx
chmod u+s nginx/sbin/nginx
cat /etc/profile |grep "openresty" ||(echo "PATH=/opt/openresty/nginx/sbin:\$PATH" >> /etc/profile && source /etc/profile)
## 安装 luarocks
cd /opt/down/luarocks-3.2.1
./configure --prefix=/opt/openresty/luarocks \
--with-lua=/opt/openresty/luajit/ \
--with-lua-include=/opt/openresty/luajit/include/luajit-2.1 \
--lua-suffix='jit'
make && make install
~~~
### 安装 openstar
~~~bash
# 下载
cd /opt/openresty/
git clone --depth=1 https://github.com/op-sec-team/releases-openstar-Enterprise
cp -Rf ./releases-openstar-Enterprise/openstar /opt/openresty/
cp -Rf ./releases-openstar-Enterprise/view-private /opt/openresty/nginx/html/
mkdir -p /opt/openresty/nginx/conf/conf.d
mkdir -p /opt/openresty/nginx/conf/stream
mkdir -p /opt/openresty/nginx/certs
mkdir -p /opt/openresty/nginx/root_certs
chown nobody:nobody -R /opt/openresty/openstar
chown nobody:nobody -R /opt/openresty/nginx/html/view-private
~~~
### 收尾
~~~bash
# 执行 ./openstar.sh 脚本
# 选择 【 8 openstar运行检查 】
~~~
## 添加开机启动
把 redis 、nginx 设置好开机启动即可;操作简略如下!
bash目录下有一些 service 文件,在 centos7 下用于配置开机启动服务的,具体可以参考一些 [文档](https://www.cnblogs.com/lycokcc/p/5239318.html)
也可以直接放到启动脚本中 /etc/rc.d/rc.local 设置文件可执行
~~~bash
vim /etc/rc.d/rc.local
# 文件最后追加下面的内容
# 集群 master 增加 redis 启动项(安装了redis的服务器添加)
sudo sh opt/openresty/openstar/bash/rds.sh start
# 增加 nginx 启动项
/opt/openresty/nginx/sbin/nginx
# 配置rc.local执行权限
chmod +x /etc/rc.d/rc.local
~~~
## 注意事项
1. openstar 目录固定 /opt/openresty/openstar 或 /opt/tengine/openstar **目录固定放到这里,不要修改!**
2. 新开启一个shell后,使用命令 nginx -t 测试成功,查看是否测试成功执行 nginx 启动 nginx 后,访问 WAF 的 IP eg:[http://192.168.1.23](http://192.168.1.23) 可以是否正常访问
~~~bash
# 响应内容 如下
{
"msg": "system is ok"
}
~~~
访问 http://192.168.1.23:5460 看看是否可以看到 WAF 的管理后台

## 常见问题
1:openresty-1.15.8.1 版本出现 cannot load incompatible bytecode 问题
注:1.13.6.2 之后的版本都需要增加编译参数 \--without-luajit-gc64
解决:修改编译参数
~~~bash
./configure --prefix=/opt/openresty \
.....
--without-luajit-gc64
~~~
2:时区问题
需要配置WAF服务器时区为上海时区(北京)
~~~bash
ln -sf /usr/share/zoneinfo/Asia/Shanghai /etc/localtime
~~~
- kcon 兵器谱
- 演示 1
- 演示 2
- 演示 3
- 演示 4
- 演示 5
- 前言
- 安装
- 更新
- 登录后台
- 授权认证
- 集群配置
- 7层防护 -- 最佳实践
- 匹配位置说明
- 匹配方式说明
- 规则匹配详解
- 全局 - CDN规则
- 添加header头配置
- 限速limit配置
- 缓存proxy_cache配置
- 清除缓存
- 全局 - 获取真实IP配置
- 全局 - IP黑白名单
- 全局 - 域名方法配置(白名单)
- 全局 - 跳转规则配置
- 全局 - 高级规则配置
- 全局 - 普通规则配置
- 全局 - 频率规则配置
- 全局 - 内容替换规则
- 内容替换规则(插件使用)
- 全局 - 拦截信息配置
- 全局 - LOG规则配置
- 平台配置
- 基本配置
- 高级配置
- 配置文件管理
- 4 层代理
- 转发配置
- 插件管理
- 防护配置
- 网站管理
- 证书管理
- 域名管理
- 网站规则
- 插件管理
- 插件操作 --- 基本使用
- 插件操作 --- 手机号脱敏插件
- 归档
- 更新日志
- 视频教程目录