查询出了所有的教师,如何将其转化为浏览器可以识别的html代码呢?在1.3小节中,或许能找到我们想要的答案。在1.3小节中,我们删除了`Index.php`中`index()`方法中的以下代码:
```php
public function index()
{
✘ return '<style type="text/css">*{ padding: 0; margin: 0; } div{ padding: 4px 48px;} a{color:#2E5CD5;cursor: pointer;text-decoration: none} a:hover{text-decoration:underline; } body{ background: #fff; font-family: "Century Gothic","Microsoft yahei"; color: #333;font-size:18px;} h1{ font-size: 100px; font-weight: normal; margin-bottom: 12px; } p{ line-height: 1.6em; font-size: 42px }</style><div style="padding: 24px 48px;"> <h1>:) </h1><p> ThinkPHP V' . \think\facade\App::version() . '<br/><span style="font-size:30px;">14载初心不改 - 你值得信赖的PHP框架</span></p><span style="font-size:25px;">[ V6.0 版本由 <a href="https://www.yisu.com/" target="yisu">亿速云</a> 独家赞助发布 ]</span></div><script type="text/javascript" src="https://tajs.qq.com/stats?sId=64890268" charset="UTF-8"></script><script type="text/javascript" src="https://e.topthink.com/Public/static/client.js"></script><think id="ee9b1aa918103c4fc"></think>';
}
```
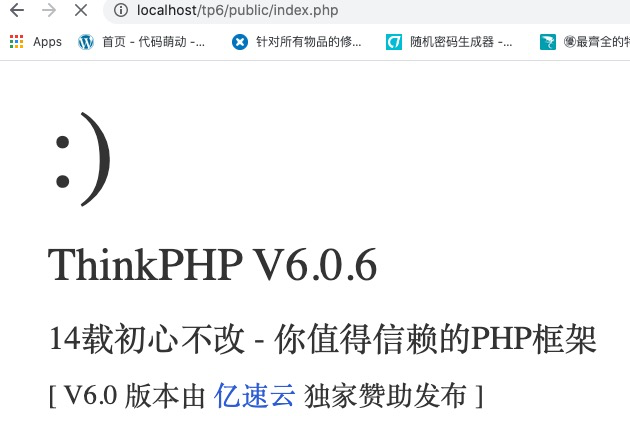
该代码的作用是显示一下`Hello ThinkPHP`的欢迎页:
## 发生了什么
下面让我们在`Index.php`中复原上述代码,并刷新页面重新查看ThinkPHP的欢迎页面,在此页面的任意位置上点击右键 -> 查看源代码
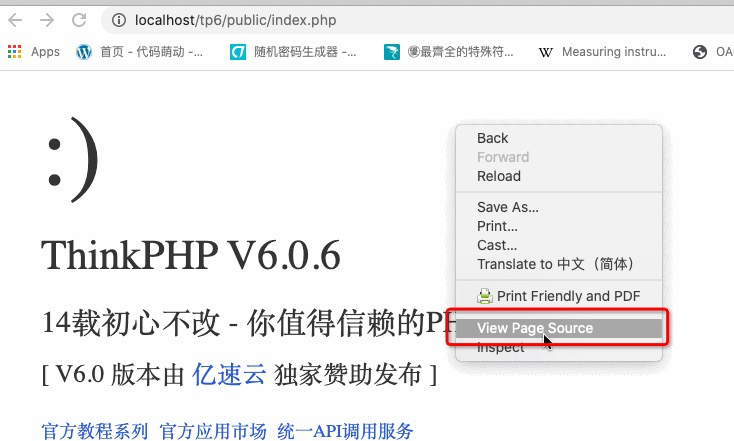
是的,如我们所见,查看到的源代码即是ThinkPHP中使用return语句返回的字符串。

* ❻❼ ThinkPHP将Html格式的字符串返回给浏览器
* ❽ 浏览器接到的Html格式被称为网页源代码,浏览器根据接收到的网页源代码将代码变更为更容易被人类识别的界面
所以1.3小节的作业答案也便有了:
```php
public function index()
{
return '<h1 style="color: red">Hello World!</h1>';
}
```
当然也可以这样:
```php
public function index()
{
return '<style type="text/css">h1 {color: red}</style><h1>Hello World!</h1>';
}
```
当然还会有其它的方案,但相信无论哪种方案,最终返回的都是浏览器最终可以显示为红色的Hello World!的html代码。
## 返回table
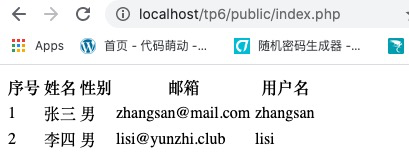
本节我们的最终目标是显示一个如下的表格:

该表格是个标准的table,使用html实现大体如下:
```html
<table>
<tr>
<th>序号</th>
<th>姓名</th>
<th>性别</th>
<th>邮箱</th>
<th>用户名</th>
</tr>
<tr>
<td>1</td>
<td>张三</td>
<td>男</td>
<td>zhangsan@mail.com</td>
<td>zhangsan</td>
</tr>
<tr>
<td>2</td>
<td>李四</td>
<td>男</td>
<td>lisi@yunzhi.club</td>
<td>lisi</td>
</tr>
</table>
```
按照我们刚刚讲过的理论,直接把上述html代码使用return的方法返回给浏览器即可实现我们既定的效果:
```php
public function index()
{
return '<table>
<tr>
<th>序号</th>
<th>姓名</th>
<th>性别</th>
<th>邮箱</th>
<th>用户名</th>
</tr>
<tr>
<td>1</td>
<td>张三</td>
<td>男</td>
<td>zhangsan@mail.com</td>
<td>zhangsan</td>
</tr>
<tr>
<td>2</td>
<td>李四</td>
<td>男</td>
<td>lisi@yunzhi.club</td>
<td>lisi</td>
</tr>
</table>';
}
```
保存后刷新界面:
## 动态实现
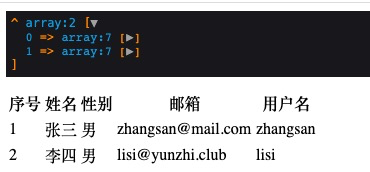
成功的显示了表格以下,我们再加入上个小节中查询到的teachers数据,以实现显示数据库中的教师数据的功能。
```php
public function index()
{
// think镇facade村的Db提供了一个query方法,调用该方法可以进行数据查询
// 使用select * from yunzhi_teacher查询数据库
$teachers = \think\facade\Db::query('select * from yunzhi_teacher');
// 调用tp提供的dump方法,友好的输出查询结果
dump($teachers);
// 分别获取张三和李四
$zhangsan = $teachers[0];
$lisi = $teachers[1];
return '<table>
...
```
>[warning] `...`在教程中表达省略了部分代码,该省略部分在大家跟随教程练习的过程并**不**可省略。
接下来我们将`return '<table> ....</table>'`修改为`return "<table> ....</table>"`,即将原来的单引号修改为双引号,然后在适当的位置上加入`teachers`变量中的内容:
```php
public function index()
{
// think镇facade村的Db提供了一个query方法,调用该方法可以进行数据查询
// 使用select * from yunzhi_teacher查询数据库
$teachers = \think\facade\Db::query('select * from yunzhi_teacher');
// 调用tp提供的dump方法,友好的输出查询结果
dump($teachers);
// 分别获取张三和李四
$zhangsan = $teachers[0];
$lisi = $teachers[1];
return "<table>
<tr>
<th>序号</th>
<th>姓名</th>
<th>性别</th>
<th>邮箱</th>
<th>用户名</th>
</tr>
<tr>
<td>1</td>
<td>$zhangsan[name]</td>
<td>$zhangsan[sex]</td>
<td>$zhangsan[email]</td>
<td>$zhangsan[username]</td>
</tr>
<tr>
<td>2</td>
<td>$lisi[name]</td>
<td>$lisi[sex]</td>
<td>$lisi[email]</td>
<td>$lisi[username]</td>
</tr>
</table>";
}
```
保存后刷新页面:
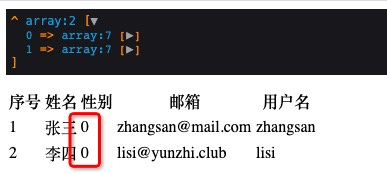
注意此时性别已由`男`变更为`0`,请明成功的显示了数据库中的字段。你当然还可以使用navicat打开yunzhi_teacher表,并修改其它中的内容。最后刷新界面来查看界面显示的内容是否动态的发生了变化。
休息一会,就到这里。
# 本节作业
* 本节中最后将单引号换成了双引号,不这么改会发生什么?
* 请观察本节开始恢复的1.3小节的代码使用的是单引号还是双引号,把两个符号换一下看看会发生什么?
* 猜一猜为什么会这样。
# 相关资源
| 内容 | 地址 |
| ----------- | ----------- |
| Html 表格 | [https://www.runoob.com/html/html-images.html](https://www.runoob.com/html/html-images.html)|
| PHP Sting 字符串| [https://www.php.net/manual/zh/language.types.string.php#language.types.string.syntax.single](https://www.php.net/manual/zh/language.types.string.php#language.types.string.syntax.single)|
| 本节源码 | [https://github.com/mengyunzhi/tp6/archive/step2.2.5.zip](https://github.com/mengyunzhi/tp6/archive/step2.2.5.zip) |
- 序言
- 第一章 Hello World
- 1.1 运行环境
- 1.1.1 windows
- 1.1.2 macos
- 1.1.3 ubuntu
- 1.2 Hello ThinkPHP
- 1.2.1 windows
- 1.2.2 macos
- 1.2.3 ubuntu
- 2.3 Hello World
- 第二章 教师管理
- 2.1 数据库初始化
- 2.2 CRUD之 R 读取数据
- 1 数据流
- 2.2.2 连接数据库
- 2.2.3 直接读取数据之DB
- 2.2.4 间接读取数据之模型
- 2.2.5 显示数据之原始文案
- 2.2.6 单引号与双引号
- 2.2.7 显示数据之视图
- 2.2.8 模板语法
- 2.2.9 使用bootstrap美化界面
- 2.3 CRUD之 C 增加数据
- 2.3.1 MCA默认路由