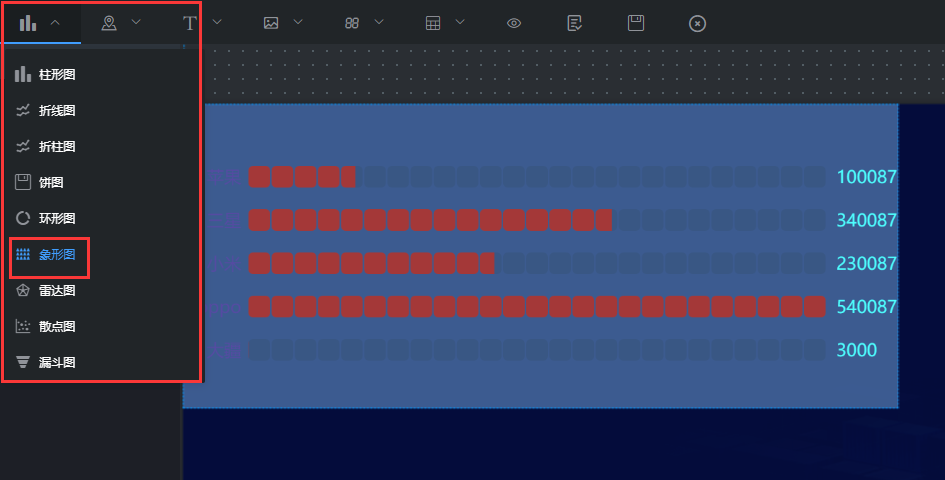
### 象形图组件就是添加象形图的组件。点击“”图标,再点击“象形图”,即可创建新的图像,如图2.51;

## **一、组件名称设置**
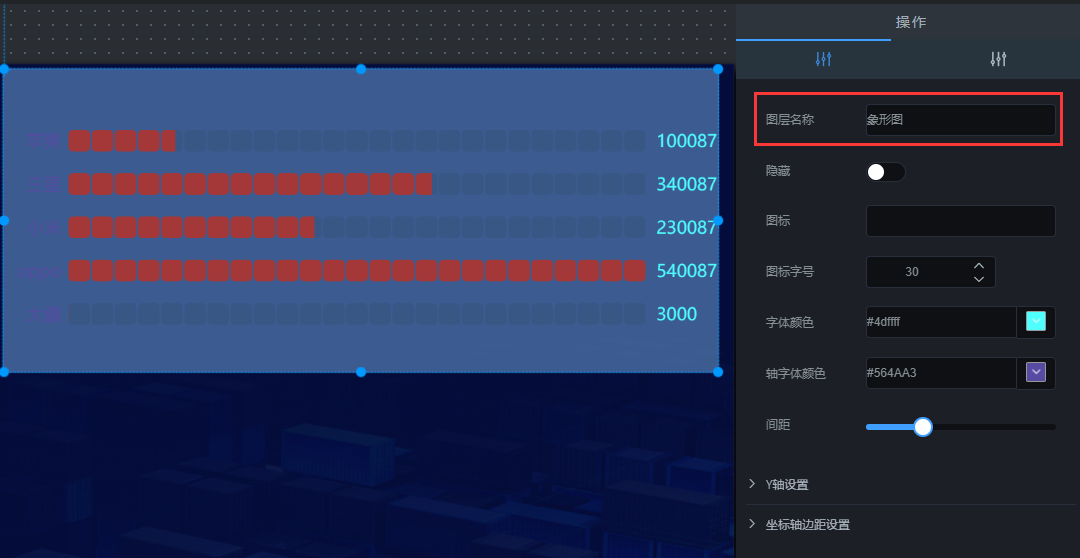
### 选中象形图组件,在操作界面右侧的“图层名称”处可修改组件的名称,如图2.52。(名称最好要设置一下,方便后期组件管理)

## **二、图标**
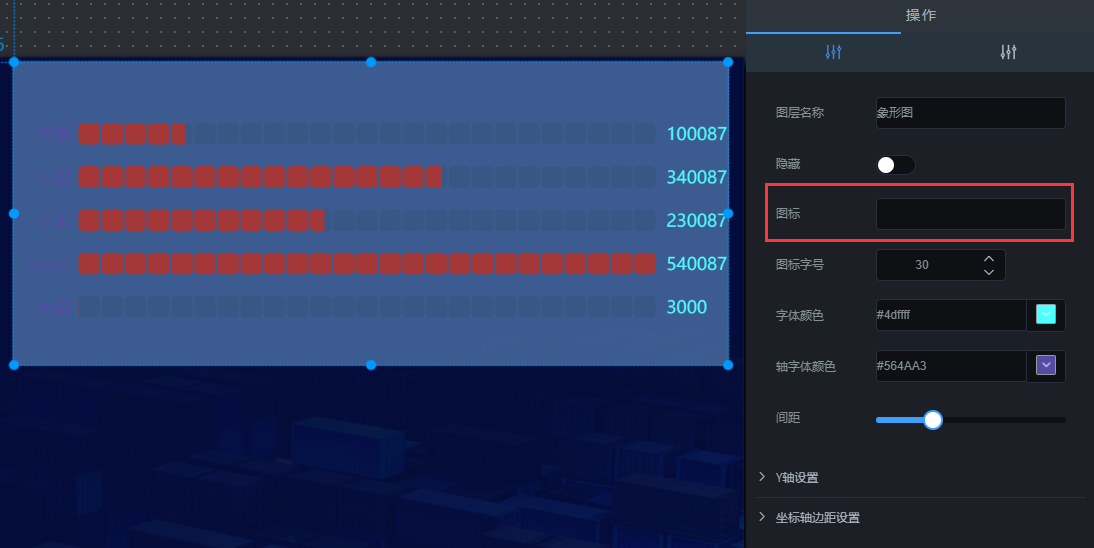
### 选中该象形组件,在操作界面右侧,输入图片地址,即可自定义设置象形图图标,如图2.53。

## **三、图标字号**
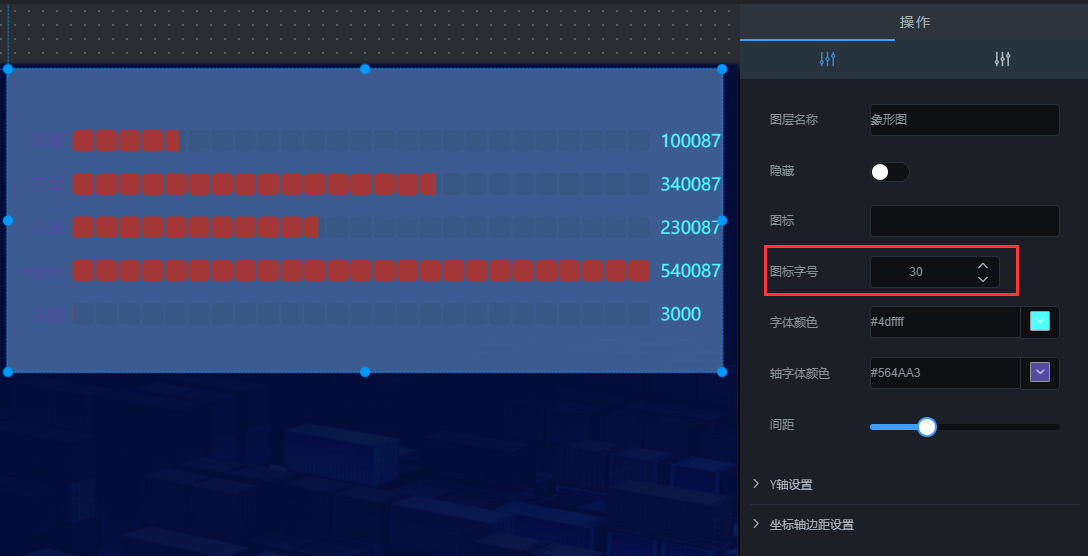
### 选中该象形图组件,在操作界面右侧,选择图标字号,可设置图标的大小,如图2.54。

## **四、字体设置**
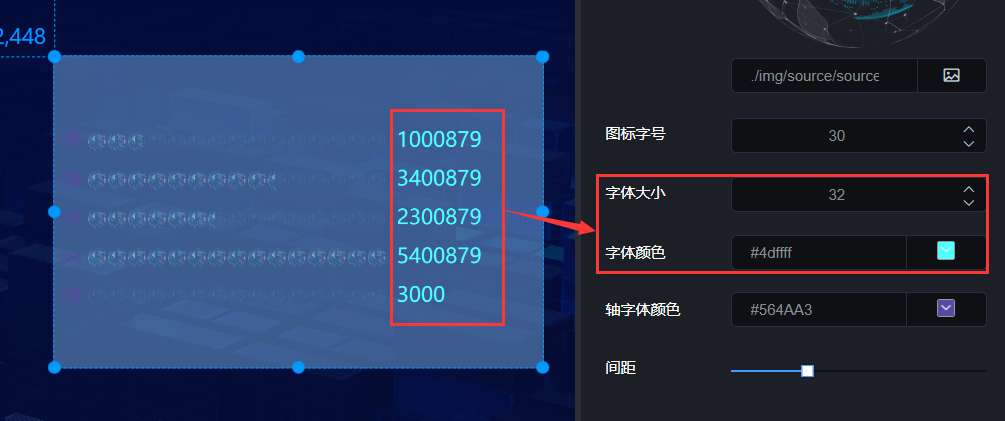
### 包含设置“字体大小、字体颜色”,如图2.55。

## **五、轴字体颜色**
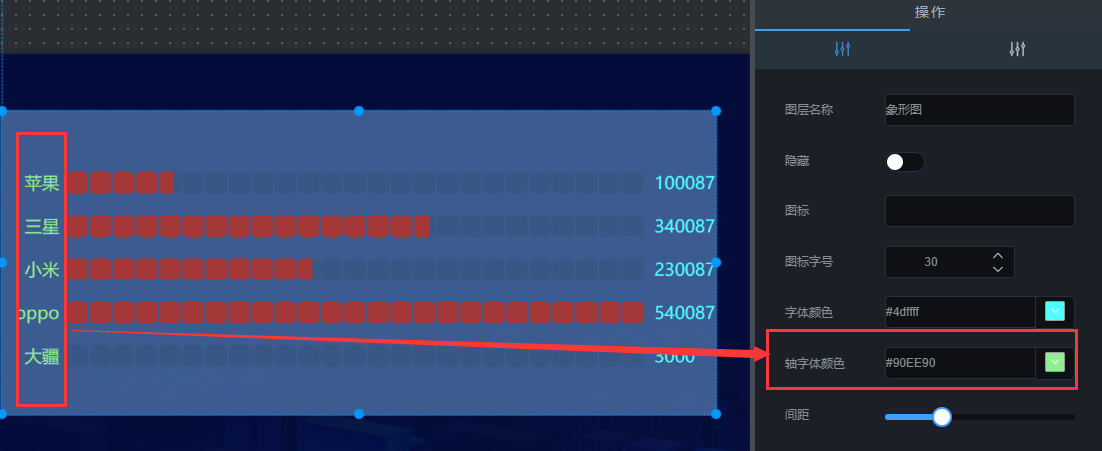
### 选中该象形图组件,在操作界面右侧,选择轴字体颜色,可设置轴文字的颜色(即Y轴文字的颜色),如图2.56。

## **六、间距**
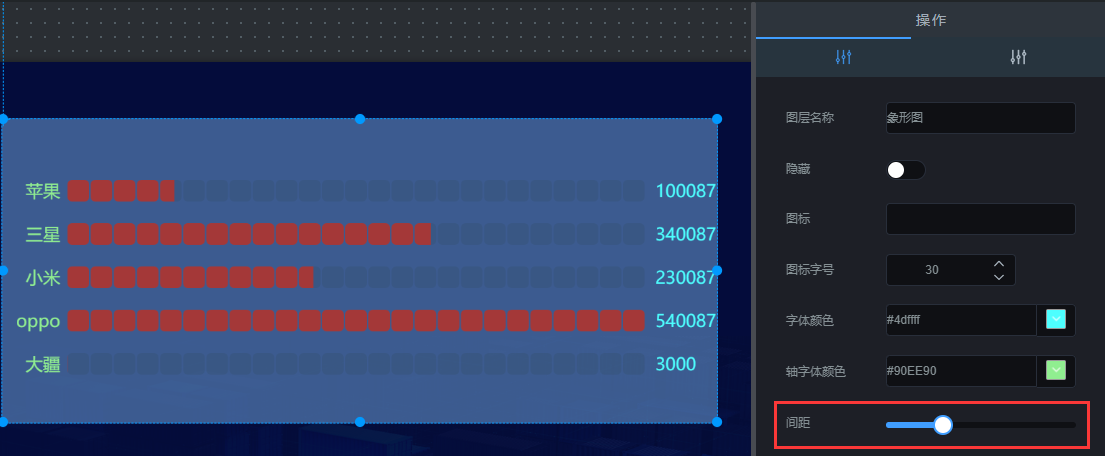
### 选中该象形图组件,在操作界面右侧,调整“间距”大小,可修改组件Y轴之间的间距,如图2.57。

## **七、Y轴设置**
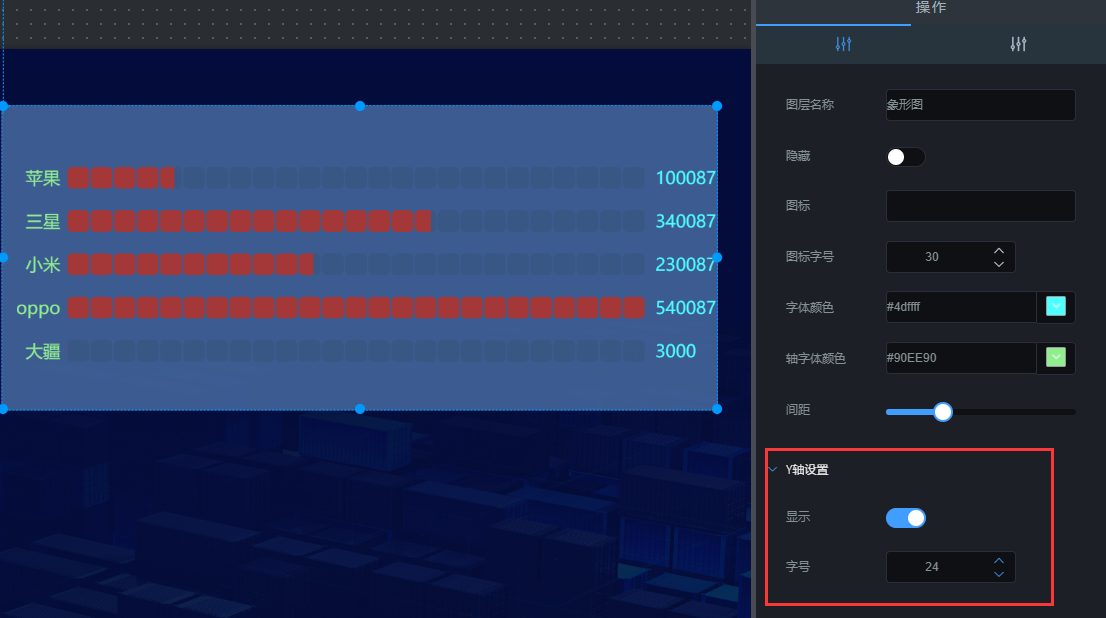
### 选中该象形图组件,在操作界面右侧的“Y轴设置”处可设置Y轴的样式,如图2.58。
* ### 显示:是否显示Y轴字体;
* ### 字号:Y轴字体的大小;

## **八、坐标轴边距设置**
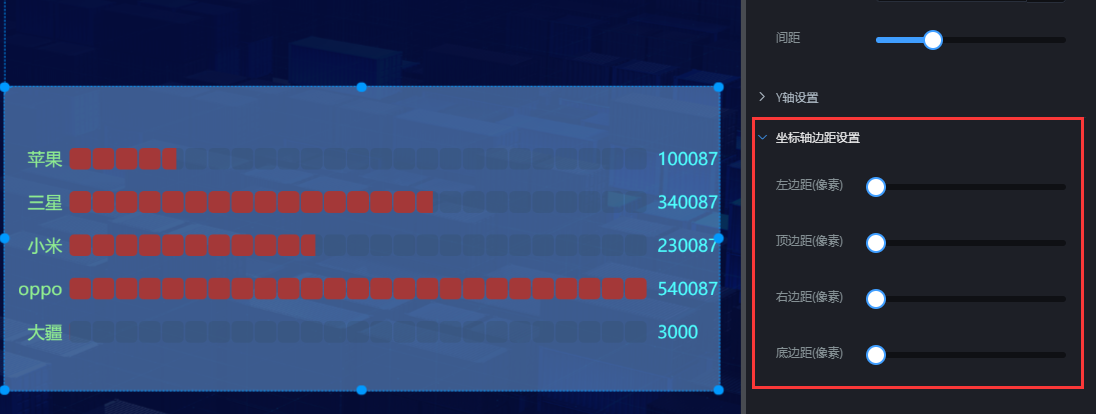
### 选中该象形图组件,在操作界面右侧的“坐标轴边距设置”处可配置距离左、右、上、下的距离,如图2.59。
* ### 左边距(像素):柱形图距离左边的距离;
* ### 顶边距(像素):柱形图距离顶部的距离;
* ### 右边距(像素):柱形图距离右边的距离;
* ### 底边距(像素):柱形图距离底部的距离;

## **九、接口设置**
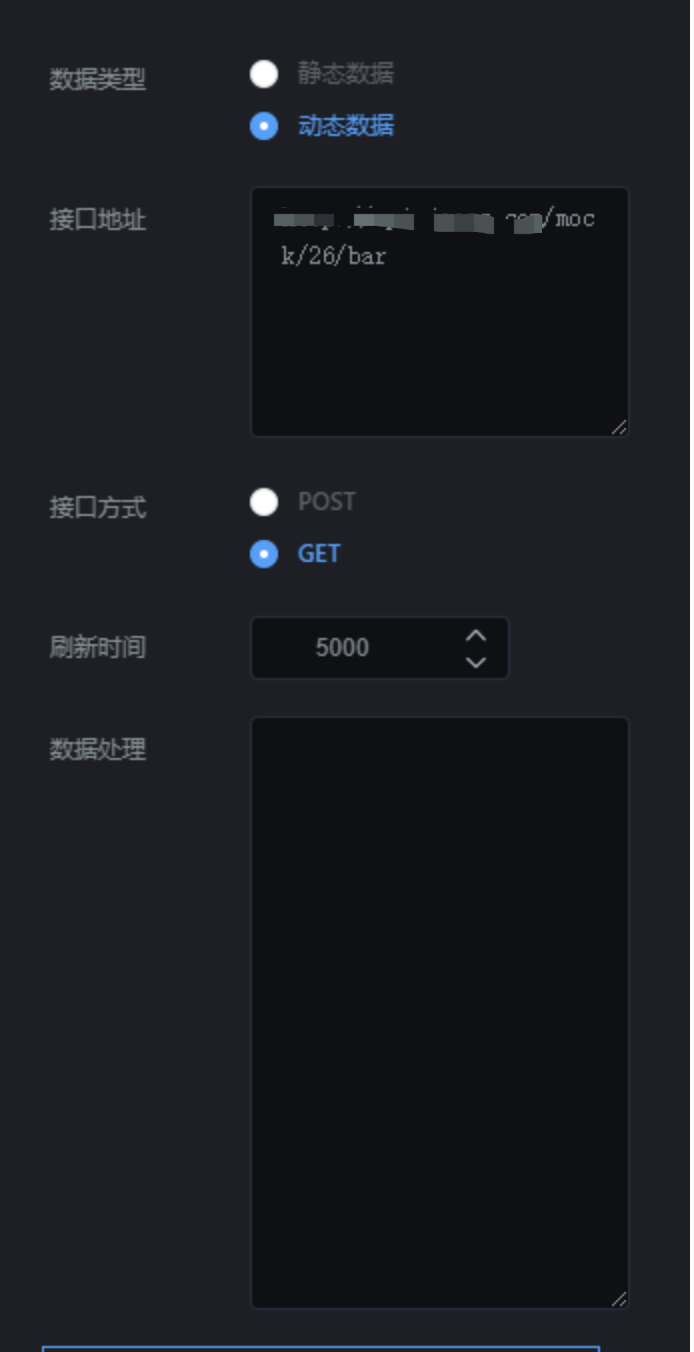
### 选中该象形图组件,在操作界面右侧,点击“”,可设置接口,如图2.591。
### 1\. 数据类型
### 数据类型分为静态数据和动态数据;
* ### 静态数据:写死的数据;
* ### 动态数据:会随着接口传过来的数据实时变化;(一般这种比较常用)
### 2\. 接口地址
* ### name:为标签名称;
* ### value:为标签值;
### (1)静态数据,接口地址传过来的内容要符合以下格式:
~~~
[
{
"name": "苹果",
"value": 1000879
},
{
"name": "三星",
"value": 3400879
},
{
"name": "小米",
"value": 2300879
},
{
"name": "oppo",
"value": 5400879
},
{
"name": "大疆",
"value": 3000
},
{
"name": "抖音",
"value": 2000
}
]
~~~
### (2)动态数据,接口地址传过来的内容要符合以下格式:
~~~
{"data":[{"name":"苹果","value":1000879},{"name":"三星","value":3400879},{"name":"小米","value":2300879},{"name":"oppo","value":5400879},{"name":"大疆","value":3000}]}
~~~
### 3\. 刷新时间
### 这个参数主要针对动态数据设置的,完成数据的实时更新。
* ### 如果你想设置成5秒刷新一次,可以将刷新时间设置成“5000”;
### 4\. 刷新数据
### 这个参数主要是重新请求以下接口,完成数据的更新。
- 文档目录
- 智能网关使用说明
- P411硬件使用手册
- P42x硬件使用手册
- P43x硬件使用手册
- P45x硬件使用手册
- EdgeLink软件使用说明
- 智能网关功能说明
- 智能网关远程管理
- 防火墙功能使用说明
- GPS定位功能使用说明
- 本地固件升级
- TCP透传功能使用说明
- 工业云平台使用说明
- 旧组态功能使用说明
- 新组态功能使用说明
- V P N服务
- 云平台报警功能介绍
- 定时任务功能使用说明
- 视频监控功能使用说明
- 定时任务实现网关防拆功能
- 微信小程序使用说明
- 组织管理功能使用说明
- 新平台数据点表公式说明
- 旧平台数据点表公式说明
- 大屏监控使用说明
- 基本操作
- 1.新建大屏
- 2.画布介绍
- 3.添加组件
- 4.调整组件的图层和位置
- 5.预览、保存组件
- 6.修改大屏
- 组件使用说明
- 1.背景设置
- 2.图表类组件
- 2.1柱图形组件
- 2.2折线图组件
- 2.3饼图组件
- 2.4环形图组件
- 2.5象形图组件
- 2.6雷达图组件
- 2.7散点图组件
- 2.8漏斗图组件
- 3.文本类组件
- 3.1文本框组件
- 3.2跑马灯组件
- 3.3超链接组件
- 3.4实时时间组件
- 4.图片类组件
- 4.1图片组件
- 4.2图片框组件
- 4.3轮播图组件
- 4.4滑动组件
- 4.5iframe组件
- 4.6video组件
- 5.指标类组件
- 5.1翻牌器组件
- 5.2仪盘表组件
- 5.3字符云组件
- 5.4进度条组件
- 6.表格类组件
- 6.1表格组件
- 6.2选项卡组件
- 7.地图类组件
- 7.1地图组件
- 8.万能组件
- 8.1堆叠条形图
- 8.2正负条形图
- 8.3双向对比柱形图
- 8.4圆形柱形图
- 8.5嵌套饼图
- 8.6矩形树图
- 8.7K线图
- 组件数据
- 智能网关与电脑主机驱动列表
- ModbusRTU主站
- ModbusSlave软件模拟ModbusRTU从站
- MCGS触摸屏做ModbusRTU从站
- 威纶通触摸屏做ModbusRTU从站
- 西门子S7-200 Smart ModbusRTU从站
- 艾莫迅PLC做ModbusRTU从站
- 亚控组态王做ModbusRTU从站
- 海为PLC做ModbusRTU从站
- 英威腾PLC ModbusRTU从站
- ModbusTCP主站
- ModbusSlave软件模拟ModbusTCP从站
- MCGS触摸屏做ModbusTCP从站
- 威纶通触摸屏做ModbusTCP从站
- 西门子S7-200 Smart ModbusTCP数据采集
- 亚控组态王做ModbusTCP从站
- 创恒P700 DCS做Modbus TCP从站
- PLC自有协议主站
- 西门子S7-200 PPI
- 西门子S7-200 Smart以太网
- 西门子S7-1200 以太网
- 三菱FX协议
- 台达
- 永宏
- 信捷XC
- ModbusRTU从站
- ModbusPoll软件模拟ModbusRTU主站
- MCGS触摸屏做ModbusRTU主站
- 威纶通触摸屏做ModbusRTU主站
- 亚控组态王做ModbusRTU主站
- ModbusTCP从站
- ModbusPoll软件模拟ModbusTCP主站
- MCGS触摸屏做ModbusTCP主站
- 威纶通触摸屏做ModbusTCP主站
- 亚控组态王做ModbusTCP主站
- 智能网关串口透传
- 三菱PLC远程上下载
- 英威腾PLC远程上下载
- 台达PLC远程上下载
- 永宏PLC远程上下载
- 信捷PLC远程上下载
- 海为PLC远程上下载
- HighLink软件使用说明
- P401/P200系列DTU模块使用说明
- P401使用说明书(图)
- DTU配置工具使用说明
- 固件升级说明
- 串口透传:组态王与西门子S7-200远程采集
- P401应用西门子200远程数据采集
- V P N应用:网口远程上下载调试
- 西门子S7-200 SMART远程上下载调试
- 西门子S7-1200远程上下载调试
- 威纶通触摸屏远程上下载调试
- 昆仑通态触摸屏远程上下载调试
- HighLink方案远程调试功能说明
- 同时连接不同网关下的网络设备
- 第三方平台数据接入
- 网关接入阿里云物联网平台
- 网关接入客户自建MQTT服务器
- MQTT客户端接入创恒云平台
- 附录I、错误码说明
- 附录II、获取网关ID和设备ID
- HTTP API实现数据上报下发(新平台)
- HTTP API实现数据上报下发(旧平台)
- 网关接入华云RomaConnect云平台
- 创恒云点表导出至华为云
- 常见问题
- 设备状态显示离线
- HighLink常见问题
- 232/485串口通信连接不上
- VPN远程 常见问题 排查方法
- 数据采集常见问题
- 点表编写常见问题
- DTU配置工具常见问题
- 本地无法进入网关管理页面
- HighLink路由表常见问题
- AP和STA是什么意思
- 资料分享
- 常用MQTT客户端介绍及使用
- Modbus协议
- LTE-CAT1介绍
- 物联网卡问题总结
- 新老平台差别说明
- 联系我们
- 硬件定制开发
- 云平台定制
- 应用案例
