[TOC]
## **1. Spring Cloud Bus 解决的问题**
### 1.1 **疑问: 当我们更新 GitHub 中的配置文件内容后, Config 客户端服务是否会及时更新的配置内容呢?**
* **测试:**
修改config客户端,microservice-config-application.yml配置文件的prod的端口号
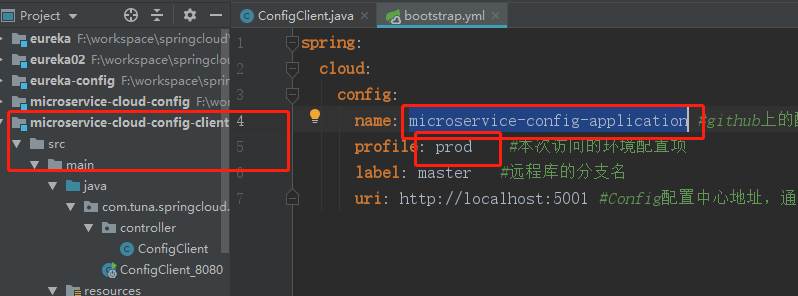
git配置
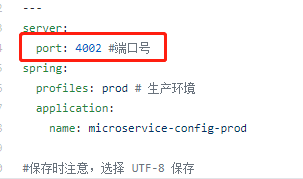
**将端口配置改成4010**
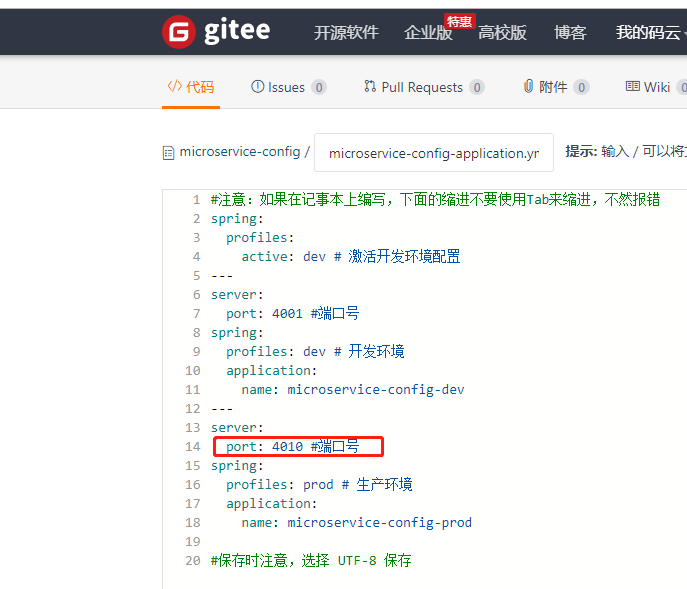
**但是端口的修改没有生效,还是原来的4002**

* **结果**
重启config客户端后,配置生效

* **解决:**
如果希望在不重启微服务的情况下更新配置如何来实现呢? 我们使用 Spring Cloud Bus 来实现配置的自动更新。
## **2. Spring Cloud Bus介绍**
1. **Spring Cloud Bus 翻译为消息总线。** 大家可以将它理解为管理和传播所有分布式项目中的消息即可。
2. Spring Cloud Bus本质是**利用了MQ的广播机制** ***在分布式的系统中传播消息,目前常用的有Kafka和RabbitMQ。***
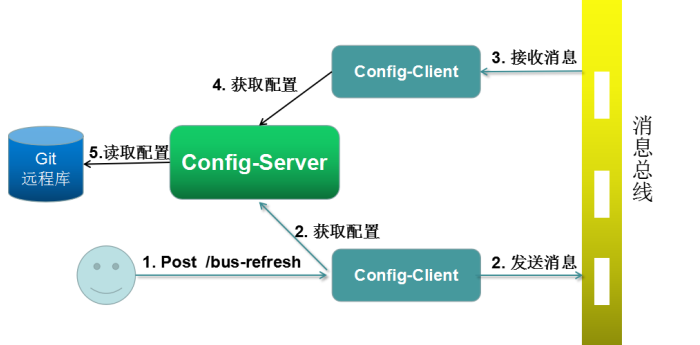
3. 利用Bus的机制可以做很多的事情,其中配置中心客户端刷新就是典型的应用场景之一,我们用一张图来描述Bus在配置中心使用的机制。
## **3. Spring Cloud Bus实践**
### 3.1 应用服务端配置
**1. 应用服务端配置pom,添加依赖**
```
<!--Bus 与 rabbitMQ依赖-->
<dependency>
<groupId>org.springframework.cloud</groupId>
<artifactId>spring-cloud-starter-bus-amqp</artifactId>
</dependency>
<!--监听器-->
<dependency>
<groupId>org.springframework.boot</groupId>
<artifactId>spring-boot-starter-actuator</artifactId>
</dependency>
```
**2. 修改 bootstrap.yml添加**
```
spring:
rabbitmq:
host: localhost
port: 5672
username: guest
password: guest
# 暴露触发消息总线的地址
management:
endpoints:
web:
exposure:
include: bus-refresh
```
3. 修改git上的microservice-config-product.yml

改为
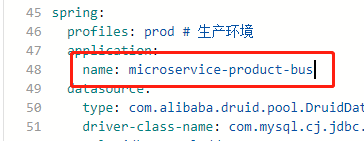
但是Eureka注册名称很明显,没有改过来,一定要重启吗?

**4. 使用 postman工具发送配置更新请求**
发送 POST 请求: http://localhost:8001/actuator/bus-refresh发送请求后,会向 rabbitmq 队列发送数据,就会被监听到进行更新服务配置信息

配置很快就生效了

### **3.2 自定义类中读取配置实战**
**1. 修改GitHub上的配置**
修改GitHub上的 microservice\-config\-product.yml 配置文件,增加自定义配置信息:
```
emp:
name: tuna
```
**2. 用@Value注解获取配置**
~~~
@Value("${emp.name}")
private String name;
@GetMapping("/emp")
public String getEmpName() {
return name;
}
~~~
**3. 访问测试**
注意:当@Value注解去取配置时,如果配置文件没有加这个配置,则程序启动不起来,并报解析错误
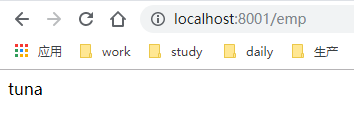
已经读取到了配置
**4. 修改配置**
```
emp:
name: tuna
```
改成
```
emp:
name: fish
```
使用 postman工具发送 POST 请求: http://localhost:8001/actuator/bus-refresh,发现并没有生效
### **5. 自定义配置需要 在controller上加 `@RefreshScope`注解支持**
是因为需要在 ProductController 上添加 @RefreshScope 注解 ,用于刷新配置
~~~
package com.tuna.springcloud.server.controller;
import com.tuna.springcloud.common.entities.Product;
import com.tuna.springcloud.server.service.ProductService;
import org.springframework.beans.factory.annotation.Autowired;
import org.springframework.beans.factory.annotation.Value;
import org.springframework.cloud.context.config.annotation.RefreshScope;
import org.springframework.web.bind.annotation.*;
import java.util.List;
@RefreshScope
@RestController
public class ProductController {
。。。
@Value("${emp.name}")
private String name;
@GetMapping("/emp")
public String getEmpName() {
return name;
}
}
~~~
**还原配置,重启应用服务端**
再次post更新请求,生效

## 4.修改数据源实战
1\. 先访问 http://localhost:8001/product/get/1,发现当前获取了 springcloud\_db01 库的数据

2\. 修改GitHub上的 microservice\-config\-product.yml 配置文件,将 profile: dev (开发环境) 的 库名 改 为 springcloud\_db02

3\. 使用 postman工具发送 POST 请求: http://localhost:8001/actuator/bus-refresh
4\. 访问 http://localhost:8001/product/get/1,发现依然是 springcloud\_db01 库的数据, 发现并没有刷新配置。

### 4.1 自定义Druid配置类
~~~
@Configuration
public class DruidConfig {
@RefreshScope //刷新配置
@ConfigurationProperties(prefix = "spring.datasource")
@Bean
public DataSource druid() {
return new DruidDataSource();
}
}
~~~
### 4.2 测试
现在取得是数据库2

修改配置成数据库1,并发送更新消息http://localhost:8001/actuator/bus-refresh
再次请求服务端,不用重启,数据库连接立即生效了

- springcloud
- springcloud的作用
- springboot服务提供者和消费者
- Eureka
- ribbon
- Feign
- feign在微服务中的使用
- feign充当http请求工具
- Hystrix 熔断器
- Zuul 路由网关
- Spring Cloud Config 分布式配置中心
- config介绍与配置
- Spring Cloud Config 配置实战
- Spring Cloud Bus
- gateway
- 概念讲解
- 实例
- GateWay
- 统一日志追踪
- 分布式锁
- 1.redis
- springcloud Alibaba
- 1. Nacos
- 1.1 安装
- 1.2 特性
- 1.3 实例
- 1. 整合nacos服务发现
- 2. 整合nacos配置功能
- 1.4 生产部署方案
- 环境隔离
- 原理讲解
- 1. 服务发现
- 2. sentinel
- 3. Seata事务
- CAP理论
- 3.1 安装
- 分布式协议
- 4.熔断和降级
- springcloud与alibba
- oauth
- 1. abstract
- 2. oauth2 in micro-service
- 微服务框架付费
- SkyWalking
- 介绍与相关资料
- APM系统简单对比(zipkin,pinpoint和skywalking)
- server安装部署
- agent安装
- 日志清理
- 统一日志中心
- docker安装部署
- 安装部署
- elasticsearch 7.x
- logstash 7.x
- kibana 7.x
- ES索引管理
- 定时清理数据
- index Lifecycle Management
- 没数据排查思路
- ELK自身组件监控
- 多租户方案
- 慢查询sql
- 日志审计
- 开发
- 登录认证
- 链路追踪
- elk
- Filebeat
- Filebeat基础
- Filebeat安装部署
- 多行消息Multiline
- how Filebeat works
- Logstash
- 安装
- rpm安装
- docker安装Logstash
- grok调试
- Grok语法调试
- Grok常用表达式
- 配置中常见判断
- filter提取器
- elasticsearch
- 安装
- rpm安装
- docker安装es
- 使用
- 概念
- 基础
- 中文分词
- 统计
- 排序
- 倒排与正排索引
- 自定义dynamic
- 练习
- nested object
- 父子关系模型
- 高亮
- 搜索提示
- kibana
- 安装
- docker安装
- rpm安装
- 整合
- 收集日志
- 慢sql
- 日志审计s
- 云
- 分布式架构
- 分布式锁
- Redis实现
- redisson
- 熔断和降级
