[TOC]
>[success] # 双向绑定
>[success] ## input事件 + value 组合

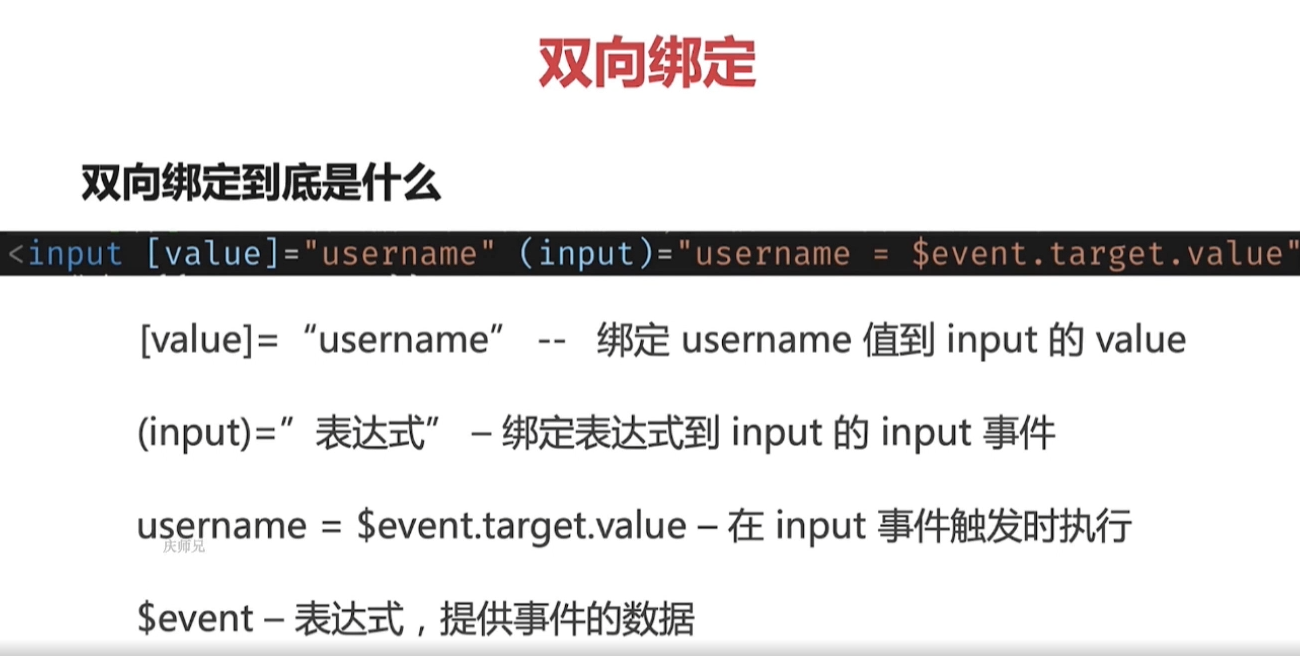
这个 **双向绑定** 有点类似 **vue** 的 **@input + value** 的组合。
这里有个问题,在 **html** 中直接使用 **$event.target.value** 会报错,因为 **ts 不知道这个东西是否存在** ,所以就需要使用 **$any() ,这个html中的方法就相当于 ts里面的 as any的操作.** ,具体说明我在网上查了一些[文档](https://blog.csdn.net/Damien_J_Scott/article/details/117460992),**$any()** 也有可能会有问题,直接定义一个方法把,然后在方法内写赋值逻辑
**html代码**
~~~
<input
type="text"
[value]="username"
(input)="username = $any($event.target).value"
/>
<span>你好,{{ username }}</span>
~~~
**ts代码**
~~~
import { Component, OnInit } from '@angular/core';
@Component({
selector: 'app-horizontal-grid',
templateUrl: './horizontal-grid.component.html',
styleUrls: ['./horizontal-grid.component.css']
})
export class HorizontalGridComponent implements OnInit {
username = '';
constructor() {}
ngOnInit() {}
}
~~~
>[success] ## ngModel

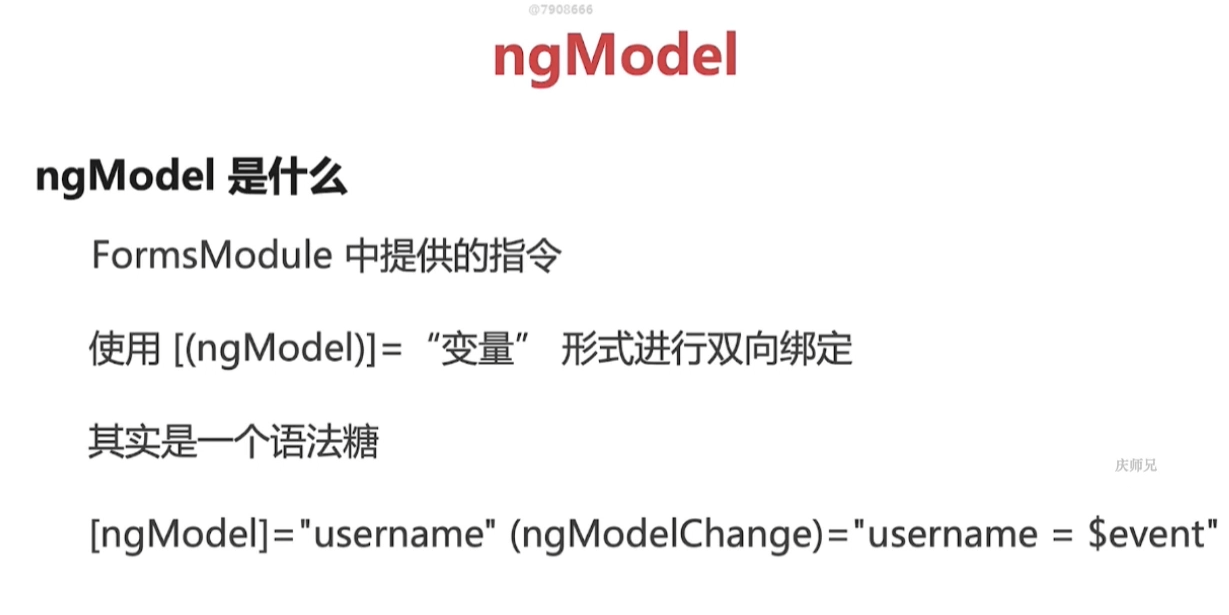
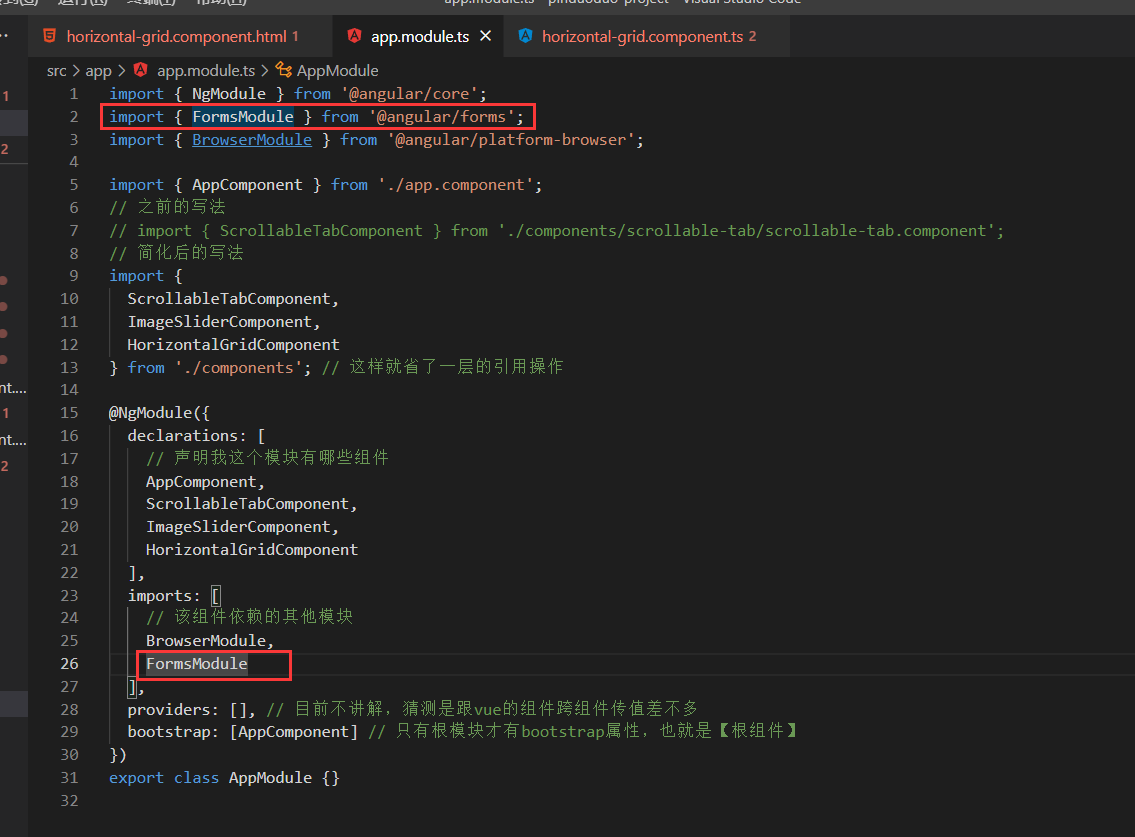
**ngModel** 跟 **vue** 的 **v-model** ,很像,在使用 **ngModel**,之前,我们需要在 **app.module.ts** 中引入 **FormsModule** 才可以使用

**html代码**
~~~
<input type="text" [(ngModel)]="username" />
<span>你好,{{ username }}</span>
~~~
**ts代码**
~~~
import { Component, OnInit } from '@angular/core';
@Component({
selector: 'app-horizontal-grid',
templateUrl: './horizontal-grid.component.html',
styleUrls: ['./horizontal-grid.component.css']
})
export class HorizontalGridComponent implements OnInit {
username = '';
constructor() {}
ngOnInit() {}
}
~~~
>[success] ## 实现一个双向数据绑定(根据vue写法推断出来的)
1. **父组件写法:**
**父组件 html**
~~~
<app-horizontal-grid [(username)]="username"></app-horizontal-grid>
~~~
**父组件 ts**
~~~
{
username = '默认值';
}
~~~
2. **子组件写法:**
**子组件 html**
~~~
<input type="text" [value]="username" (input)="handleInput($event)" />
~~~
**子组件 ts**
~~~
import { Component, EventEmitter, Input, Output } from '@angular/core';
@Component({
selector: 'app-horizontal-grid',
templateUrl: './horizontal-grid.component.html',
styleUrls: ['./horizontal-grid.component.css']
})
export class HorizontalGridComponent {
// 父组件传入的 username 属性
@Input()
username = '';
// 定义 emit 方法
@Output() usernameChange = new EventEmitter();
// eslint-disable-next-line @typescript-eslint/no-empty-function
constructor() {}
// input监听事件
handleInput(ev: any) {
// 通过 emit 把 input 更新的值,传给父组件
this.usernameChange.emit(ev.target.value);
}
}
~~~
>[success] ## 实现一个双向数据绑定(angular视频版本)
实际上 **vue 版本与 angula r版本实现的效果是一样的** ,本质上都是相同的,**都是在数据变化时,通过 **emit** 把数据传递给父组件**,**vue 版本是通过 **Oninput** 事件变化时传递给父组件,而 angular 版本是通过计算属性 get set ,每次 set 时监听数据变化,就通过 emit 把数据回传给父组件**
1. **父组件写法:**
**父组件 html**
~~~
<app-horizontal-grid [(username)]="username"></app-horizontal-grid>
~~~
**父组件 ts**
~~~
{
username = '默认值';
}
~~~
2. **子组件写法(不同之处就是在子组件的 get set这里)**:
**子组件 html**
~~~
<input
type="text"
[value]="username"
(input)="username = $any($event.target).value"
/>
~~~
**子组件 ts**
~~~
import { Component, EventEmitter, Input, Output } from '@angular/core';
@Component({
selector: 'app-horizontal-grid',
templateUrl: './horizontal-grid.component.html',
styleUrls: ['./horizontal-grid.component.css']
})
export class HorizontalGridComponent {
private _username = ''; // 私有属性
// 定义 emit 方法
@Output() usernameChange = new EventEmitter();
// eslint-disable-next-line @typescript-eslint/no-empty-function
constructor() {}
// 获取 username
@Input()
public get username(): string {
return this._username;
}
// 写入 username
public set username(value: string) {
this._username = value;
// 通过 emit 把 input 更新的值,传给父组件
this.usernameChange.emit(value);
}
}
~~~
- Angular8开发拼多多WebApp
- 框架对比
- 环境搭建与项目创建
- 开发工具配置
- 初始组件
- ngFor指令
- ngIf指令
- 样式绑定的几种方式
- 组件生命周期
- 在组件类中引用模版(类似vue 的 ref)
- 双向绑定
- 什么是模块
- 【以下目录未完成】什么是注解(装饰器)
- 指令的概念
- 组件的事件绑定和样式绑定
- 组件嵌套和投影组件
- 路由概念
- 路由实战
- 路由URL和参数
- 管道的概念
- 依赖注入
- 脏值检测
- HTTP 概览
- Postman 和 Rest Client 调试 HTTP
- Rest API
- HttpClient 修改
- Http 拦截器 HttpInterceptor
- 其他
- Angular终极课程
- RxJS快速入门
