
## Keyboard Message
When the button is pressed in this example, a text string is sent to the computer as keyboard input. The string reports the number of times the button has been pressed. Once you have the Leonardo programmed and wired up, open up your favourite text editor to see the results.
NB: When you use the Keyboard.print() command, the Arduino takes over your computer's keyboard! To insure you don't lose control of your computer while running a sketch with this function, make sure to set up a reliable control system before you call Keyboard.print(). This sketch includes a pushbutton to toggle the keyboard, so that it only runs after the button is pressed.
### Hardware Required
* Arduino Leonardo, Micro, or Due board
* momentary pushbutton
* 10k ohm resistor
### Software Required
* Any text editor
### Circuit
Attach one pin of the pushbutton to pin 4 on the Arduino. Attach the other pin to 5V. Use the resistor as a pull-down, providing a reference to ground, by attaching it from pin 4 to ground.
Once you've programmed your board, unplug the USB cable, open a text editor and put the text cursor at in the typing area. Connect the board to your computer through USB again and press the button to write in the document.
click the images to enlarge
[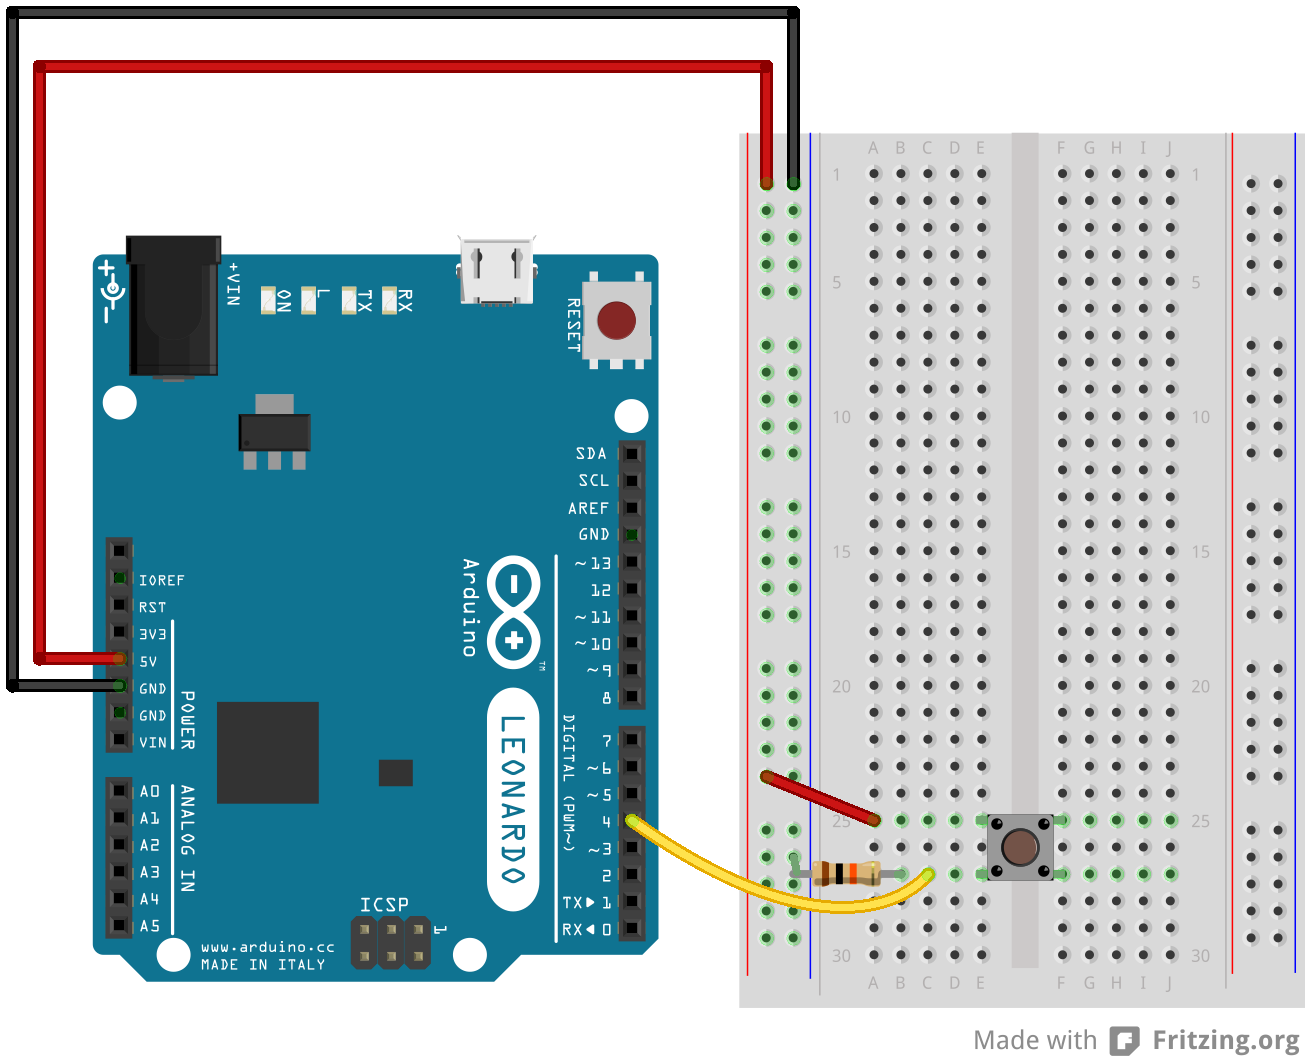](https://www.arduino.cc/en/uploads/Tutorial/KeyboardMessage3_bb.png)
image developed using [Fritzing](http://www.fritzing.org/). For more circuit examples, see the [Fritzing project page](http://fritzing.org/projects/)
[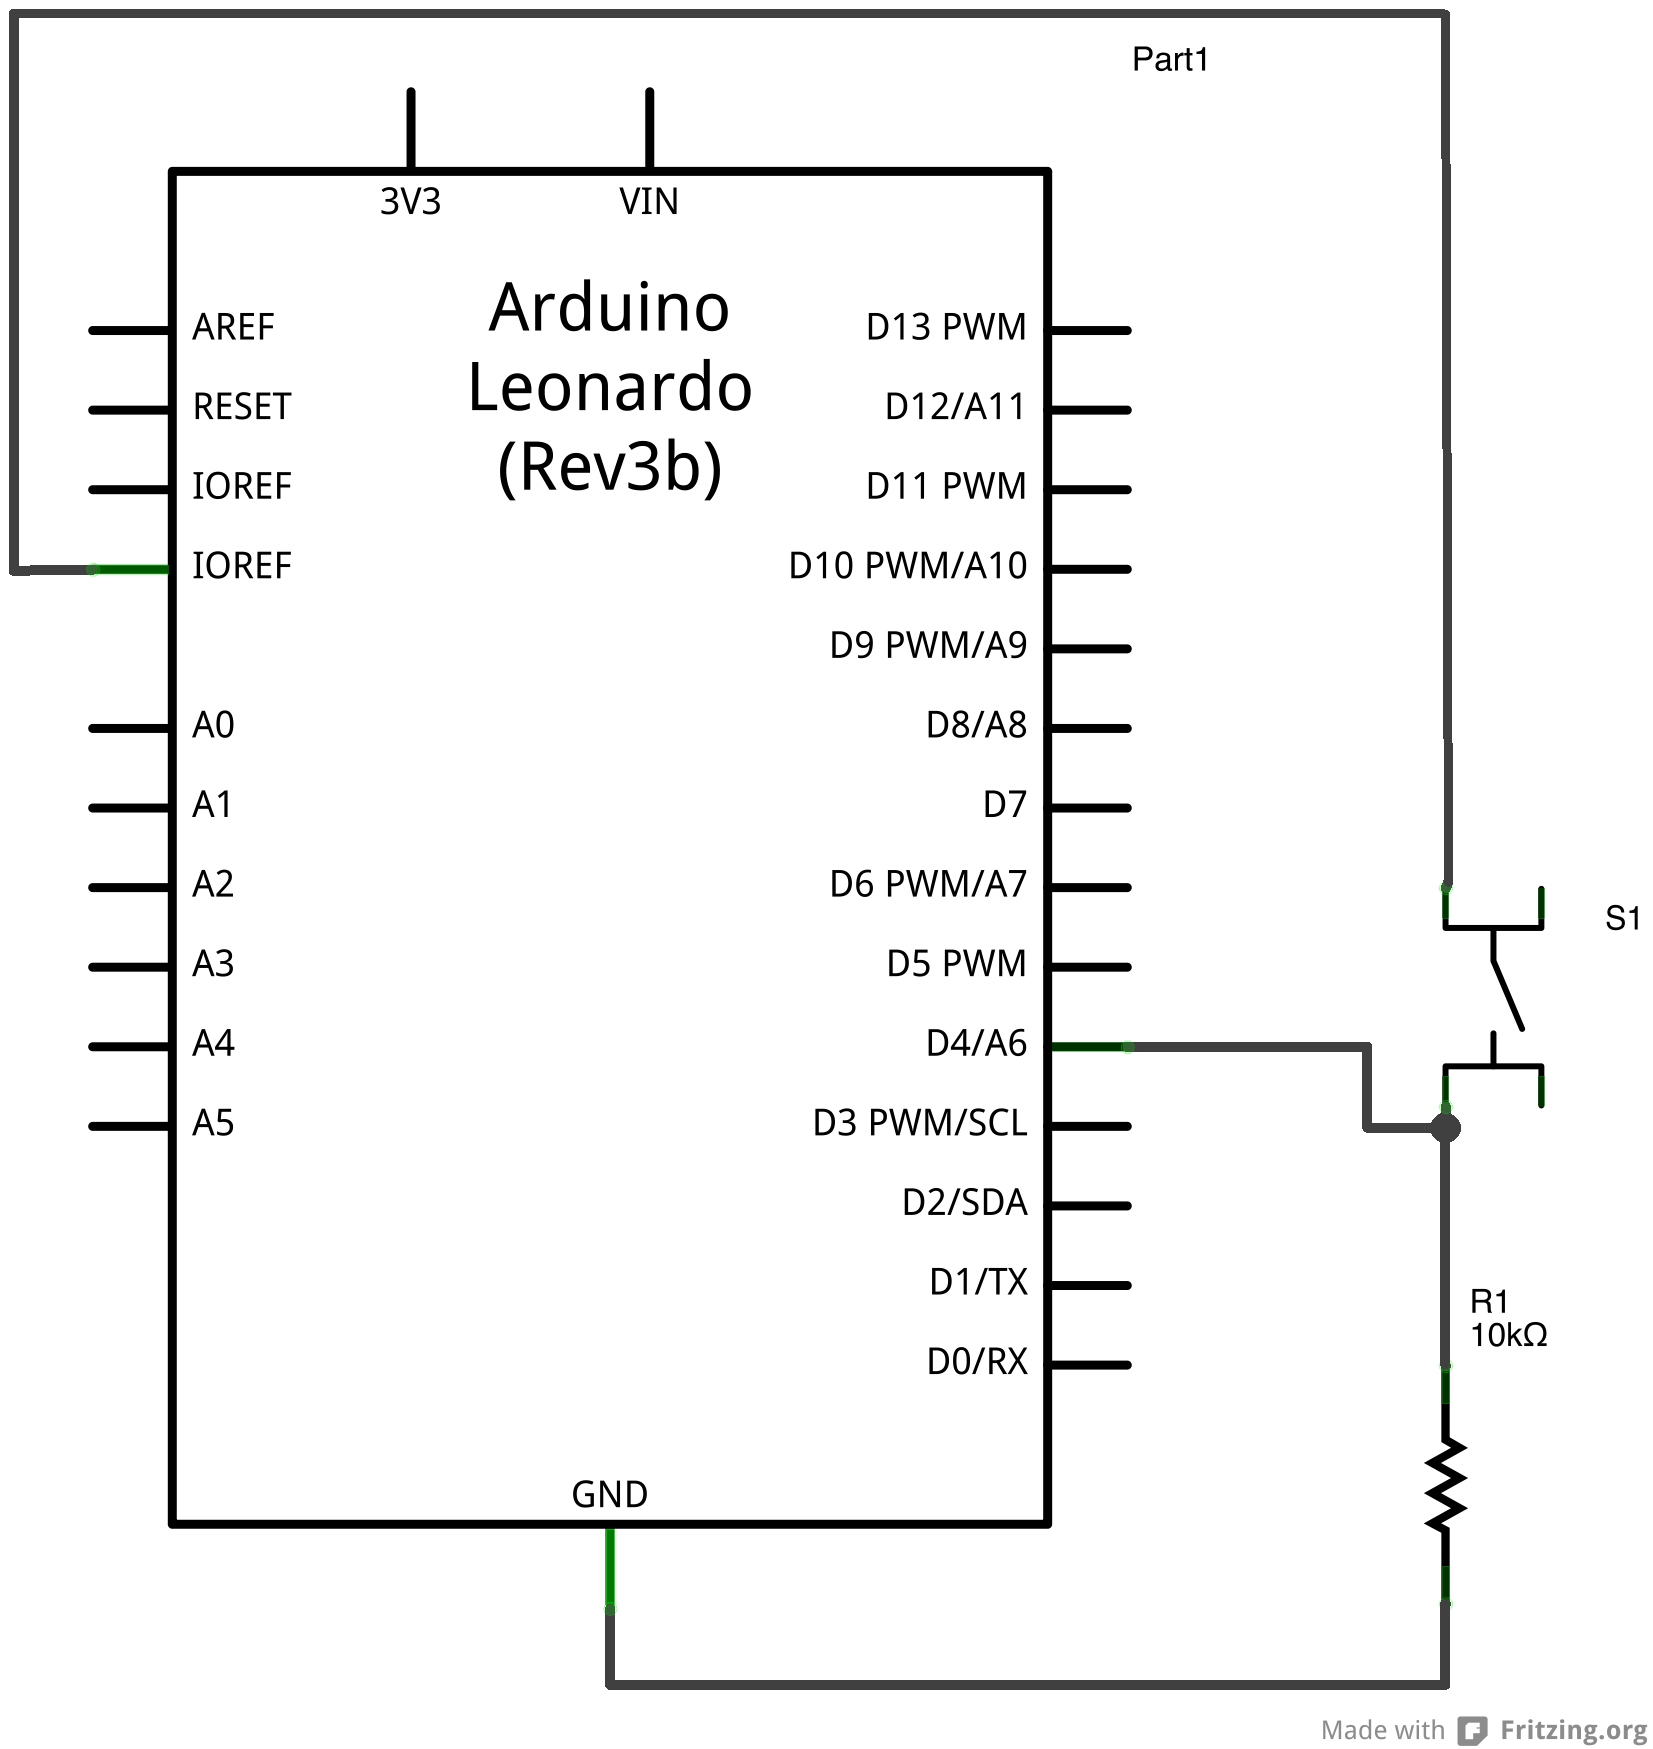](https://www.arduino.cc/en/uploads/Tutorial/KeyboardMessage3_schem.png)
### Code
/*
Keyboard Message test
For the Arduino Leonardo and Micro.
Sends a text string when a button is pressed.
The circuit:
- pushbutton attached from pin 4 to +5V
- 10 kilohm resistor attached from pin 4 to ground
created 24 Oct 2011
modified 27 Mar 2012
by Tom Igoe
modified 11 Nov 2013
by Scott Fitzgerald
This example code is in the public domain.
http://www.arduino.cc/en/Tutorial/KeyboardMessage
*/
#include "Keyboard.h"
const int buttonPin = 4; // input pin for pushbutton
int previousButtonState = HIGH; // for checking the state of a pushButton
int counter = 0; // button push counter
void setup() {
// make the pushButton pin an input:
pinMode(buttonPin, INPUT);
// initialize control over the keyboard:
Keyboard.begin();
}
void loop() {
// read the pushbutton:
int buttonState = digitalRead(buttonPin);
// if the button state has changed,
if ((buttonState != previousButtonState)
// and it's currently pressed:
&& (buttonState == HIGH)) {
// increment the button counter
counter++;
// type out a message
Keyboard.print("You pressed the button ");
Keyboard.print(counter);
Keyboard.println(" times.");
}
// save the current button state for comparison next time:
previousButtonState = buttonState;
}
[[Get Code]](https://www.arduino.cc/en/Tutorial/KeyboardMessage?action=sourceblock&num=1)
### See Also
* [Keyboard.write](https://www.arduino.cc/en/Reference/KeyboardWrite)()
* [Keyboard.print](https://www.arduino.cc/en/Reference/KeyboardPrint)()
* [Keyboard.println](https://www.arduino.cc/en/Reference/KeyboardPrintln)()
* [KeyboardLogout](https://www.arduino.cc/en/Tutorial/KeyboardLogout) - Logs out the current user with key commands.
* [KeyboardReprogram](https://www.arduino.cc/en/Tutorial/KeyboardReprogram) - Opens a new window in the Arduino IDE and reprograms the Leonardo with a simple blink program.
* [KeyboardSerial](https://www.arduino.cc/en/Tutorial/KeyboardSerial) - Reads a byte from the serial port, and sends back a keystroke.
* [KeyboardAndMouseControl](https://www.arduino.cc/en/Tutorial/KeyboardAndMouseControl) - Demonstrates the Mouse and Keyboard commands in one program.
* [ButtonMouseControl](https://www.arduino.cc/en/Tutorial/ButtonMouseControl) - Control cursor movement with 5 pushbuttons.
* [JoystickMouseControl](https://www.arduino.cc/en/Tutorial/JoystickMouseControl) - Controls a computer's cursor movement with a Joystick when a button is pressed.
- 说明
- 系统示例文件目录结构及说明
- 01.Basics
- AnalogReadSerial
- BareMinimum
- Blink
- DigitalReadSerial
- Fade
- ReadAnalogVoltage
- 02.Digital
- BlinkWithoutDelay
- Button
- Debounce
- DigitalInputPullup
- StateChangeDetection
- toneKeyboard
- toneMelody
- toneMultiple
- tonePitchFollower
- 03.Analog
- AnalogInOutSerial
- AnalogInput
- AnalogWriteMega
- Calibration
- Fading
- Smoothing
- 04.Communication
- ASCIITable
- Dimmer
- Graph
- Midi
- MultiSerial
- PhysicalPixel
- ReadASCIIString
- SerialCallResponse
- SerialCallResponseASCII
- SerialEvent
- SerialPassthrough
- VirtualColorMixer
- 05.Control
- Arrays
- ForLoopIteration
- IfStatementConditional
- switchCase
- switchCase2
- WhileStatementConditional
- 06.Sensors
- ADXL3xx
- Knock
- Memsic2125
- Ping
- 07.Display
- barGraph
- RowColumnScanning
- 08.Strings
- CharacterAnalysis
- StringAdditionOperator
- StringAppendOperator
- StringCaseChanges
- StringCharacters
- StringComparisonOperators
- StringConstructors
- StringIndexOf
- StringLength
- StringLengthTrim
- StringReplace
- StringStartsWithEndsWith
- StringSubstring
- StringToInt
- 09.USB
- Keyboard
- KeyboardLogout
- KeyboardMessage
- KeyboardReprogram
- KeyboardSerial
- KeyboardAndMouseControl
- Mouse
- ButtonMouseControl
- JoystickMouseControl
- 10.StarterKit_BasicKit (与特定硬件相关,暂无)
- p02_SpaceshipInterface
- p03_LoveOMeter
- p04_ColorMixingLamp
- p05_ServoMoodIndicator
- p06_LightTheremin
- p07_Keyboard
- p08_DigitalHourglass
- p09_MotorizedPinwheel
- p10_Zoetrope
- p11_CrystalBall
- p12_KnockLock
- p13_TouchSensorLamp
- p14_TweakTheArduinoLogo
- p15_HackingButtons
- 11.ArduinoISP(暂无)
- ArduinoISP