
关于前端路由,网上有很多可以参考,但是感觉都是一些mini实现,对hashchange、pushState、replaceState这几个api的使用。所以准备梳理下官方github仓库的的源码实现,同时给自己也作为阅读笔记作为学习记录,在代码截图中,为便于理解,会删除大量干扰阅读的支线/边界情况代码。
看完本篇文章你将理解:
1. Vue Router 的基本实现原理
2. 路径是如何管理的,路径和路由组件的渲染是如何映射的
3. 导航守卫是如何执行的
4. 给路由组件传递数据,有几种方式,分别都怎么做的
先把[github源码](https://github.com/vuejs/vue-router-next) clone 下来。
首先从入口index.js文件开始浏览:
```
export { createWebHistory } from './history/html5'
export { createMemoryHistory } from './history/memory'
export { createWebHashHistory } from './history/hash'
export { createRouterMatcher, RouterMatcher } from './matcher'
export {
LocationQuery,
parseQuery,
stringifyQuery,
LocationQueryRaw,
LocationQueryValue,
LocationQueryValueRaw,
} from './query'
export { RouterHistory, HistoryState } from './history/common'
export { RouteRecord, RouteRecordNormalized } from './matcher/types'
export {
PathParserOptions,
_PathParserOptions,
} from './matcher/pathParserRanker'
export {
routeLocationKey,
routerViewLocationKey,
routerKey,
matchedRouteKey,
viewDepthKey,
} from './injectionSymbols'
export {
// route location
_RouteLocationBase,
LocationAsPath,
LocationAsRelativeRaw,
RouteQueryAndHash,
RouteLocationRaw,
RouteLocation,
RouteLocationNormalized,
RouteLocationNormalizedLoaded,
RouteParams,
RouteParamsRaw,
RouteParamValue,
RouteParamValueRaw,
RouteLocationMatched,
RouteLocationOptions,
RouteRecordRedirectOption,
// route records
_RouteRecordBase,
RouteMeta,
START_LOCATION_NORMALIZED as START_LOCATION,
RouteComponent,
// RawRouteComponent,
RouteRecordName,
RouteRecordRaw,
NavigationGuard,
NavigationGuardNext,
NavigationGuardWithThis,
NavigationHookAfter,
} from './types'
export {
createRouter,
Router,
RouterOptions,
RouterScrollBehavior,
} from './router'
export {
NavigationFailureType,
NavigationFailure,
isNavigationFailure,
} from './errors'
export { onBeforeRouteLeave, onBeforeRouteUpdate } from './navigationGuards'
export {
RouterLink,
useLink,
RouterLinkProps,
UseLinkOptions,
} from './RouterLink'
export { RouterView, RouterViewProps } from './RouterView'
export * from './useApi'
export * from './globalExtensions'
```
我们主要关注:
* `history`模块
* `matcher`模块
* `router`模块
* `RouterLink、RouterView`模块
* `navigationGuards`模块
## createRouter
我们一般使用时这样使用的:
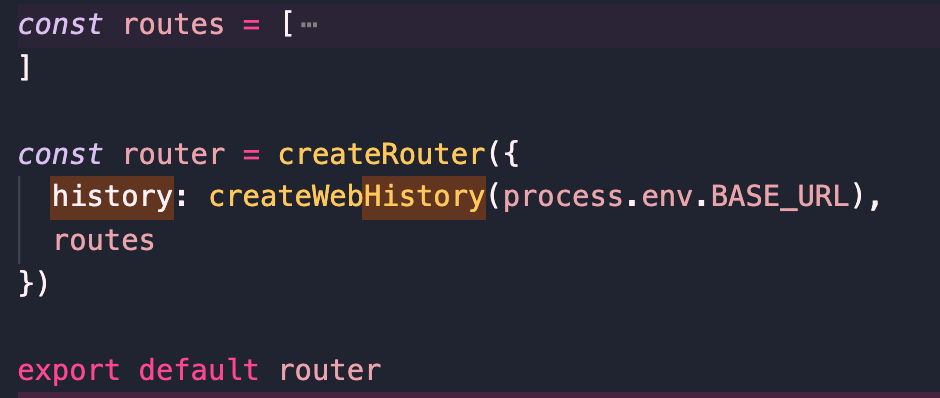
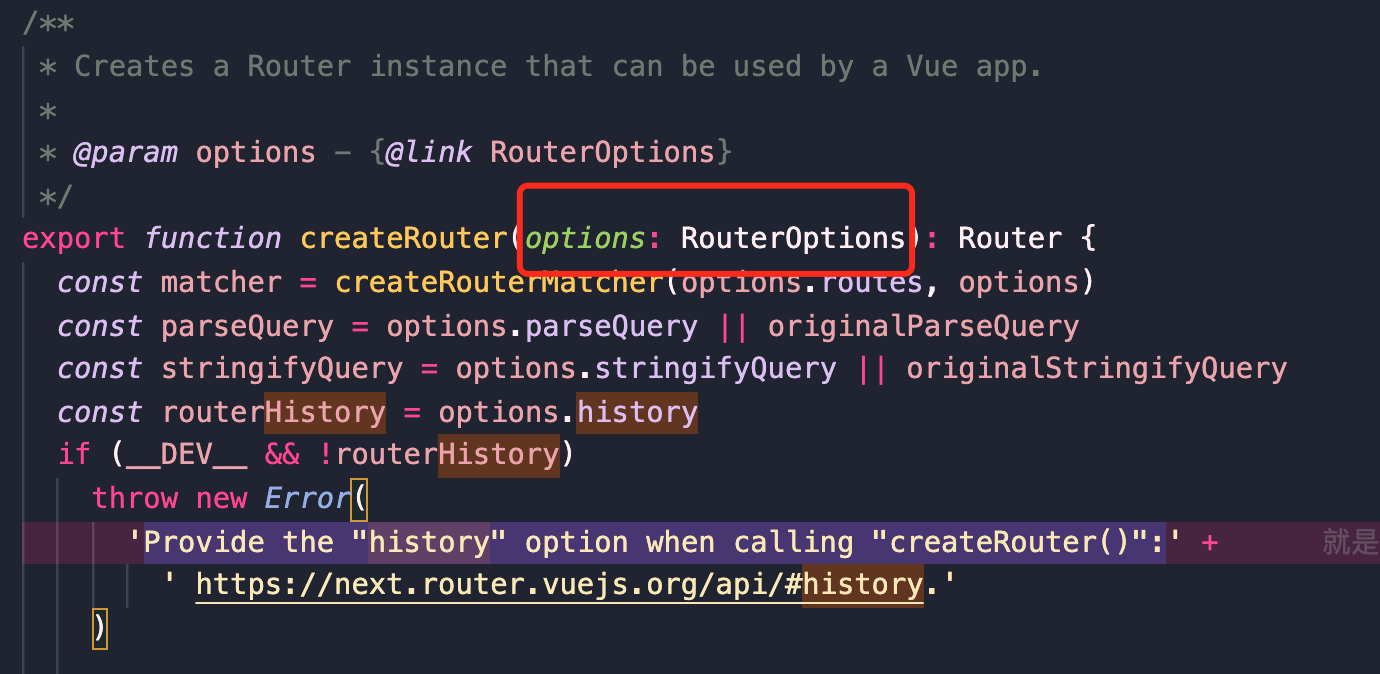
在入口文件中找到`createRouter`方法,它是通过`router`模块导出的,`router`模块源码路径为`src/router.ts`,在该文件中找到`createRouter`方法源码,传入`RouterOptions`类型的对象,然后返回一个`Router`实例,同时了提供了很多方法。
```
export function createRouter(options: RouterOptions): Router {
const router: Router = {
currentRoute,
addRoute,
removeRoute,
hasRoute,
getRoutes,
resolve,
options,
push,
replace,
go,
back: () => go(-1),
forward: () => go(1),
beforeEach: beforeGuards.add,
beforeResolve: beforeResolveGuards.add,
afterEach: afterGuards.add,
onError: errorHandlers.add,
isReady,
install(app: App) {
// ...
},
}
return router
}
```
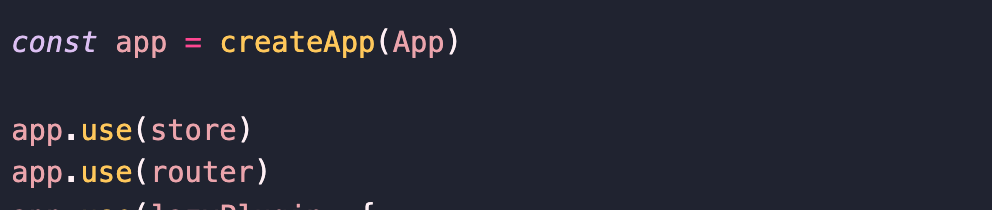
## install方法
当我们在vue main.js中 app.use(router)其实就是调用了 router中install方法,接受一个vue app实例作为参数。
```
const router = {
install(app) {
const router = this
// 注册路由组件
app.component('RouterLink', RouterLink)
app.component('RouterView', RouterView)
// 全局配置定义 $router 和 $route
app.config.globalProperties.$router = router
Object.defineProperty(app.config.globalProperties, '$route', {
get: () = >unref(currentRoute),
})
// 在浏览器端初始化导航
if (isBrowser &&
!started &&
currentRoute.value === START_LOCATION_NORMALIZED) {
// see above
started = true
push(routerHistory.location).
catch(err = >{
warn('Unexpected error when starting the router:', err)
})
}
// 路径变成响应式
const reactiveRoute = {}
for (let key in START_LOCATION_NORMALIZED) {
reactiveRoute[key] = computed(() = >currentRoute.value[key])
}
// 全局注入 router 和 reactiveRoute
app.provide(routerKey, router)
app.provide(routeLocationKey, reactive(reactiveRoute))
let unmountApp = app.unmount
installedApps.add(app)
// 应用卸载的时候,需要做一些路由清理工作
app.unmount = function() {
installedApps.delete(app)
if (installedApps.size < 1) {
removeHistoryListener()
currentRoute.value = START_LOCATION_NORMALIZED
started = false
ready = false
}
unmountApp.call(this, arguments)
}
}
}
```
简单说install做了几件事:
1. 引入vue, 注册RouterLink、RouterView为全局组件
2. 在浏览器端初始化导航
3. 路径变成响应式
4. 通过provide全局注入 router 和 reactiveRoute
5. 拦截vue实例的unmount方法,在unmount方法调用之前,先执行VueRouter相关的卸载工作
## createRouter的参数(RouterOptions)
这里的类型文件写的非常的清楚并且贴心的带了example(源码中直接复制过来的,有点又臭又长的的意思,但是实际很简单):
```
export interface RouterOptions extends PathParserOptions {
/**
* History implementation used by the router. Most web applications should use
* `createWebHistory` but it requires the server to be properly configured.
* You can also use a _hash_ based history with `createWebHashHistory` that
* does not require any configuration on the server but isn't handled at all
* by search engines and does poorly on SEO.
*
* @example
* ```js
* createRouter({
* history: createWebHistory(),
* // other options...
* })
* ```
*/
history: RouterHistory
/**
* Initial list of routes that should be added to the router.
*/
routes: RouteRecordRaw[]
/**
* Function to control scrolling when navigating between pages. Can return a
* Promise to delay scrolling. Check {@link ScrollBehavior}.
*
* @example
* ```js
* function scrollBehavior(to, from, savedPosition) {
* // `to` and `from` are both route locations
* // `savedPosition` can be null if there isn't one
* }
* ```
*/
scrollBehavior ? :RouterScrollBehavior
/**
* Custom implementation to parse a query. See its counterpart,
* {@link RouterOptions.stringifyQuery}.
*
* @example
* Let's say you want to use the package {@link https://github.com/ljharb/qs | qs}
* to parse queries, you can provide both `parseQuery` and `stringifyQuery`:
* ```js
* import qs from 'qs'
*
* createRouter({
* // other options...
* parse: qs.parse,
* stringifyQuery: qs.stringify,
* })
* ```
*/
parseQuery ? :typeof originalParseQuery
/**
* Custom implementation to stringify a query object. Should not prepend a leading `?`.
* {@link RouterOptions.parseQuery | parseQuery} counterpart to handle query parsing.
*/
stringifyQuery ? :typeof originalStringifyQuery
/**
* Default class applied to active {@link RouterLink}. If none is provided,
* `router-link-active` will be applied.
*/
linkActiveClass ? :string
/**
* Default class applied to exact active {@link RouterLink}. If none is provided,
* `router-link-exact-active` will be applied.
*/
linkExactActiveClass ? :string
/**
* Default class applied to non active {@link RouterLink}. If none is provided,
* `router-link-inactive` will be applied.
*/
// linkInactiveClass?: string
}
```
上面的参数:
* history:可以用createWebHistory创建也可以用createWebhashHistory
* `routes`:应该添加到路由的初始路由列表
其他的可选参数:
* `scrollBehavior`:在页面之间导航时控制滚动的函数。可以返回一个 `Promise` 来延迟滚动
* `parseQuery`:用于解析查询的自定义实现。必须解码查询键和值。参见对应的 `stringifyQuery`
* `stringifyQuery`:对查询对象进行字符串化的自定义实现。不应该在前面加上 ?。应该正确编码查询键和- 值。 `parseQuery` 对应于处理查询解析。
* `linkActiveClass`:用于激活的 `RouterLink` 的默认类。如果什么都没提供,则会使用 `router-link-active`
* `linkExactActiveClass`:用于精准激活的 `RouterLink` 的默认类。如果什么都没提供,则会使用 `router-link-exact-active`
### 其中options参数中的history的type是RouterHistory
定义如下
```
interface RouterHistory {
// 只读属性,基本路径,会添加到每个url的前面
readonly base: string
// 只读属性,当前路由
readonly location: HistoryLocation
// 只读属性,当前状态
readonly state: HistoryState
// 路由跳转方法
push(to: HistoryLocation, data?: HistoryState): void
// 路由跳转方法
replace(to: HistoryLocation, data?: HistoryState): void
// 路由跳转方法
go(delta: number, triggerListeners?: boolean): void
// 添加一个路由事件监听器
listen(callback: NavigationCallback): () => void
// 生成在锚点标签中使用的href的方法
createHref(location: HistoryLocation): string
// 清除listeners
destroy(): void
}
```
`options.history`参数为createWebHistory、createWebHashHistory、createMemoryHistory三种的其中一种。
`hash`和`history`路由模式,除了`base`的处理逻辑不同,其他属性或者方法使用的是共同的逻辑。
**1、createWebHashHistory**
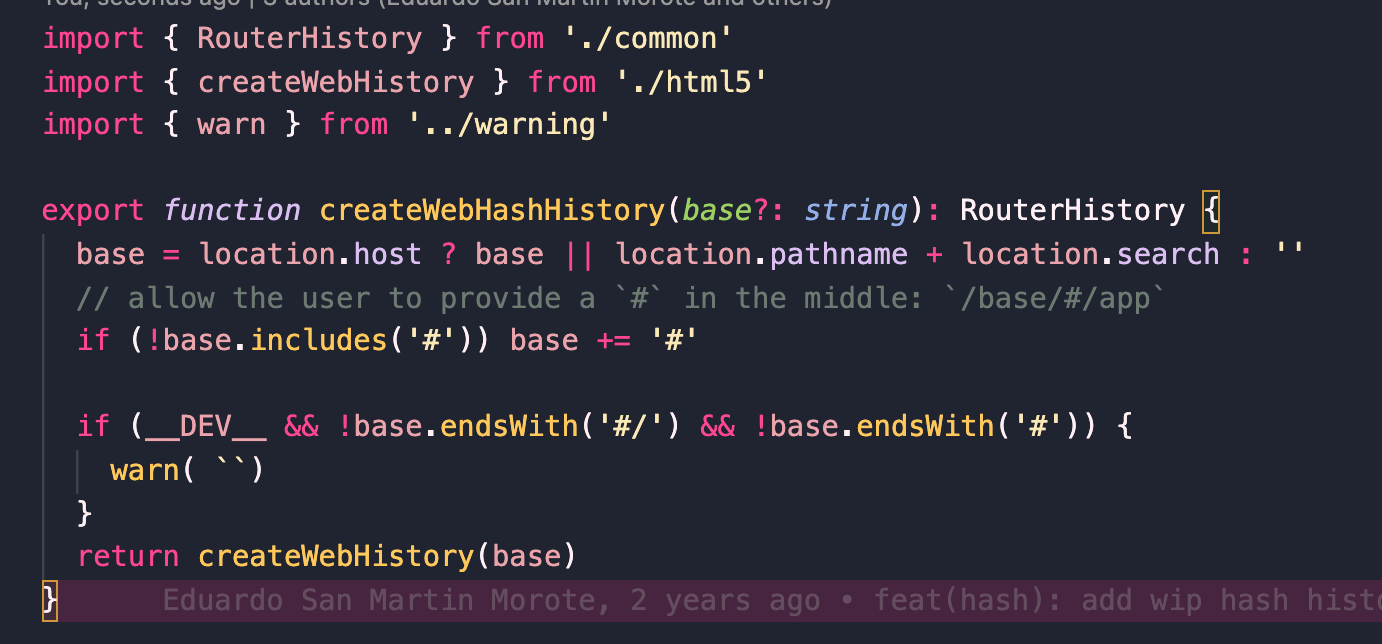
createWebHashHistory这个模式很简单,这是检测下有没有#号 没有就加上,然后调用createWebHistory(base),base为基本路径,其中重点分析还是createWebHistory
**2、createWebHistory**
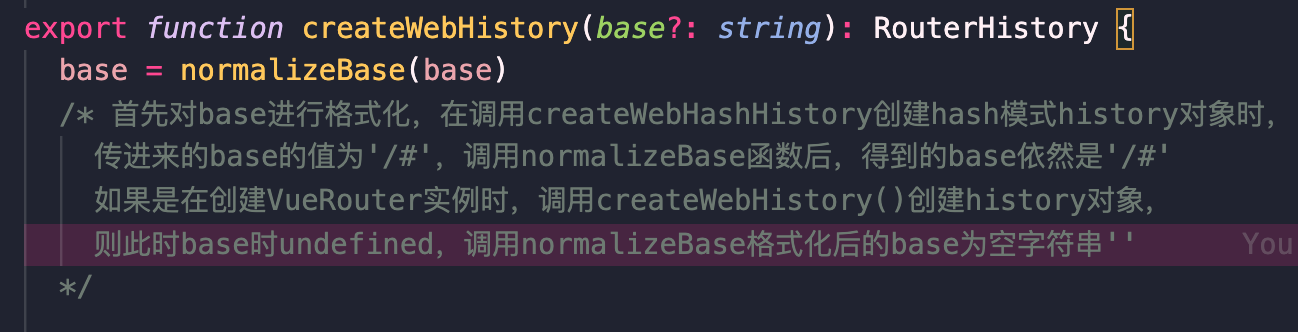
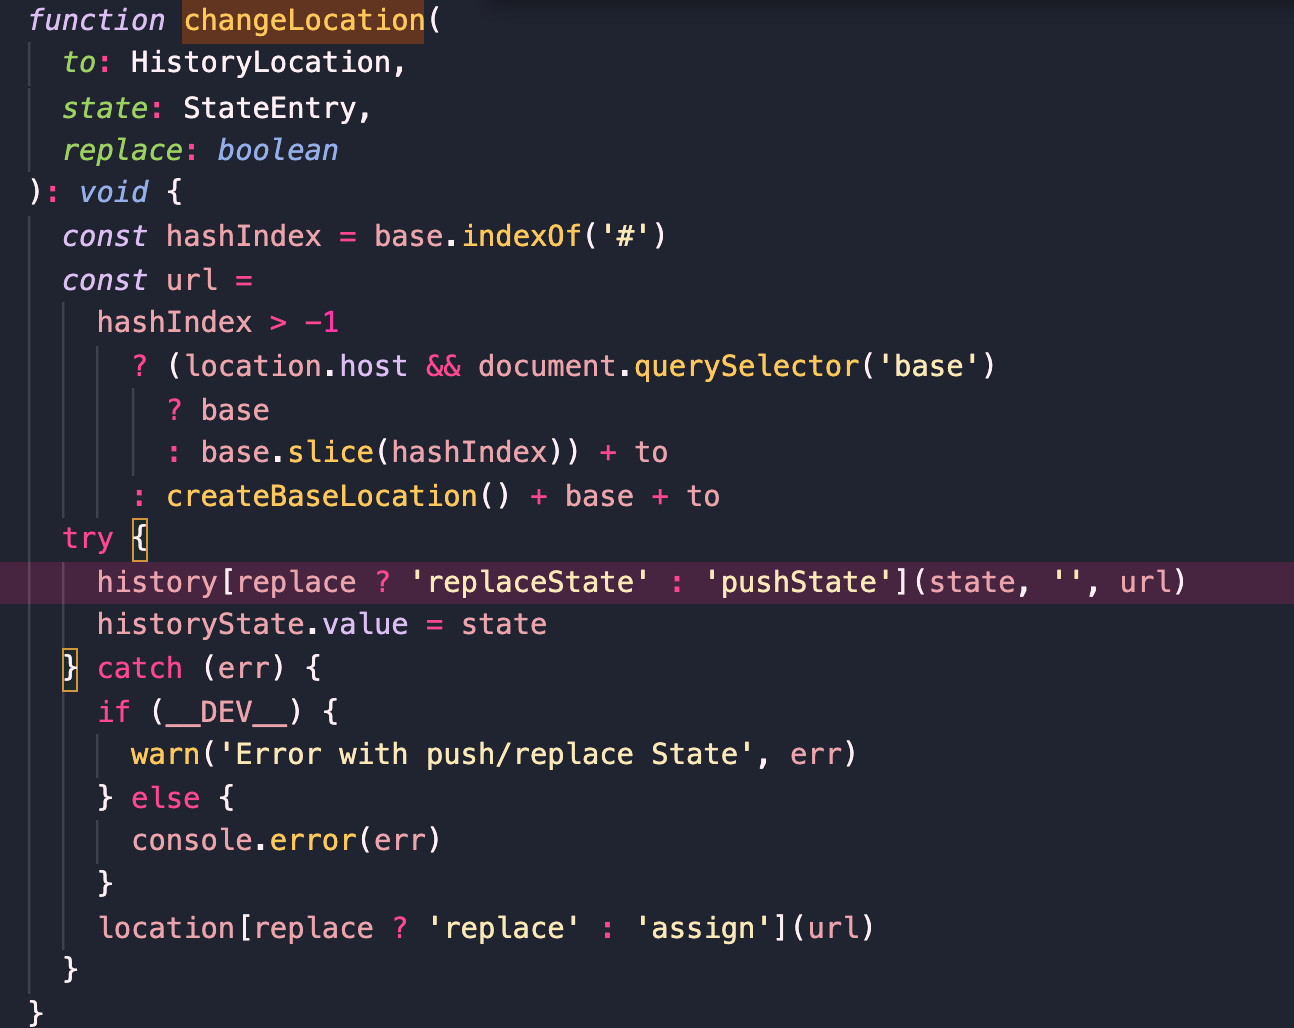
`changeLocation`方法。`changeLocation`方法十分重要,它是`push`方法和`replace`等路由跳转方法的实现基础。该方法包含三个参数:目标`location`、目标`state`对象、是否为替换当前`location`,这里发生错误都时候用location做了一个降级。
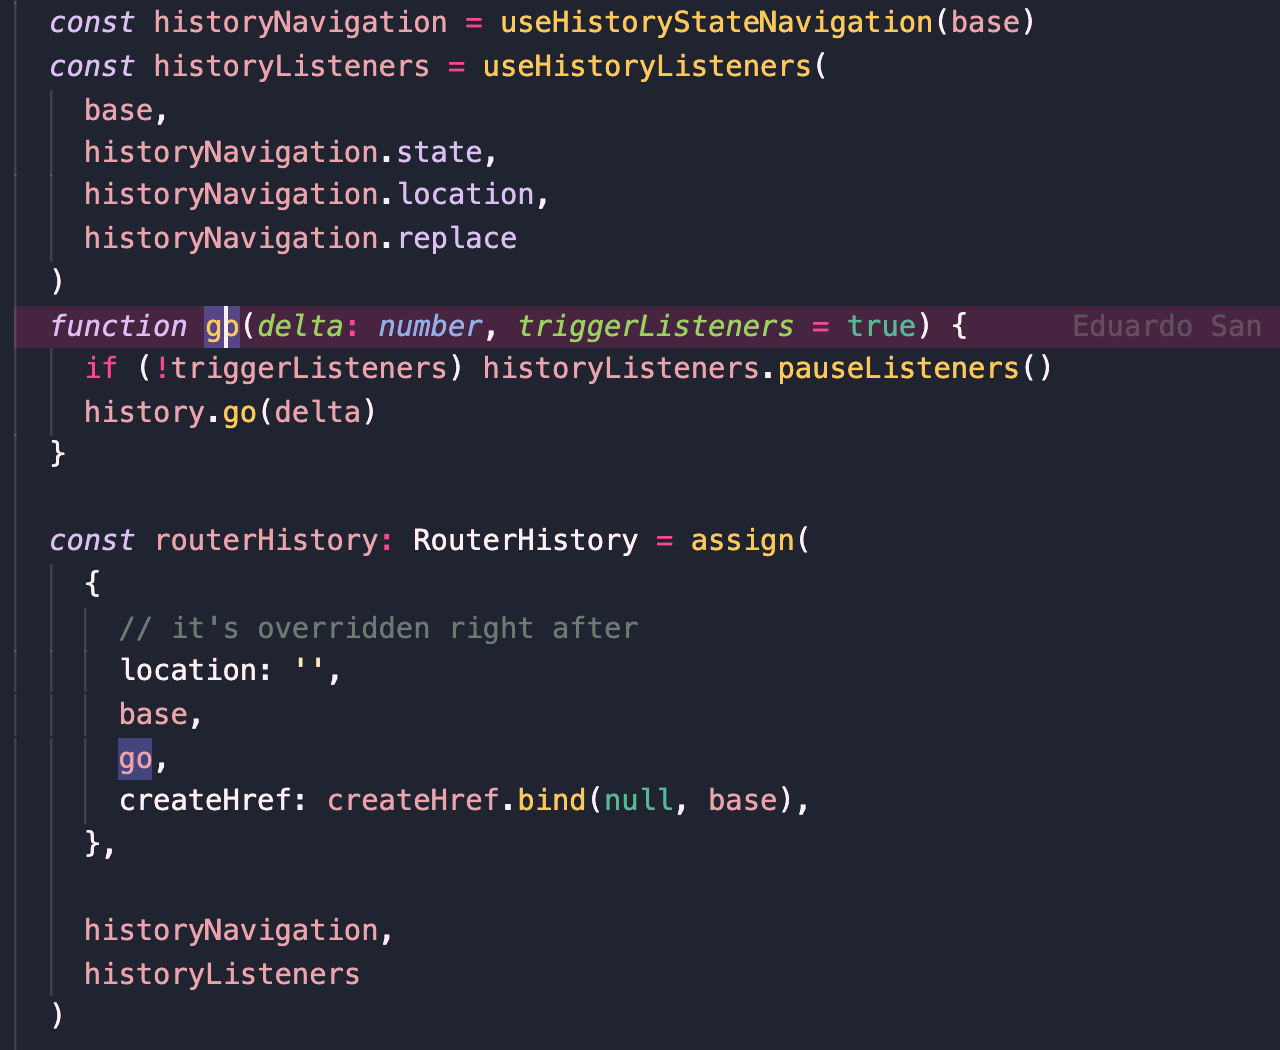
在createWebHistory的时候,执行了这样一句:
```
const historyListeners = useHistoryListeners(
base,
historyNavigation.state,
historyNavigation.location,
historyNavigation.replace)
```
其中useHistoryListeners的代码实现:
这里的listen方法由useHistoryListeners函数返回,在useHistoryListeners函数内部查看listen方法相关源码
~~~
function useHistoryListeners() {
let listeners: NavigationCallback[] = []
let teardowns: Array<() => void> = []
function listen(callback: NavigationCallback) {
listeners.push(callback)
const teardown = () => {
const index = listeners.indexOf(callback)
if (index > -1) listeners.splice(index, 1)
}
teardowns.push(teardown)
return teardown
}
return {
listen,
}
}
~~~
listen方法的作用是将传入的回调函数添加到listeners数组中,并返回移除函数,同时将移除函数添加到teardowns数组中,方便进行批量移除。

这里在useHistoryListeners中执行了这句,就是添加监听,同时执行posStateHandler,在posStateHandler中:
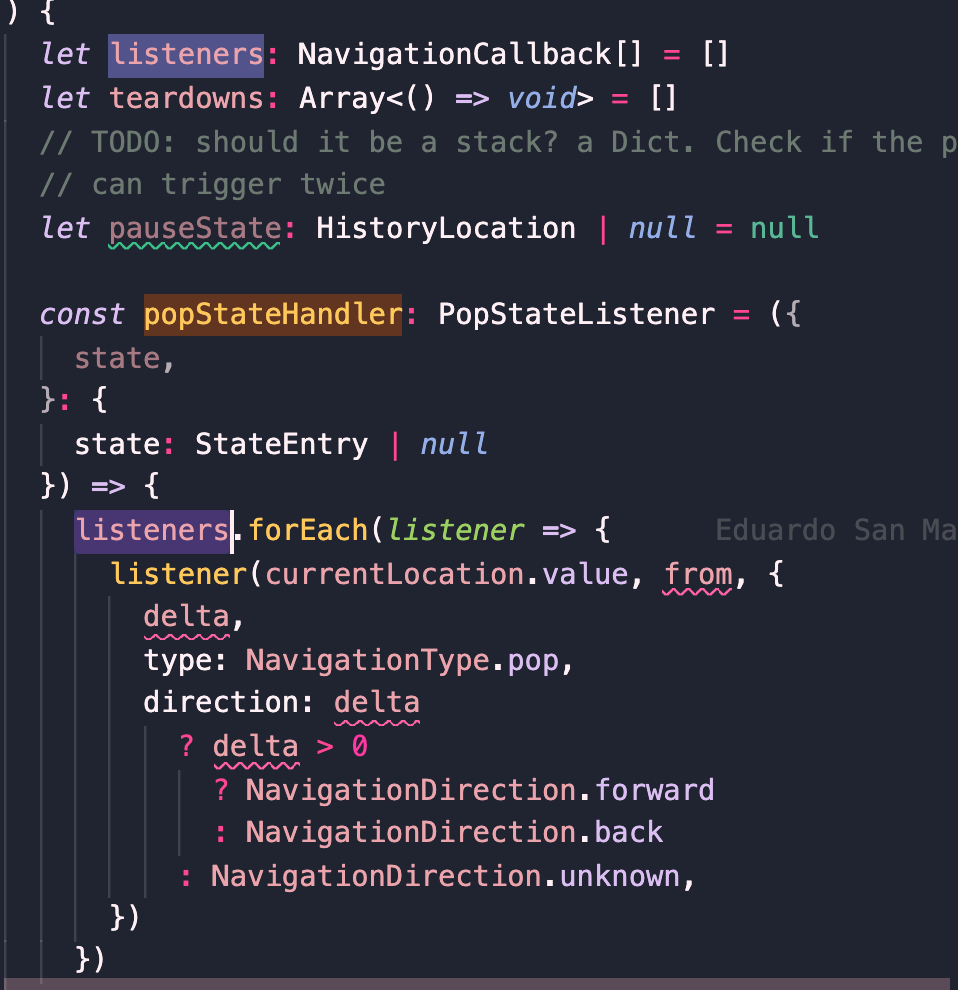
执行数组中的回调。
当用户操作浏览器导航按钮或者应用中调用了push/replace/go等方法时,都会触发该事件,调用此函数。除了更新某些对象值之外,这个函数的关键在于遍历listeners数组调用每一个注册的回调函数。
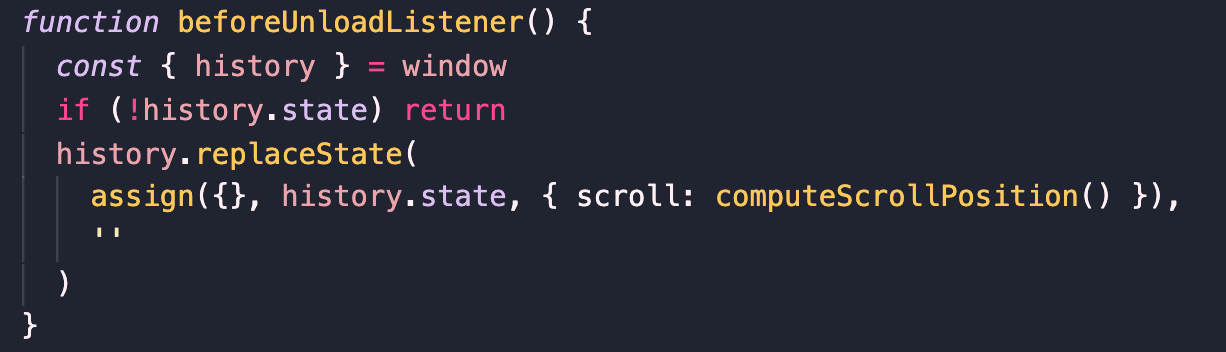
beforeunload事件当浏览器窗口关闭或者刷新时被触发,此时会调用beforeUnloadListener函数,该函数源码如下,主要作用是将当前滚动信息保存到当前历史记录实体中。
history和hash模式的差别在于base的处理,换句话可以说是浏览器url表现方式的差异,路由的跳转、事件的监听,都是基于history api。
# routes
回到createRouter方法中,可以看到该方法中只有一个地方用到了options.routes,它作为createRouterMatcher参数,执行后返回一个RouterMatcher类型的对象

createRouterMatcher函数的基本逻辑简化后的代码如下
~~~
function createRouterMatcher(
routes: RouteRecordRaw[],
globalOptions: PathParserOptions
): RouterMatcher {
const matchers: RouteRecordMatcher[] = []
const matcherMap = new Map<RouteRecordName, RouteRecordMatcher>()
globalOptions = mergeOptions(
{ strict: false, end: true, sensitive: false } as PathParserOptions,
globalOptions
)
function getRecordMatcher(name: RouteRecordName) {
// ...
}
function addRoute(
record: RouteRecordRaw,
parent?: RouteRecordMatcher,
originalRecord?: RouteRecordMatcher
) {
// ...
}
function removeRoute(matcherRef: RouteRecordName | RouteRecordMatcher) {
// ...
}
function getRoutes() {
// ...
}
function insertMatcher(matcher: RouteRecordMatcher) {
// ...
}
function resolve(
location: Readonly<MatcherLocationRaw>,
currentLocation: Readonly<MatcherLocation>
): MatcherLocation {
// ...
}
// add initial routes
routes.forEach(route => addRoute(route))
return { addRoute, resolve, removeRoute, getRoutes, getRecordMatcher }
}
~~~
该函数接收两个参数,第一个参数是路由配置数组,第二个参数是VueRouter初始化时传进来的options。然后声明两个变量matchers和matcherMap,然后是声明一系列方法,在return之前,遍历routes,通过addRoute方法,将路由配置转化为matcher。
- 前言
- 工作中的一些记录
- 破解快手直播间的webSocket的连接
- 快手「反」反爬虫的研究记录
- HTML AND CSS
- 遇到的一些还行的css笔试题
- css常见面试题
- JavaScript 深度剖析
- ES6到ESNext新特性
- 关于http与缓存
- 关于页面性能
- 关于浏览器的重排(reflow、layout)与重绘
- 手写函数节流
- 手写promise
- 手写函数防抖
- 手写图片懒加载
- 手写jsonp
- 手写深拷贝
- 手写new
- 数据结构和算法
- 前言
- 时间复杂度
- 栈
- 队列
- 集合
- 字典
- 链表
- 树
- 图
- 堆
- 排序
- 搜索
- Webpack
- Webpack原理与实践
- Vue
- Vuejs的Virtual Dom的源码实现
- minVue
- Vuex实现原理
- 一道关于diff算法的面试题
- Vue2源码笔记:源码目录设计
- vue-router源码分析(v4.x)
- React及周边
- 深入理解redux(一步步实现一个 redux)
- React常见面试题汇总
- Taro、小程序等
- TypeScript
- CI/CD
- docker踩坑笔记
- jenkins
- 最后