# 子向父传递数据
## 案例
>[success] 案例描述:单击按钮,操作父组件中的p元素显示或隐藏。
## 方式
1. 父组件通过v-on:自定义类型=”函数“
2. 子组件通过this.$emit(自定义事件名称)
## 步骤
1.在父组件上指定**自定义事件并且指定函数名称**。注意绑定事件对应的**函数名称不可以加括号**
:-: 
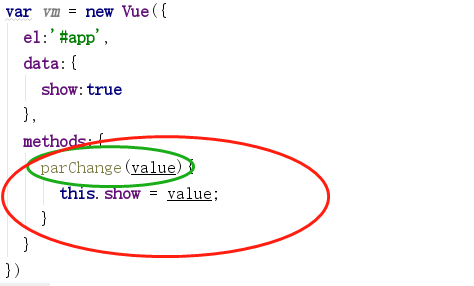
2.指定的函数名称书写在对应的组件环境的methods下。并且定义该功能时,一般都要传参。
:-: 
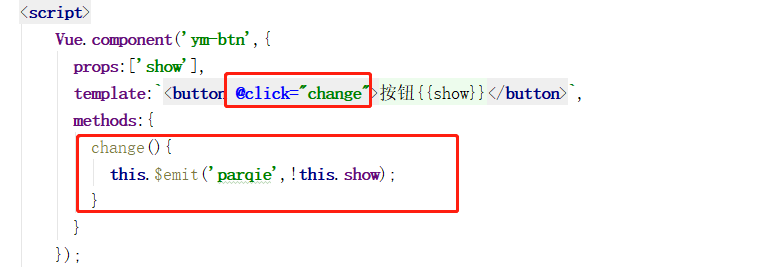
3.在子组件中正常绑定事件。并且在当前组件环境的methods下定义该功能change。
:-: 
4.对应的功能如何才能将父组件中的自定义事件对应的函数功能触发,通过**this.$emit('自定义事件名称',参数)**
:-: 
:-: 
## 代码
```
<div id="app">
<ym-btn @parqie="parChange" :show="show"></ym-btn>
<p v-show="show"></p>
</div>
<script src="js/vue.js"></script>
<script>
Vue.component('ym-btn',{
props:['show'],
template:`<button @click="change">按钮{{show}}</button>`,
methods:{
change(){
this.$emit('parqie',!this.show);
}
}
});
var vm = new Vue({
el:'#app',
data:{
show:true
},
methods:{
parChange(value){
this.show = value;
}
}
})
</script>
```
## 总结
1. 父组件通过v-on:自定义类型=”函数“
2. 子组件通过this.$emit(自定义事件名称)
