
[TOC]
>[success] # 路由详解(一)----基础篇
<br>
>[success] ## router-link组件
**router-link** 实际上是封装了一个 **a标签** ,他有一个 **to属性** , **to属性** 指定的 **值** 是一个 **路径(path)** , **router-link标签** 中可以写一些内容,例如:
~~~
<router-link to="/about">关于</router-link>
~~~
意思就是 **跳转到/about页面** ,前提,你的 **router > router.js** 中一定要 **配置** 好了这个 **about** 路由
>[success] ### to属性的路径讲解
**to属性** 里写的是 **要渲染的组件的的路径**,在 **router > router.js** 文件的 **路由列表** 中配置, **路由列表** 是一个 **数组** , **数组** 里面是 **路由对象** ,一个 **最基本** 的 **路由对象** 要有 **2** 个属性, **path** 和 **component**,而 **component** 可以有 **3种方式引入** 如下:
1. **.vue文件方式引入**
**router/router.js**
~~~
import Home from '@/views/Home'
export default [
{
path: '/', // 路径(URL上的路径)
name: 'home', // 命名路由会用到
component: Home // 指定要渲染的组件
},
{
path: '/about',
name: 'about',
// route level code-splitting
// this generates a separate chunk (about.[hash].js) for this route
// which is lazy-loaded when the route is visited.
component: () => import(/* webpackChunkName: "about" */ '@/views/About.vue')
}
]
~~~
也许你会发现 **路由列表** 中的 **第一个路由对象** 和 **第二个路由对象** 的 **component引入方式不同** , **第二种引入方式** 会起到一个 **懒加载** 的作用, **只有访问到这个页面的时候它才会去加载这个页面组件** ,这样就起到了一个 **优化的作用** ,【/* webpackChunkName: "about" */】这段 **注释** 的意思是打包时候会以 **about.[hash].js** 中间为 **哈希值** 的方式去打包 **命名文件名称**。
2. . **对象方式引入组件**
**router/router.js**
~~~
// 定义组件配置对象
const Home = {
template: '<div><h1 @click="test">我是Home组件,点击我</h1></div>',
data(){
return{
name: '鸣子嘎'
}
},
methods:{
test(){
alert(this.name)
}
}
}
const Login = { template: '<div>Login</div>' }
export default [
{
path: '/',
name: 'home',
component: Home,
},
{
path: '/login',
name: 'login',
component: Login
}
]
~~~
引入后可能会报错 **You are using the runtime-only build of Vue where the template compiler is not available** ,**解决方法** :修改 **vue.config.js** 文件的配置,只需要在 **module.exports** 中加入如下代码:
**vue.config.js**
~~~
module.exports = {
configureWebpack: {
resolve: {
alias: { // 别名
'vue$': 'vue/dist/vue.esm.js'
}
}
}
}
~~~
然后 **重启项目** 即可。
3. **Vue.extend()方式引入组件**
**router/router.js**
~~~
import Vue from 'vue'
// Vue.extend() 创建的组件构造器
const Home = Vue.extend({
template: '<div><h1 @click="test">我是Home1组件,点击我</h1></div>',
data(){
return{
name: '鸣子嘎'
}
},
methods:{
test(){
alert(this.name)
}
}
})
const Login = Vue.extend({ template: '<div>Login</div>' })
export default [
{
path: '/',
name: 'home',
component: Home,
},
{
path: '/login',
name: 'login',
component: Login
}
]
~~~
也需要像 **对象方式引入组件** 方式一样,在 **vue.config.js** 中进行配置。**Vue.extend()** 也可以 **注册全局组件**
**main.js**
~~~
import Vue from 'vue'
import App from './App.vue'
import router from './router'
import store from './store'
import './plugins/element.js'
Vue.config.productionTip = false
// vue构造器创建子类
const btn = Vue.extend({ template: '<button>我是按钮</button>' })
// 注册全局组件
Vue.component('btn', Login)
new Vue({
router,
store,
render: h => h(App)
}).$mount('#app')
~~~
页面中可以直接使用 **btn** 组件
>[success] ## router-view组件
**router-view** 是 **视图组件** , **点击router-link跳转的页面,都会在router-view组件中显示呈现在页面上**。
>[success] ## 路由配置
接下来开始讲解路由的配置
>[success] ### 动态路由(路由传参)
这里 **动态路由** 的意思是 **同一个页面根据不同的参数来判断处理不同的逻辑**,实际上就是 **路由传参**。
>[success] #### 字符串模板拼接path传参
1. 首先在 **router.js** 中给 **路由对象** 的 **path属性拼接参数** 。
**router.js**
~~~
import Home from '@/views/Home'
export default [
{
path: '/',
name: 'home',
component: Home
},
{
path: '/about/:name/:age', // 1. 拼接参数
name: 'about',
component: () => import('@/views/About.vue'),
}
~~~
2. 在 **Home.vue** 中点击按钮时,用 **$router.push** 方式跳转页面,给 **path属性** 用 **字符串模板拼接参数** 来 **传参**。
**Home.vue**
~~~
<template>
<div>
<button @click="handleClick">点击我跳转About页面</button>
</div>
</template>
<script>
export default {
data(){
return{
name: '小明',
age: '18'
}
},
methods: {
handleClick(){
this.$router.push({ // 2. 用字符串模板拼接来实现(params)
path: `/about/${ this.name }/${ this.age }`,
})
}
}
}
</script>
~~~
3. 在 **About.vue** 页面这样使用参数
**About.vue**
~~~
<template>
<div>
我的名字叫{{ $route.params.name }},今年{{ $route.params.age }}岁
</div>
</template>
~~~
4. **需要注意** :
4.1 如果在 **传参** 时, **少写、漏写、多写** 参数(与 **router.js** 中的 **路由对象** 的 **参数个数不匹配**),像这样: **path: `/about/${ this.name }**,跳转的页面就会不显示内容。
4.2 **该传参方式页面刷新时参数不会丢失**。
4.3 不可以像下面这样使用:
~~~
this.$router.push({
path: `/argu`,
params: {
name: this.name
}
})
~~~
上面的例子中既使用了 **path** 也使用了 **params** , 这时 **params** 是 **无效的** ,它会忽略 **params**。
>[success] #### params传参
1. **params**跟**字符串模板拼接方式**的不同点就是**Home.vue**页面的传参写法不一样。
**Home.vue**
~~~
handleClick(){
this.$router.push({ // 2. params方式传参
name: 'about',
params: {
name: this.name,
age: this.age
}
})
}
~~~
2. **需要注意** :
2.1 **params** 在 **传参** 时,**少写、漏写、多写** 参数,跳转的页面还会正常打开,只不过**用到参数的地方没有值**。
2.2 如果 **router.js** 中 **路由对象** 的 **path属性** 中不 **拼接参数**,在用到 **参数**的页面, **刷新页面时,参数会丢失**。
>[success] #### query传参
1. **query** 方式传参跟上面 **2** 种方式不同, **router.js** 中的 **路由对象** 的 **path属性** 不需要 **拼接参数**。
**router.js**
~~~
import Home from '@/views/Home'
export default [
{
path: '/',
name: 'home',
component: Home
},
{
path: '/about',
name: 'about',
component: () => import('@/views/About.vue'),
}
~~~
2. 在 **Home.vue** 中点击按钮时,用 **$router.push.query** 方式跳转页面 **传参** 。
**Home.vue**
~~~
<template>
<div>
<button @click="handleClick">点击我跳转About页面</button>
</div>
</template>
<script>
export default {
data(){
return{
name: '小明',
age: '18'
}
},
methods: {
handleClick(){
this.$router.push({ // 1. query方式传参
name: 'about',
query: {
name: this.name,
age: this.age
}
})
}
}
}
</script>
~~~
3. 在**About.vue**页面这样使用参数
~~~
<template>
<div>
我的名字叫{{ $route.query.name }},今年{{ $route.query.age }}岁
</div>
</template>
~~~
4. **需要注意** :
4.1 **query**在**传参**时, **少写、漏写、多写** 参数,跳转的页面还会正常打开,只不过**用到参数的地方没有值**。
4.2 **query** 方式传参, **页面刷新时参数不会丢失** 。
4.3 如果通过 **query** 的方式传递 **对象或数组**,在 **浏览器URL地址栏** 中会被强制转换成 \[object Object\],**刷新后也获取不到对象值** ,此时可以通过 **JSON.stringify()** 方法将要传递的参数转换为字符串传递,在详情页再通过 **JSON.parse()** 转换成对象。
>[info] #### 动态路由总结
1. **3种传参方式** , **url** 的显示方式。
~~~
// "字符串模板拼接" 和 "params" (路由对象的path属性拼接参数时)的 url 显示方式
http://localhost:8080/#/about/小明/18
// params方式传参(路由对象的path属性不拼接参数时),url显示方式
http://localhost:8080/#/about
// query方式url显示方式
http://localhost:8080/#/about?name=小明&age=18
~~~
>[success] ### 嵌套路由
在实际开发中有可能会有一种需求 **需要多层嵌套组件(组件中嵌入组件)** ,就可以使用 **嵌套路由** 。
**router.js**
~~~
export default [
{
path: '/parent',
component: () => import('@/views/parent.vue'),
children: [ // parent页面的子页面路由列表
{
path: 'child', // 这里不需要写斜线 '/child'
component: () => import('@/views/child.vue'),
}
]
}
]
~~~
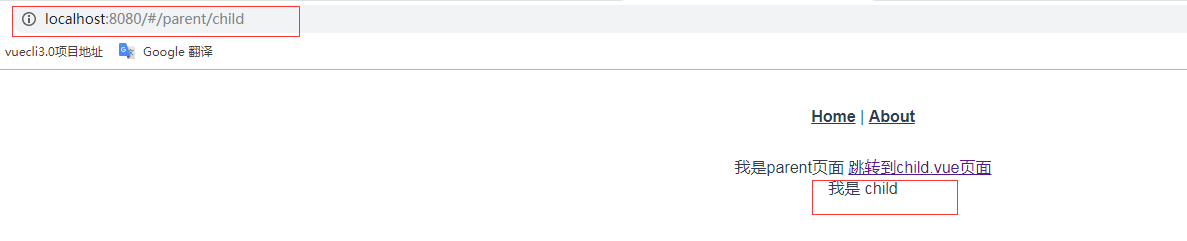
**父页面 parent.vue**
~~~
<template>
<div>
我是parent页面
<router-link to="parent/child">跳转到child.vue页面</router-link>
<router-view /> // router-view视图组件,可以显示router-link点击的页面
</div>
</template>
<script>
export default {
//
}
</script>
~~~
**子页面 child.vue**
~~~
<template>
<div>
我是 child
</div>
</template>
<script>
export default {
//
}
</script>
~~~
点击 **router-link** 后就会像下面图片显示:
>[success] ### 命名路由
所谓 **命名路由** 就是在 **router.js** 中的 **路由列表** 的 **路由对象** 中添加 **name属性**,在 **router-link标签** 中使用 **命名路由** ,只需要给 **router-link标签** 的 **to属性** 传入一个 **对象** ,例子如下:
**router.js**
~~~
import Home from '@/views/Home'
export default [
{
path: '/',
name: 'home', // 在这里添加name属性
component: Home
},
{
path: '/about',
name: 'about',
component: () => import(/* webpackChunkName: "about" */ '@/views/About.vue')
}
]
~~~
**app.vue**
~~~
<template>
<div id="app">
<!-- 命名路由 -->
<router-link :to="{ name: 'about' }">About</router-link>
<!-- router-view中显示router-link点击后显示的页面 -->
<router-view/>
</div>
</template>
~~~
上面有一个知识点, **router-link标签** 是因为里面需要写 **文字内容**所以写了 **闭合标签** ,如果组件中没有 **插槽或文字** 可以只写 **单标签**。
>[success] ### 命名视图
如果我们在一个 **.vue文件** 中有多个 **视图 (router-view标签)** ,让 **每一个视图显示指定的.vue文件** 应该怎么做呢?
**app.vue**
~~~
<template>
<div id="app">
<router-link to="/named_view">点击我显示命名视图</router-link>
<!-- 命名视图 -->
<router-view/>
<router-view name="email"/>
<router-view name="tel"/>
</div>
</template>
~~~
**router.js**
~~~
import Home from '@/views/Home'
export default [
{
path: '/',
name: 'home',
component: Home
},
{
path: '/named_view', // 路径(这里的路指的是浏览器上url后拼接的路由路径,而不是文件路径)
components: { // 注意这里是【components】不是【component】,是有【s】的
default: () => import('@/views/child.vue'), // 会在App.vue中的<router-view/>中显示
email: () => import('@/views/email.vue'), // 会在App.vue中的<router-view name="email"/>中显示
tel: () => import('@/views/tel.vue'), // 会在App.vue中的<router-view name="tel"/>中显示
}
}
]
~~~
只要点击 **router-link按钮** , **app.vue** 页面的 **router-view**中就会对应 **显示** 各自 **name** 对应的 **.vue文件**。
>[success] ## 重定向
**重定向** 可以 **把我们当前访问的URL重定向(重新跳转)** 到另一个 **URL**页面
1. 通过 **path路径** 进行 **重定向**
~~~
import Home from '@/views/Home'
export default [
{
path: '/',
name: 'home',
component: Home
},
{
path: '/main',
redirect: '/' // 这里输入的是路由的 "path" 属性,斜杠代表重新跳转到 "home" 页面
}
]
~~~
2. 通过 **name命名路由** 进行 **重定向**
~~~
{
path: '/main',
redirect: { // 用 "命名路由" 的形式来访问home页面,和上面效果是一样的
name: 'home'
}
}
~~~
3. 通过 **函数** 进行 **重定向**, **函数** 里面可以实现一些 **判断的逻辑**,例如 **根据路由的参数来判断跳转到哪些页面**
~~~
{
path: '/main',
redirect: to => {
console.log(JSON.stringify(to))
}
}
// 打印结果,要跳转的页面的信息
{
"meta": {},
"path": "/main",
"hash": "",
"query": {},
"params": {},
"fullPath": "/main",
"matched": [
{
"path": "/main",
"regex": {
"keys": []
},
"components": {},
"instances": {},
"meta": {},
"props": {}
}
]
}
~~~
使用方法如下:
1. 通过 **path方式** 跳转,返回一个 **字符串路径** 即可
~~~
{
path: '/main',
redirect: to => {
return '/about'
}
}
// 箭头函数简写
{
path: '/main',
redirect: to => '/about'
}
~~~
2. 通过 **name命名路由** 跳转,返回一个带有 **name属性** 的 **对象**
~~~
{
path: '/main',
redirect: to => {
return {
name: 'about'
}
}
}
~~~
>[success] ## 别名
**别名** 顾名思义,给 路由** 起一个 **新的名字**, **访问这个新的名字跟访问原来的名字效果一样** ,**别名** 定义方法,只需要在 **路由列表对象** 中声明 **alias** 属性 ,然后在 **浏览器URL** 中访问该属性即可。
**router.js**
~~~
import Home from '@/views/Home'
export default [
{
path: '/',
name: 'home',
alias: '/home_page', // 访问该路径也可以跳转到home页
component: Home
}
~~~
>[success] ## 编程式导航
**编程式导航:通过js进行控制页面跳转**。
>[success] ### 返回上一页和前进一页
**home.vue**
~~~
<template>
<div>
<button @click="handleClick">返回上一页</button>
</div>
</template>
<script>
export default {
methods: {
handleClick(){
this.$router.go(-1) // 返回上一页
// 等同于
// this.$router.back() // 返回上一页
// this.$router.go(1) // 前进一页
}
}
};
</script>
~~~
>[success] ### push 跳转到指定页面
**home.vue**
~~~
<template>
<div>
<button @click="handleClick">跳转到parent页面</button>
</div>
</template>
<script>
export default {
methods: {
handleClick(){
this.$router.push('/parent')
// 等同于
// this.$router.push({
// name: 'parent'
// })
}
}
}
</script>
~~~
>[success] ### replace 替换页面
1. **push**:使用 **push方法** 时候 **会在浏览历史里面加一个记录**, **后退的时候就会后退到这个页面**。
2. **replace**: 使用 **replace方法** ,在 **后退** 的时候就会回到 **replace方法指定的这个页面**
3. **替换规则** :例如:把 **路由** 每次的 **前进、后退** 的页面用 **$push()** 方法储存到一个 **数组** 中,如下:
~~~
['/a', '/b', '/c']
假如路由已经用 'puth' 方法 '依次跳转' 了以上'3'个页面,揭下来用 'replace' 方法跳转到 '/d'
页面,此时不会向数组中添加 '/d'页面,因为 'replace' 方法 '不会添加访问记录'
['/a', '/b', '/d']
而且 '返回上一页' 时,只能访问到 '/b' 页面,因为 '新的页面不会push新的记录,而是把最后的记录替换掉',
所以返回上一页时是 '/b' 页面
~~~
**使用案例**
~~~
<template>
<div>
<button @click="handleClick">替换页面</button>
</div>
</template>
<script>
export default {
methods: {
handleClick(){
this.$router.replace('/parent')
// 等同于
// this.$router.replace({
// name: 'parent'
// })
}
}
}
</script>
~~~
>[warning] ## 注意事项
这里要 **特别注意** 在 **获取参数** 的时候是 **$route.params** 而不是 **$router** 这很重要。
>[warning] ## 后期补充(该项后期删除)
1. 以上几种**路由**的**应用场景**
2. **命名视图**以及**嵌套路由**可不可以在除了**app.vue**之外的页面使用?
3. 对照一遍**vue-router**文档
搜索 后期
- vue 26课
- Vue-cli3.0项目搭建
- Vue-ui 创建cli3.0项目
- Vue-ui 界面详解
- 项目目录详解
- public文件夹
- favicon.ico
- index.html
- src文件夹
- api文件夹
- assets文件夹
- components文件夹
- config文件夹
- directive文件夹
- lib文件夹
- mock文件夹
- mock简明文档
- router文件夹
- store文件夹
- views文件夹
- App.vue
- main.js
- .browserslistrc
- .editorconfig
- .eslintrc.js
- .gitignore
- babel.config.js
- package-lock.json
- package.json
- postcss.config.js
- README.en.md
- README.md
- vue.config.js
- Vue Router
- 路由详解(一)----基础篇
- 路由详解(二)----进阶篇
- Vuex
- Bus
- Vuex-基础-state&getter
- Vuex-基础-mutation&action/module
- Vuex-进阶
- Ajax请求
- 解决跨域问题
- 封装axios
- Mock.js模拟Ajax响应
- 组件封装
- 从数字渐变组件谈第三方JS库使用
- 从SplitPane组件谈Vue中如何【操作】DOM
- 渲染函数和JSX快速掌握
- 递归组件的使用
- 登陆/登出以及JWT认证
- 响应式布局
- 可收缩多级菜单的实现
- vue杂项
- vue递归组件
- vue-cli3.0多环境打包配置
- Vue+Canvas实现图片剪切
- vue3系统入门与项目实战
- Vue语法初探
- 初学编写 HelloWorld 和 Counter
- 编写字符串反转和内容隐藏功能
- 编写TodoList功能了解循环与双向绑定
- 组件概念初探,对 TodoList 进行组件代码拆分
- Vue基础语法
- Vue 中应用和组件的基础概念
- 理解 Vue 中的生命周期函数
- 常用模版语法讲解
- 数据,方法,计算属性和侦听器
- 样式绑定语法
- 条件渲染
- 列表循环渲染
- 事件绑定
- 表单中双向绑定指令的使用
- 探索组件的理念
- 组件的定义及复用性,局部组件和全局组件
- 组件间传值及传值校验
- 单向数据流的理解
- Non-Props 属性是什么
- 父子组件间如何通过事件进行通信
- 组件间双向绑定高级内容
- 使用匿名插槽和具名插槽解决组件内容传递问题
- 作用域插槽
- 动态组件和异步组件
- 基础语法知识点查缺补漏
- Vue 中的动画
- 使用 Vue 实现基础的 CSS 过渡与动画效果
- 使用 transition 标签实现单元素组件的过渡和动画效果
- 组件和元素切换动画的实现
- 列表动画
- 状态动画
- Vue 中的高级语法
- Mixin 混入的基础语法
- 开发实现 Vue 中的自定义指令
- Teleport 传送门功能
- 更加底层的 render 函数
- 插件的定义和使用
- 数据校验插件开发实例
- Composition API
- Setup 函数的使用
- ref,reactive 响应式引用的用法和原理
- toRef 以及 context 参数
- 使用 Composition API 开发TodoList
- computed方法生成计算属性
- watch 和 watchEffect 的使用和差异性
- 生命周期函数的新写法
- Provide,Inject,模版 Ref 的用法
- Vue 项目开发配套工具讲解
- VueCLI 的使用和单文件组件
- 使用单文件组件编写 TodoList
- Vue-Router 路由的理解和使用
- VueX 的语法详解
- CompositionAPI 中如何使用 VueX
- 使用 axios 发送ajax 请求
- Vue3.0(正式版) + TS
- 你好 Typescript: 进入类型的世界
- 什么是 Typescript
- 为什么要学习 Typescript
- 安装 Typescript
- 原始数据类型和 Any 类型
- 数组和元组
- Interface- 接口初探
- 函数
- 类型推论 联合类型和 类型断言
- class - 类 初次见面
- 类和接口 - 完美搭档
- 枚举(Enum)
- 泛型(Generics) 第一部分
- 泛型(Generics) 第二部分 - 约束泛型
- 泛型第三部分 - 泛型在类和接口中的使用
- 类型别名,字面量 和 交叉类型
- 声明文件
- 内置类型
- 总结