
# 1. 前言
借助`CollapsingToolbarLayout`实现一个可折叠式标题栏的效果。顾名思义,`CollapsingToolbarLayout`是一个作用于`Toolbar`基础之上的布局,它也是由`Material`库提供的。`CollapsingToolbarLayout`可以让`Toolbar`的效果变得更加丰富,不仅仅是展示一个标题栏,而且能够实现非常华丽的效果。不过,`CollapsingToolbarLayout`是不能独立存在的,它在设计的时候就被限定只能作为`AppBarLayout`的直接子布局来使用。而`AppBarLayout`又必须是`CoordinatorLayout`的子布局。
# 2. 使用
这里梳理一下:
- 使用`CoordinatorLayout`作为最外层布局;
- 在`CoordinatorLayout`中嵌套一个`AppBarLayout`,宽度指定为`match_parent`,高度指定为`250dp`;
- 在`AppBarLayout`中再嵌套一个`CollapsingToolbarLayout`;
也就是:
~~~
<?xml version="1.0" encoding="utf-8"?>
<androidx.coordinatorlayout.widget.CoordinatorLayout xmlns:android="http://schemas.android.com/apk/res/android"
xmlns:app="http://schemas.android.com/apk/res-auto"
xmlns:tools="http://schemas.android.com/tools"
android:layout_width="match_parent"
android:layout_height="match_parent"
tools:context=".MainActivity">
<com.google.android.material.appbar.AppBarLayout
android:layout_width="match_parent"
android:layout_height="250dp">
<com.google.android.material.appbar.CollapsingToolbarLayout
android:layout_width="match_parent"
android:layout_height="match_parent"
android:theme="@style/ThemeOverlay.AppCompat.Dark.ActionBar"
app:contentScrim="@color/gray"
app:layout_scrollFlags="scroll|exitUntilCollapsed">
<!--ImageView-->
<ImageView
android:layout_width="match_parent"
android:layout_height="match_parent"
android:scaleType="centerCrop"
android:src="@drawable/icon"
app:layout_collapseMode="parallax" />
<!-- Toolbar -->
<androidx.appcompat.widget.Toolbar
android:id="@+id/toolbar"
android:layout_width="match_parent"
android:layout_height="?attr/actionBarSize"
android:background="@color/teal_200"
app:layout_collapseMode="pin" />
</com.google.android.material.appbar.CollapsingToolbarLayout>
</com.google.android.material.appbar.AppBarLayout>
</androidx.coordinatorlayout.widget.CoordinatorLayout>
~~~
`app:layout_collapseMode`用于指定当前控件在`CollapsingToolbarLayout`折叠过程中的折叠模式,其中`Toolbar`指定成`pin`,表示在折叠的过程中位置始终保持不变,`ImageView`指定成`parallax`,表示会在折叠的过程中产生一定的错位偏移。
为了测试,不妨在其下放置一个可以滚动的列表,然后达到可以滚动,比如下面的案例:
~~~
<?xml version="1.0" encoding="utf-8"?>
<androidx.coordinatorlayout.widget.CoordinatorLayout xmlns:android="http://schemas.android.com/apk/res/android"
xmlns:app="http://schemas.android.com/apk/res-auto"
xmlns:tools="http://schemas.android.com/tools"
android:layout_width="match_parent"
android:layout_height="match_parent"
tools:context=".MainActivity">
<com.google.android.material.appbar.AppBarLayout
android:layout_width="match_parent"
android:layout_height="150dp">
<com.google.android.material.appbar.CollapsingToolbarLayout
android:layout_width="match_parent"
android:layout_height="match_parent"
android:theme="@style/ThemeOverlay.AppCompat.Dark.ActionBar"
app:contentScrim="@color/white"
app:layout_scrollFlags="scroll|exitUntilCollapsed">
<!--ImageView-->
<ImageView
android:layout_width="match_parent"
android:layout_height="match_parent"
android:scaleType="centerCrop"
android:src="@drawable/icon"
app:layout_collapseMode="parallax" />
<!-- Toolbar -->
<androidx.appcompat.widget.Toolbar
android:id="@+id/toolbar"
android:layout_width="match_parent"
android:layout_height="?attr/actionBarSize"
android:background="@color/teal_200"
app:layout_collapseMode="pin" />
</com.google.android.material.appbar.CollapsingToolbarLayout>
</com.google.android.material.appbar.AppBarLayout>
<androidx.core.widget.NestedScrollView
android:layout_width="match_parent"
android:layout_height="match_parent"
app:layout_behavior="@string/appbar_scrolling_view_behavior"
>
<LinearLayout
android:layout_width="match_parent"
android:layout_height="wrap_content"
android:orientation="vertical"
>
<com.google.android.material.card.MaterialCardView
android:layout_width="match_parent"
android:layout_height="200dp">
<ImageView
android:layout_width="match_parent"
android:layout_height="match_parent"
android:src="@drawable/icon"
android:scaleType="centerCrop"
/>
</com.google.android.material.card.MaterialCardView>
</LinearLayout>
</androidx.core.widget.NestedScrollView>
</androidx.coordinatorlayout.widget.CoordinatorLayout>
~~~
结果很容易就达到了收缩和放大的`ActionBar`效果。如下图:
非完全展开:
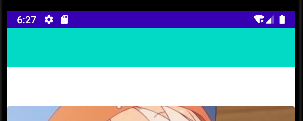
完全展开:

- 介绍
- UI
- MaterialButton
- MaterialButtonToggleGroup
- 字体相关设置
- Material Design
- Toolbar
- 下拉刷新
- 可折叠式标题栏
- 悬浮按钮
- 滑动菜单DrawerLayout
- NavigationView
- 可交互提示
- CoordinatorLayout
- 卡片式布局
- 搜索框SearchView
- 自定义View
- 简单封装单选
- RecyclerView
- xml设置点击样式
- adb
- 连接真机
- 小技巧
- 通过字符串ID获取资源
- 自定义View组件
- 使用系统控件重新组合
- 旋转菜单
- 轮播图
- 下拉输入框
- 自定义VIew
- 图片组合的开关按钮
- 自定义ViewPager
- 联系人快速索引案例
- 使用ListView定义侧滑菜单
- 下拉粘黏效果
- 滑动冲突
- 滑动冲突之非同向冲突
- onMeasure
- 绘制字体
- 设置画笔Paint
- 贝赛尔曲线
- Invalidate和PostInvalidate
- super.onTouchEvent(event)?
- setShadowLayer与阴影效果
- Shader
- ImageView的scaleType属性
- 渐变
- LinearGradient
- 图像混合模式
- PorterDuffXfermode
- 橡皮擦效果
- Matrix
- 离屏绘制
- Canvas和图层
- Canvas简介
- Canvas中常用操作总结
- Shape
- 圆角属性
- Android常见动画
- Android动画简介
- View动画
- 自定义View动画
- View动画的特殊使用场景
- LayoutAnimation
- Activity的切换转场效果
- 属性动画
- 帧动画
- 属性动画监听
- 插值器和估值器
- 工具
- dp和px的转换
- 获取屏幕宽高
- JNI
- javah命令
- C和Java相互调用
- WebView
- Android Studio快捷键
- Bitmap和Drawable图像
- Bitmap简要介绍
- 图片缩放和裁剪效果
- 创建指定颜色的Bitmap图像
- Gradle本地仓库
- Gradle小技巧
- RxJava+Okhttp+Retrofit构建网络模块
- 服务器相关配置
- node环境配置
- 3D特效