# 1. View动画
针对对象是`View`,支持四种动画:平移、缩放、旋转、透明度。这四种动画对应着`Animation`的四个子类:`TranslateAnimation`、`ScaleAnimation`、`RotateAnimation`和`AlphaAnimation`。均支持使用`xml`和动态代码创建。当然,对于`View`动画来说建议使用`xml`方式,因为可读性更好。
上述四种动画对应的`xml`标签:`translate`、`scale`、`rotate`、`alpha`。也就是对应的开头的单词小写。
# 2. 平移动画
## 2.1 xml方式
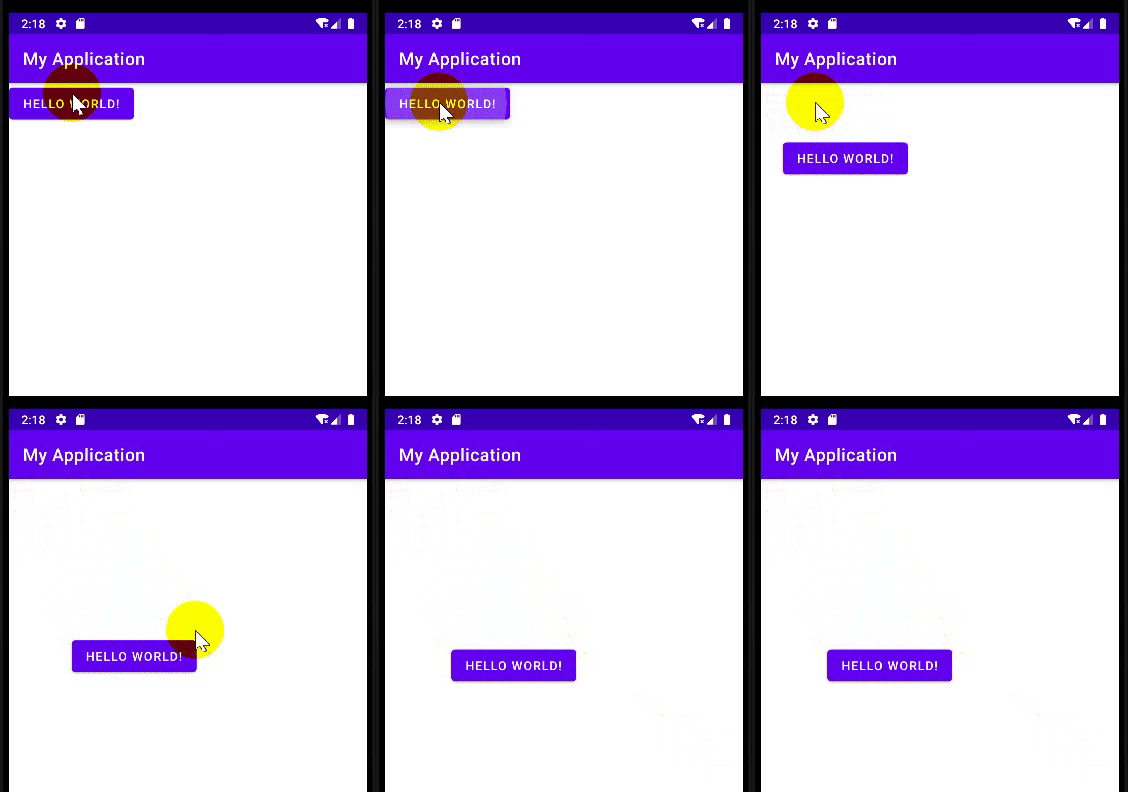
在`res/anim`目录下创建`translate01.xml`文件:
~~~
<?xml version="1.0" encoding="utf-8"?>
<set xmlns:android="http://schemas.android.com/apk/res/android"
android:fillAfter="true"
>
<translate
android:fromXDelta="0"
android:fromYDelta="0"
android:toXDelta="200"
android:toYDelta="500"
android:interpolator="@android:anim/linear_interpolator"
android:duration="2000"
>
</translate>
</set>
~~~
这里对上述属性做一个简单的介绍:
* `android:interpolator`,用来指定一个插值器,会影响动画的播放速度。比如默认为`@android:anim/accelerate_decelerate_interpolator`,也就是加速减速插值器。
* `android:fillAfter`,用来指定`View`动画结束后,是否停留在结束为止;
* `android:duration`,用来指定`View`动画持续时间;
然后我们将上述动画,通过`View`对象的`startAnimation(animation)`来进行关联:
~~~
val btn by lazy { findViewById<Button>(R.id.btn) }
override fun onCreate(savedInstanceState: Bundle?) {
super.onCreate(savedInstanceState)
setContentView(R.layout.activity_main)
btn.setOnClickListener {
val animation = AnimationUtils.loadAnimation(this, R.anim.translate01)
btn.startAnimation(animation)
}
}
~~~
结果:

## 2.2 kotlin代码方式
除了使用`xml`方式配置,也可以直接创建一个`animation`对象,然后配置动画效果,即:
~~~
val btn by lazy { findViewById<Button>(R.id.btn) }
override fun onCreate(savedInstanceState: Bundle?) {
super.onCreate(savedInstanceState)
setContentView(R.layout.activity_main)
btn.setOnClickListener {
val animation = TranslateAnimation(0f, 200f, 0f, 300f)
animation.interpolator = AccelerateDecelerateInterpolator();
animation.fillAfter = true
animation.duration = 2000
btn.startAnimation(animation)
}
}
~~~
效果同上,这里就不再截图。
# 3. 缩放动画
## 3.1 xml方式
~~~
<?xml version="1.0" encoding="utf-8"?>
<set xmlns:android="http://schemas.android.com/apk/res/android"
android:fillAfter="true"
>
<scale
android:fromXScale="0.5"
android:toXScale="2"
android:fromYScale="1"
android:toYScale="2"
android:duration="2000"
>
</scale>
</set>
~~~
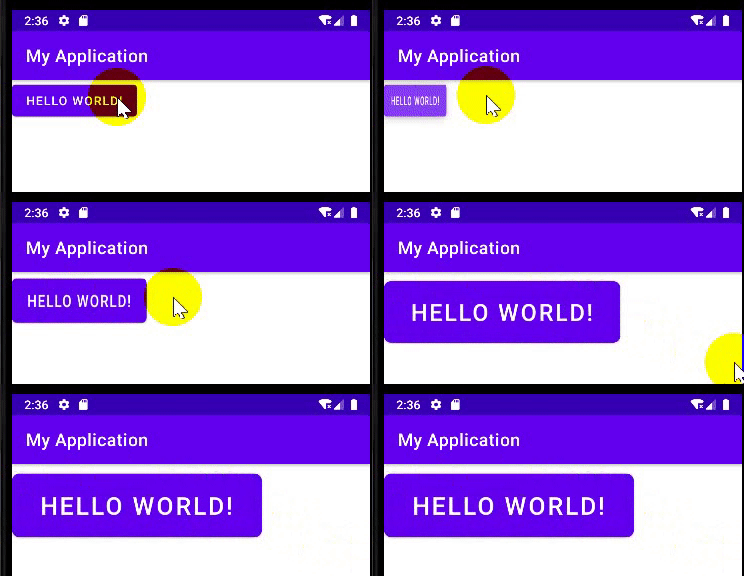
然后,这里还是应用在`Button`上:
~~~
btn.setOnClickListener {
val animation = AnimationUtils.loadAnimation(this, R.anim.scale01)
btn.startAnimation(animation)
}
~~~
效果:

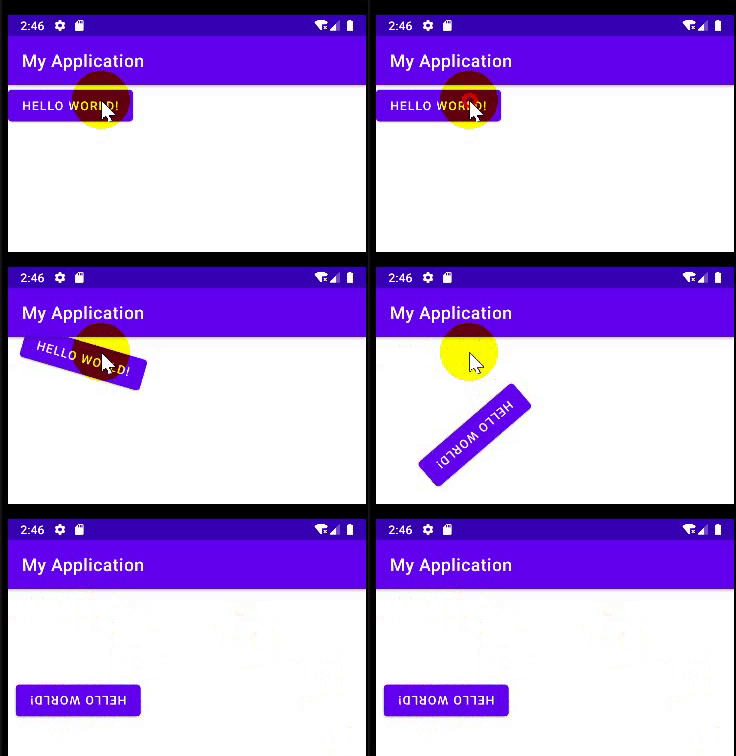
# 4. 旋转动画
~~~
<?xml version="1.0" encoding="utf-8"?>
<set xmlns:android="http://schemas.android.com/apk/res/android"
android:fillAfter="true">
<rotate
android:fromDegrees="0"
android:toDegrees="180"
android:duration="2000"
android:pivotX="200"
android:pivotY="200"
>
</rotate>
</set>
~~~

# 5. 透明动画
`kotlin`代码方式:
~~~
btn.setOnClickListener {
val animation = AlphaAnimation(1f, 0f)
animation.duration = 2000
animation.fillAfter = true // 保持最后状态
btn.startAnimation(animation)
}
~~~
`xml`布局方式:
~~~
<?xml version="1.0" encoding="utf-8"?>
<set xmlns:android="http://schemas.android.com/apk/res/android"
android:fillAfter="true"
>
<alpha
android:fromAlpha="1"
android:toAlpha="0"
android:duration="2000"
>
</alpha>
</set>
~~~
效果就不再截图。
- 介绍
- UI
- MaterialButton
- MaterialButtonToggleGroup
- 字体相关设置
- Material Design
- Toolbar
- 下拉刷新
- 可折叠式标题栏
- 悬浮按钮
- 滑动菜单DrawerLayout
- NavigationView
- 可交互提示
- CoordinatorLayout
- 卡片式布局
- 搜索框SearchView
- 自定义View
- 简单封装单选
- RecyclerView
- xml设置点击样式
- adb
- 连接真机
- 小技巧
- 通过字符串ID获取资源
- 自定义View组件
- 使用系统控件重新组合
- 旋转菜单
- 轮播图
- 下拉输入框
- 自定义VIew
- 图片组合的开关按钮
- 自定义ViewPager
- 联系人快速索引案例
- 使用ListView定义侧滑菜单
- 下拉粘黏效果
- 滑动冲突
- 滑动冲突之非同向冲突
- onMeasure
- 绘制字体
- 设置画笔Paint
- 贝赛尔曲线
- Invalidate和PostInvalidate
- super.onTouchEvent(event)?
- setShadowLayer与阴影效果
- Shader
- ImageView的scaleType属性
- 渐变
- LinearGradient
- 图像混合模式
- PorterDuffXfermode
- 橡皮擦效果
- Matrix
- 离屏绘制
- Canvas和图层
- Canvas简介
- Canvas中常用操作总结
- Shape
- 圆角属性
- Android常见动画
- Android动画简介
- View动画
- 自定义View动画
- View动画的特殊使用场景
- LayoutAnimation
- Activity的切换转场效果
- 属性动画
- 帧动画
- 属性动画监听
- 插值器和估值器
- 工具
- dp和px的转换
- 获取屏幕宽高
- JNI
- javah命令
- C和Java相互调用
- WebView
- Android Studio快捷键
- Bitmap和Drawable图像
- Bitmap简要介绍
- 图片缩放和裁剪效果
- 创建指定颜色的Bitmap图像
- Gradle本地仓库
- Gradle小技巧
- RxJava+Okhttp+Retrofit构建网络模块
- 服务器相关配置
- node环境配置
- 3D特效
