正式的进行查询以前。让我们使用统一的文件来重新初始化一个前后端分离的项目,以避免由于小版本问题可能给我们带来的困扰。
# 效果展示

# 下载
请点击:[下载地址](https://github.com/mengyunzhi/spring-boot-and-angular-guild/archive/step2.2.zip),下载后将其解压到自己喜欢的位置,以后这个位置便是我们学习的项目目录了。解压后将得到以下目录:
```
.
├── api
│ ├── HELP.md
│ ├── mvnw
│ ├── mvnw.cmd
│ ├── pom.xml
│ └── src
└── web-app
├── README.md
├── angular.json
├── browserslist
├── e2e
├── karma.conf.js
├── node_modules
├── package-lock.json
├── package.json
├── src
├── tsconfig.app.json
├── tsconfig.json
├── tsconfig.spec.json
└── tslint.json
```
其中`api`文件夹为后台,`web-app`文件夹为前台。后台是一个标准的`maven`托管的项目,前台是一个标准的`npm`托管的项目。这也是网上一些示例代码的标准的文件结构。说起来有些惭愧,大概是在3年前我购买了一套模板,然后下然到本地大概就是上面的文件结构,当时自己除了能看看源代码外,根本就不知道应该如何在这种代码下起环境,所以高喊上当。然后大概又过了1年,记忆差的自己在相同的站点上又以同样的价格购买了相同的模板。。。下载到本地后竟然感觉似曾相识,不同的是此次一看目录结构便知道是它是个`npm`管理的前台项目,起动环境也是再常规不过的操作了。
## 启动前台
进入前台项目文件夹`web-app`,然后执行`npm install --registry=https://registry.npm.taobao.org`来完成依赖包的安装。接着执行`ng serve`来启动前台。日志如下:
```
panjiedeMac-Pro:web-app panjie$ npm install --registry=https://registry.npm.taobao.org
up to date in 6.965s
╭────────────────────────────────────────────────────────────────╮
│ │
│ New minor version of npm available! 6.9.0 → 6.11.3 │
│ Changelog: https://github.com/npm/cli/releases/tag/v6.11.3 │
│ Run npm install -g npm to update! │
│ │
╰────────────────────────────────────────────────────────────────╯
panjiedeMac-Pro:web-app panjie$ ng serve
10% building 3/3 modules 0 activeℹ 「wds」: Project is running at http://localhost:4200/webpack-dev-server/
ℹ 「wds」: webpack output is served from /
ℹ 「wds」: 404s will fallback to //index.html
chunk {main} main.js, main.js.map (main) 49.5 kB [initial] [rendered]
chunk {polyfills} polyfills.js, polyfills.js.map (polyfills) 264 kB [initial] [rendered]
chunk {runtime} runtime.js, runtime.js.map (runtime) 6.15 kB [entry] [rendered]
chunk {styles} styles.js, styles.js.map (styles) 10.1 kB [initial] [rendered]
chunk {vendor} vendor.js, vendor.js.map (vendor) 4.08 MB [initial] [rendered]
Date: 2019-09-30T00:14:25.229Z - Hash: 54ed3cc2956637b195e9 - Time: 7060ms
** Angular Live Development Server is listening on localhost:4200, open your browser on http://localhost:4200/ **
ℹ 「wdm」: Compiled successfully.
```
>[info] `ng serve`启动项目;`ng serve --open`启动项目并自动打开浏览器。
然后找到自己喜爱的浏览器(教程中使用chrome。IE系列浏览器的性格不太稳定,推荐使用firefox或chrome),打开[http://localhost:4200](http://localhost:4200),查看前台启动效果。
## 启动后台
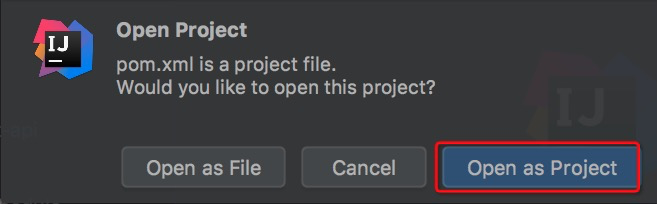
依次操作`IDEA` -> `open` -> `api/pom.xml` -> `open` -> `Open as Project`
耐心等待,直至`IDEA`为我们安装成功所有的依赖,`IDEA`最上方的启动按钮点亮。

> 此时点击启动按钮后,系统在启动的过程中会发生错误,这是由于我们没有配置数据库连接信息造成的,正常。
# 参考文档
| 名称 | 链接 |
| --- | --- |
| Angular中文--搭建环境 | [https://www.angular.cn/guide/setup-local](https://www.angular.cn/guide/setup-local) |
| 项目源码| [https://github.com/mengyunzhi/spring-boot-and-angular-guild/releases/tag/step2.2](https://github.com/mengyunzhi/spring-boot-and-angular-guild/releases/tag/step2.2) |
> 在教程中我们尽量给出所用到的知识点的一些官方链接,有些内容当前阶段的你可能看不懂,这并不影响你对本教程的学习。我们之所以给出这些文档是期望教程能起到抛砖引玉的作用,让大家可以在官方教程中找到些灵感。
- 序言
- 第一章:Hello World
- 第一节:Angular准备工作
- 1 Node.js
- 2 npm
- 3 WebStorm
- 第二节:Hello Angular
- 第三节:Spring Boot准备工作
- 1 JDK
- 2 MAVEN
- 3 IDEA
- 第四节:Hello Spring Boot
- 1 Spring Initializr
- 2 Hello Spring Boot!
- 3 maven国内源配置
- 4 package与import
- 第五节:Hello Spring Boot + Angular
- 1 依赖注入【前】
- 2 HttpClient获取数据【前】
- 3 数据绑定【前】
- 4 回调函数【选学】
- 第二章 教师管理
- 第一节 数据库初始化
- 第二节 CRUD之R查数据
- 1 原型初始化【前】
- 2 连接数据库【后】
- 3 使用JDBC读取数据【后】
- 4 前后台对接
- 5 ng-if【前】
- 6 日期管道【前】
- 第三节 CRUD之C增数据
- 1 新建组件并映射路由【前】
- 2 模板驱动表单【前】
- 3 httpClient post请求【前】
- 4 保存数据【后】
- 5 组件间调用【前】
- 第四节 CRUD之U改数据
- 1 路由参数【前】
- 2 请求映射【后】
- 3 前后台对接【前】
- 4 更新数据【前】
- 5 更新某个教师【后】
- 6 路由器链接【前】
- 7 观察者模式【前】
- 第五节 CRUD之D删数据
- 1 绑定到用户输入事件【前】
- 2 删除某个教师【后】
- 第六节 代码重构
- 1 文件夹化【前】
- 2 优化交互体验【前】
- 3 相对与绝对地址【前】
- 第三章 班级管理
- 第一节 JPA初始化数据表
- 第二节 班级列表
- 1 新建模块【前】
- 2 初识单元测试【前】
- 3 初始化原型【前】
- 4 面向对象【前】
- 5 测试HTTP请求【前】
- 6 测试INPUT【前】
- 7 测试BUTTON【前】
- 8 @RequestParam【后】
- 9 Repository【后】
- 10 前后台对接【前】
- 第三节 新增班级
- 1 初始化【前】
- 2 响应式表单【前】
- 3 测试POST请求【前】
- 4 JPA插入数据【后】
- 5 单元测试【后】
- 6 惰性加载【前】
- 7 对接【前】
- 第四节 编辑班级
- 1 FormGroup【前】
- 2 x、[x]、{{x}}与(x)【前】
- 3 模拟路由服务【前】
- 4 测试间谍spy【前】
- 5 使用JPA更新数据【后】
- 6 分层开发【后】
- 7 前后台对接
- 8 深入imports【前】
- 9 深入exports【前】
- 第五节 选择教师组件
- 1 初始化【前】
- 2 动态数据绑定【前】
- 3 初识泛型
- 4 @Output()【前】
- 5 @Input()【前】
- 6 再识单元测试【前】
- 7 其它问题
- 第六节 删除班级
- 1 TDD【前】
- 2 TDD【后】
- 3 前后台对接
- 第四章 学生管理
- 第一节 引入Bootstrap【前】
- 第二节 NAV导航组件【前】
- 1 初始化
- 2 Bootstrap格式化
- 3 RouterLinkActive
- 第三节 footer组件【前】
- 第四节 欢迎界面【前】
- 第五节 新增学生
- 1 初始化【前】
- 2 选择班级组件【前】
- 3 复用选择组件【前】
- 4 完善功能【前】
- 5 MVC【前】
- 6 非NULL校验【后】
- 7 唯一性校验【后】
- 8 @PrePersist【后】
- 9 CM层开发【后】
- 10 集成测试
- 第六节 学生列表
- 1 分页【后】
- 2 HashMap与LinkedHashMap
- 3 初识综合查询【后】
- 4 综合查询进阶【后】
- 5 小试综合查询【后】
- 6 初始化【前】
- 7 M层【前】
- 8 单元测试与分页【前】
- 9 单选与多选【前】
- 10 集成测试
- 第七节 编辑学生
- 1 初始化【前】
- 2 嵌套组件测试【前】
- 3 功能开发【前】
- 4 JsonPath【后】
- 5 spyOn【后】
- 6 集成测试
- 7 @Input 异步传值【前】
- 8 值传递与引入传递
- 9 @PreUpdate【后】
- 10 表单验证【前】
- 第八节 删除学生
- 1 CSS选择器【前】
- 2 confirm【前】
- 3 功能开发与测试【后】
- 4 集成测试
- 5 定制提示框【前】
- 6 引入图标库【前】
- 第九节 集成测试
- 第五章 登录与注销
- 第一节:普通登录
- 1 原型【前】
- 2 功能设计【前】
- 3 功能设计【后】
- 4 应用登录组件【前】
- 5 注销【前】
- 6 保留登录状态【前】
- 第二节:你是谁
- 1 过滤器【后】
- 2 令牌机制【后】
- 3 装饰器模式【后】
- 4 拦截器【前】
- 5 RxJS操作符【前】
- 6 用户登录与注销【后】
- 7 个人中心【前】
- 8 拦截器【后】
- 9 集成测试
- 10 单例模式
- 第六章 课程管理
- 第一节 新增课程
- 1 初始化【前】
- 2 嵌套组件测试【前】
- 3 async管道【前】
- 4 优雅的测试【前】
- 5 功能开发【前】
- 6 实体监听器【后】
- 7 @ManyToMany【后】
- 8 集成测试【前】
- 9 异步验证器【前】
- 10 详解CORS【前】
- 第二节 课程列表
- 第三节 果断
- 1 初始化【前】
- 2 分页组件【前】
- 2 分页组件【前】
- 3 综合查询【前】
- 4 综合查询【后】
- 4 综合查询【后】
- 第节 班级列表
- 第节 教师列表
- 第节 编辑课程
- TODO返回机制【前】
- 4 弹出框组件【前】
- 5 多路由出口【前】
- 第节 删除课程
- 第七章 权限管理
- 第一节 AOP
- 总结
- 开发规范
- 备用