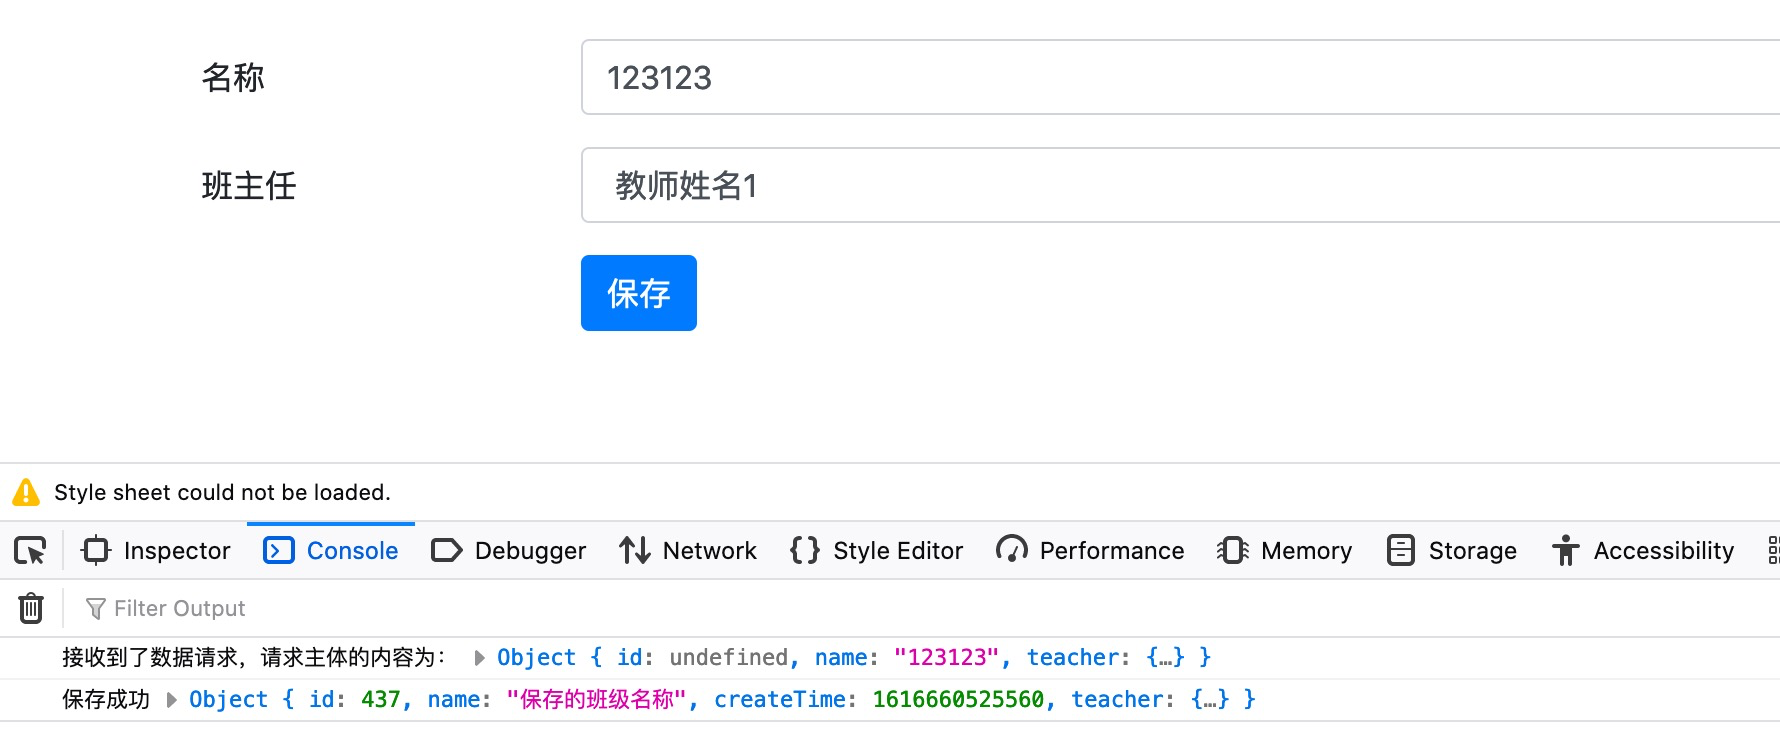
本节我们将班级选择组件应用到班级添加组件中。
**同一模块**下,一个组件引用另一个组件的方法非常简单,我们仅需要在当前组件的V层加入被引组件selector即可,比如我们打开添加班级组件的V层,添加如下代码:
```html
+++ b/first-app/src/app/clazz/add/add.component.html
@@ -10,6 +10,12 @@
</small>
</div>
</div>
+ <div class="mb-3 row">
+ <label class="col-sm-2 col-form-label">班主任</label>
+ <div class="col-sm-10">
+ <app-klass-select (beChange)="onTeacherChange($event)"></app-klass-select>
+ </div>
+ </div>
<div class="mb-3 row">
<label for="teacher" class="col-sm-2 col-form-label">班主任</label>
<div class="col-sm-10">
```
接着在C层中添加对应的方法:
```typescript
+++ b/first-app/src/app/clazz/add/add.component.ts
@@ -35,4 +35,8 @@ export class AddComponent implements OnInit {
.subscribe(clazz => console.log('保存成功', clazz),
error => console.log('保存失败', error));
}
+
+ onTeacherChange(teacherId: number): void {
+ this.clazz.teacherId = teacherId;
+ }
}
```
### 测试
启动使用mock-api进行的单元测试:
```typescript
+++ b/first-app/src/app/clazz/add/add.component.mock-api.spec.ts
@@ -36,7 +36,7 @@ describe('clazz add with mockapi', () => {
component.onSubmit();
});
- it('should create', () => {
+ fit('should create', () => {
fixture.autoDetectChanges();
});
});
```
控制台提示我们说不认识`<app-klass-select`

这是由于当前所有的动态测试模块中并不存在selecor为`app-klass-select`的组件,将教师选择组件添加到当前动态测试模块中即可:
```typescript
+++ b/first-app/src/app/clazz/add/add.component.mock-api.spec.ts
+import {KlassSelectComponent} from '../klass-select/klass-select.component';
- declarations: [AddComponent],
+ declarations: [AddComponent, KlassSelectComponent],
```
再测试时显示找不到NgControl,这是由于我们没有引用响应式表单模块,所以当前模块不认识教师选择组件中的`formControl`造成的。

引入响应式表单模块:
```typescript
- imports: [HttpClientModule, FormsModule],
+ imports: [HttpClientModule, FormsModule, ReactiveFormsModule],
```
最终效果:

点击一下试试吧。最后,我们删除原来V层中最后的那个班主任:
```html
+++ b/first-app/src/app/clazz/add/add.component.html
@@ -14,18 +14,6 @@
<label class="col-sm-2 col-form-label">班主任</label>
<div class="col-sm-10">
<app-klass-select (beChange)="onTeacherChange($event)"></app-klass-select>
- </div>
- </div>
- <div class="mb-3 row">
- <label for="teacher" class="col-sm-2 col-form-label">班主任</label>
- <div class="col-sm-10">
- <select id="teacher" class="form-control"
- name="teacher"
- [(ngModel)]="clazz.teacherId">
- <option *ngFor="let teacher of teachers" [ngValue]="teacher.id">
- {{teacher.name}}
- </option>
- </select>
<small class="text-danger"
*ngIf="clazz.teacherId === null">
必须指定一个班主任
```
测试:

## 小结
本节中我们将教师选择组件成功的应用到班级添加组件中,在模块化的道路上更近了一步。
## 本节作业
移除`fit`修正测试中发生的错误。
如果你靠自己的能力解决完了,相信你现在已经感受到了组件嵌套测试的**麻烦**,我想这也是Angular在国内使用较少的原因之一。但要相信,做为一个优秀的框架一定是尽善尽美的。在后面的章节中,我们将启用新的设计模式来彻底的解决掉这种**麻烦**。
| 名称 | 链接 |
| -------- | ------------------------------------------------------------ |
| 本节源码 | [https://github.com/mengyunzhi/angular11-guild/archive/step6.2.4.zip](https://github.com/mengyunzhi/angular11-guild/archive/step6.2.4.zip) |
- 序言
- 第一章 Hello World
- 1.1 环境安装
- 1.2 Hello Angular
- 1.3 Hello World!
- 第二章 教师管理
- 2.1 教师列表
- 2.1.1 初始化原型
- 2.1.2 组件生命周期之初始化
- 2.1.3 ngFor
- 2.1.4 ngIf、ngTemplate
- 2.1.5 引用 Bootstrap
- 2.2 请求后台数据
- 2.2.1 HttpClient
- 2.2.2 请求数据
- 2.2.3 模块与依赖注入
- 2.2.4 异步与回调函数
- 2.2.5 集成测试
- 2.2.6 本章小节
- 2.3 新增教师
- 2.3.1 组件初始化
- 2.3.2 [(ngModel)]
- 2.3.3 对接后台
- 2.3.4 路由
- 2.4 编辑教师
- 2.4.1 组件初始化
- 2.4.2 获取路由参数
- 2.4.3 插值与模板表达式
- 2.4.4 初识泛型
- 2.4.5 更新教师
- 2.4.6 测试中的路由
- 2.5 删除教师
- 2.6 收尾工作
- 2.6.1 RouterLink
- 2.6.2 fontawesome图标库
- 2.6.3 firefox
- 2.7 总结
- 第三章 用户登录
- 3.1 初识单元测试
- 3.2 http概述
- 3.3 Basic access authentication
- 3.4 着陆组件
- 3.5 @Output
- 3.6 TypeScript 类
- 3.7 浏览器缓存
- 3.8 总结
- 第四章 个人中心
- 4.1 原型
- 4.2 管道
- 4.3 对接后台
- 4.4 x-auth-token认证
- 4.5 拦截器
- 4.6 小结
- 第五章 系统菜单
- 5.1 延迟及测试
- 5.2 手动创建组件
- 5.3 隐藏测试信息
- 5.4 规划路由
- 5.5 定义菜单
- 5.6 注销
- 5.7 小结
- 第六章 班级管理
- 6.1 新增班级
- 6.1.1 组件初始化
- 6.1.2 MockApi 新建班级
- 6.1.3 ApiInterceptor
- 6.1.4 数据验证
- 6.1.5 教师选择列表
- 6.1.6 MockApi 教师列表
- 6.1.7 代码重构
- 6.1.8 小结
- 6.2 教师列表组件
- 6.2.1 初始化
- 6.2.2 响应式表单
- 6.2.3 getTestScheduler()
- 6.2.4 应用组件
- 6.2.5 小结
- 6.3 班级列表
- 6.3.1 原型设计
- 6.3.2 初始化分页
- 6.3.3 MockApi
- 6.3.4 静态分页
- 6.3.5 动态分页
- 6.3.6 @Input()
- 6.4 编辑班级
- 6.4.1 测试模块
- 6.4.2 响应式表单验证
- 6.4.3 @Input()
- 6.4.4 FormGroup
- 6.4.5 自定义FormControl
- 6.4.6 代码重构
- 6.4.7 小结
- 6.5 删除班级
- 6.6 集成测试
- 6.6.1 惰性加载
- 6.6.2 API拦截器
- 6.6.3 路由与跳转
- 6.6.4 ngStyle
- 6.7 初识Service
- 6.7.1 catchError
- 6.7.2 单例服务
- 6.7.3 单元测试
- 6.8 小结
- 第七章 学生管理
- 7.1 班级列表组件
- 7.2 新增学生
- 7.2.1 exports
- 7.2.2 自定义验证器
- 7.2.3 异步验证器
- 7.2.4 再识DI
- 7.2.5 属性型指令
- 7.2.6 完成功能
- 7.2.7 小结
- 7.3 单元测试进阶
- 7.4 学生列表
- 7.4.1 JSON对象与对象
- 7.4.2 单元测试
- 7.4.3 分页模块
- 7.4.4 子组件测试
- 7.4.5 重构分页
- 7.5 删除学生
- 7.5.1 第三方dialog
- 7.5.2 批量删除
- 7.5.3 面向对象
- 7.6 集成测试
- 7.7 编辑学生
- 7.7.1 初始化
- 7.7.2 自定义provider
- 7.7.3 更新学生
- 7.7.4 集成测试
- 7.7.5 可订阅的路由参数
- 7.7.6 小结
- 7.8 总结
- 第八章 其它
- 8.1 打包构建
- 8.2 发布部署
- 第九章 总结