## 环境变量
为了适应不同的环境,Angular提供了环境变量的概念。具体而言便是可以在开发的时候将变量设置为一个值,而在最后打包成生产代码的时候将变量再设置为另一个值。
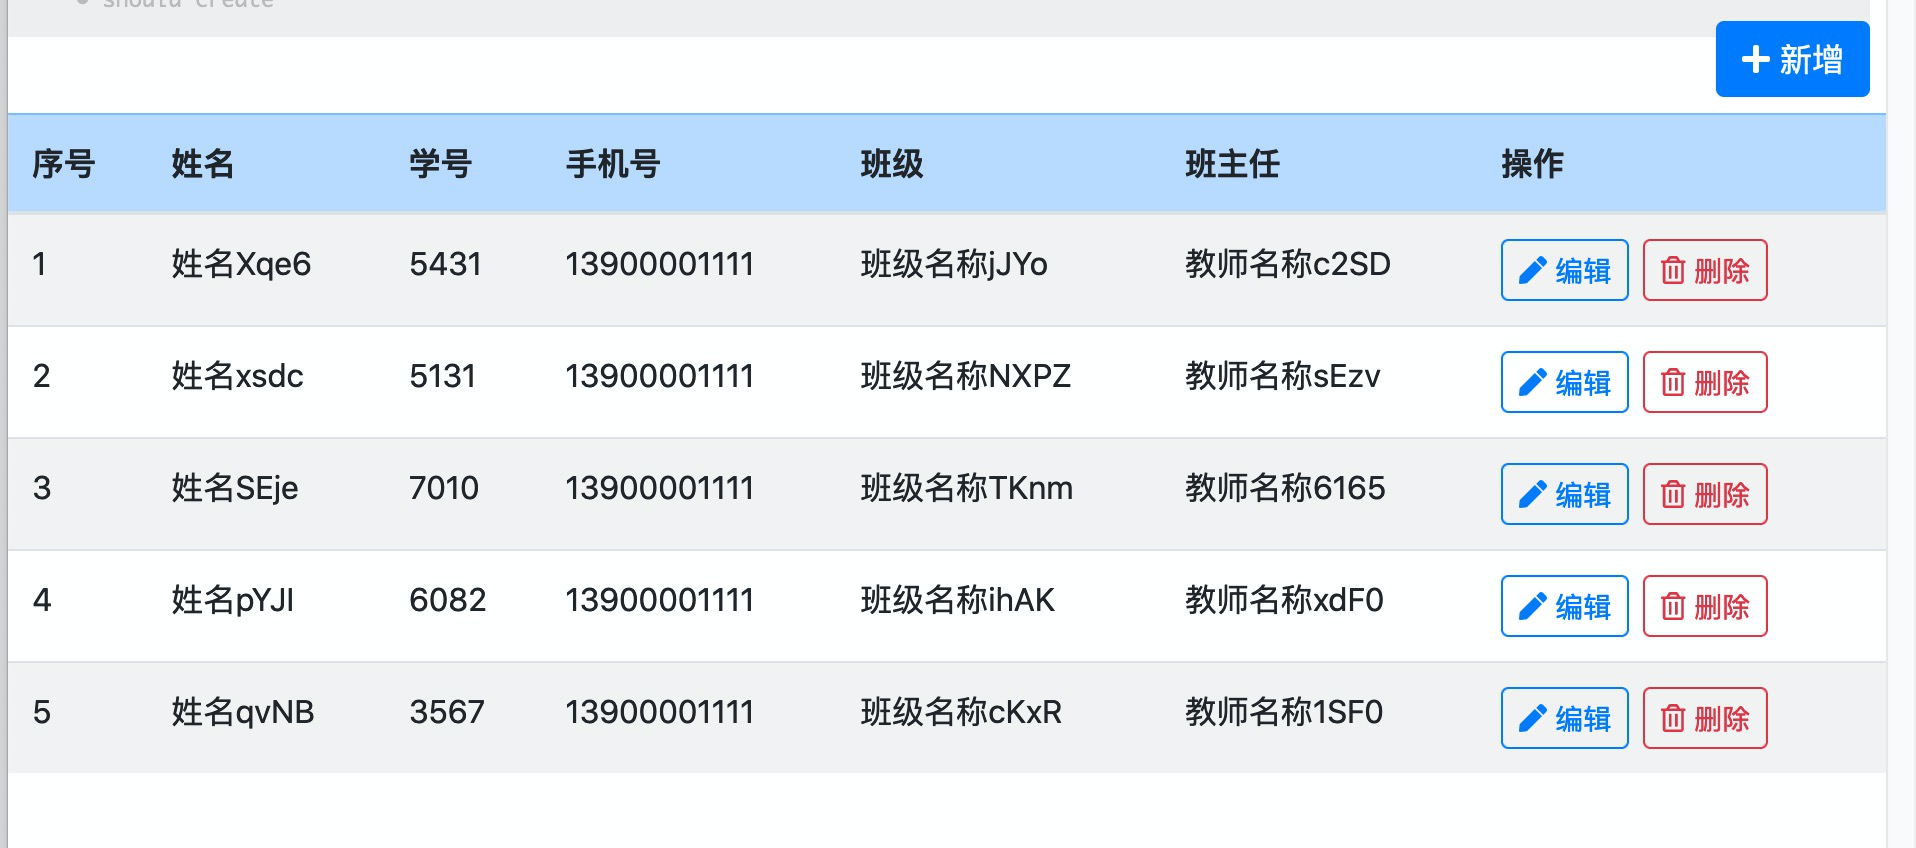
比如我们在开发时将每页大小设置成了20了,而分页组件将位于表格的最小方,这样一来每次代码变更、浏览器自动刷新后我们都需要手动的将页面拉到最下方。对于此情此景,相信你更愿意在开发时候将每页大小设置为5,同时在项目打包上线时每页大小被自动设置为20。
`src`文件夹下有个子文件夹`environments`便是为了解决以下需要而存在的:
```bash
panjie@panjies-iMac src % tree -L 1
.
├── app
├── assets
├── environments 👈
├── favicon.ico
├── index.html
├── main.ts
├── polyfills.ts
├── styles.css
├── styles.test.css
└── test.ts
```
该文件夹上有两个文件:
```bash
panjie@panjies-iMac src % tree environments
environments
├── environment.prod.ts
└── environment.ts
0 directories, 2 files
```
分别为最后打包上线时(以下简称生产环境)使用的`environment.prod.ts`以及开发时使用的`environment.ts`,预想在生产环境中将size配置为20,而在开发中将size配置为5,则仅需要在上述两个文件中分别声明size:
```typescript
+++ b/first-app/src/environments/environment.prod.ts
@@ -1,3 +1,4 @@
export const environment = {
- production: true
+ production: true,
+ size: 20
};
```
```typescript
+++ b/first-app/src/environments/environment.ts
@@ -3,7 +3,8 @@
// The list of file replacements can be found in `angular.json`.
export const environment = {
- production: false
+ production: false,
+ size: 5
};
```
接下来在组件中使用环境变量中的size来初始化组件中的size值:
```typescript
+++ b/first-app/src/app/student/student.component.ts
@@ -2,6 +2,7 @@ import {Component, OnInit} from '@angular/core';
import {Page} from '../entity/page';
import {Student} from '../entity/student';
import {StudentService} from '../service/student.service';
+import {environment} from '../../environments/environment'; 👈
@Component({
selector: 'app-student',
@@ -11,7 +12,7 @@ import {StudentService} from '../service/student.service';
export class StudentComponent implements OnInit {
pageData = {} as Page<Student>;
page = 0;
- size = 20;
+ size = environment.size;
constructor(private studentService: StudentService) {
}
```
**注意:**environment的引用位置为`environments/environment`,而**不**是`environments/environment.prod`
此时在开发过程中,每页大小为5,而在生产环境中每页大小将为20(将在后面的章节中展示)。

接下来我们引用在班级列表中使用过的分页模块。
## 分页模块
班级列表中,我们已经打造过了一个可用的分页组件。这时候我们首先想到的应该是如何去复用这个分页组件,而不是参考前面的分页组件再制造一个一模一样的组件。在引入分页组件前,还需要简单的复习一下7.2.1小节中我们是如何在学生添加组件中使用了班级选择组件的:

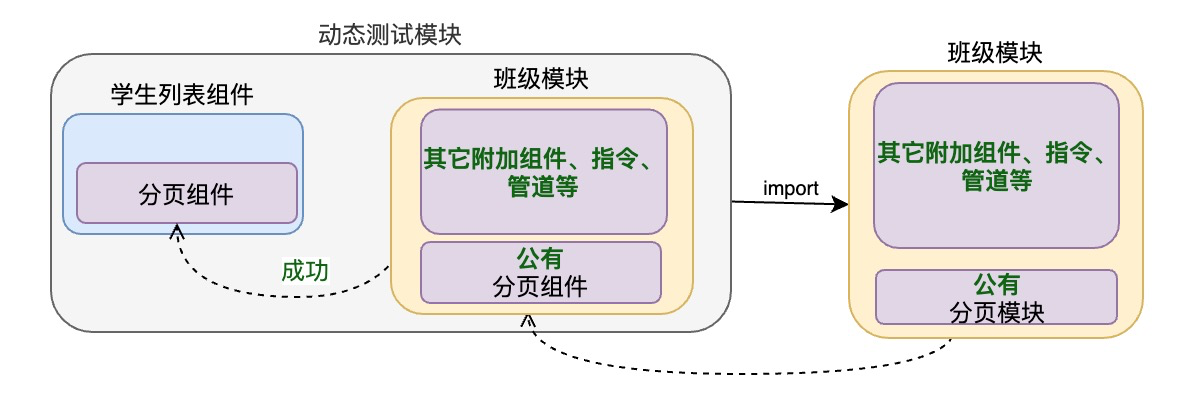
参考上图,可得如果在当前学生列表组件中使用分页组件,则需要打造一个如下图一样的关系图:

按上图的逻辑,固然能够满足当下需求。但也会面临一下问题:在`import`班级模块的时候,一些赠品(其它班级模块中的组件、指令、管道等)也会随之被引入,这与Angular模块化、惰性加载(按需加载)的思想相违背。
> Angular是个伟大的框架,革命性的完成了模块化、惰性加载的特性,做为对框架的尊重,我们也要充分的利用好Angular的伟大特性。

既然模块化能够解决按需加载的问题,那么再新建一个模块好了。

逻辑有了,实现便成了最简单的事情。
### 新建模块
来到`/src/app/clazz/page`文件夹,使用`ng g m page --flat`命令创建`PageModule`:
```bash
panjie@panjies-iMac page % pwd
/Users/panjie/github/mengyunzhi/angular11-guild/first-app/src/app/clazz/page
panjie@panjies-iMac page % ng g m page --flat
CREATE src/app/clazz/page/page.module.ts (190 bytes)
```
然后在该模块中添加`PageComponent`被将其声明为公有:
```typescript
import {NgModule} from '@angular/core';
import {CommonModule} from '@angular/common';
import {PageComponent} from './page.component';
@NgModule({
declarations: [PageComponent],
imports: [
CommonModule
],
exports: [PageComponent]
})
export class PageModule {
}
```
由于组件在一个作用域内仅能够声明在一个模块中,所以此时需要删除原班级模块中对Page组件的声明。同时为了继续在班级模块中使用分页组件,还需要在班级模块中使用import的方式来引入Page模块。
班级模块变动如下:
```typescript
+++ b/first-app/src/app/clazz/clazz.module.ts
@@ -7,6 +7,7 @@ import {ClazzComponent} from './clazz.component';
import {PageComponent} from './page/page.component';
import {EditComponent} from './edit/edit.component';
import {RouterModule, Routes} from '@angular/router';
+import {PageModule} from './page/page.module';
const routes: Routes = [
{
@@ -24,10 +25,11 @@ const routes: Routes = [
];
@NgModule({
- declarations: [AddComponent, KlassSelectComponent, ClazzComponent, PageComponent, EditComponent],
+ declarations: [AddComponent, KlassSelectComponent, ClazzComponent, EditComponent],
imports: [
CommonModule,
FormsModule,
+ PageModule,
ReactiveFormsModule,
RouterModule.forChild(routes)
]
```
动态测试模块变动如下:
```typescript
+++ b/first-app/src/app/clazz/clazz.component.spec.ts
@@ -15,9 +16,10 @@ describe('ClazzComponent', () => {
beforeEach(async () => {
await TestBed.configureTestingModule({
- declarations: [ClazzComponent, PageComponent],
+ declarations: [ClazzComponent],
imports: [
HttpClientModule,
+ PageModule,
RouterTestingModule,
MockApiTestingModule
]
```
移除所有的`fit`后进行全局的单元测试:

单元测试通过证明了我们当前代码重构的有效性,下面便可以大胆放心的完成其它功能了。我们恢复当前组件测试用例中的`fit`继续开发。
## 引入模块

最后按上图将分页模块引入动态测试模块:
```typescript
+++ b/first-app/src/app/student/student.component.spec.ts
@@ -5,6 +5,7 @@ import {RouterTestingModule} from '@angular/router/testing';
import {getTestScheduler} from 'jasmine-marbles';
import {MockApiTestingModule} from '../mock-api/mock-api-testing.module';
import {By} from '@angular/platform-browser';
+import {PageModule} from '../clazz/page/page.module';
describe('StudentComponent', () => {
let component: StudentComponent;
@@ -15,7 +16,8 @@ describe('StudentComponent', () => {
declarations: [StudentComponent],
imports: [
RouterTestingModule,
- MockApiTestingModule
+ MockApiTestingModule,
+ PageModule
]
})
.compileComponents();
@@ -31,7 +33,7 @@ describe('StudentComponent', () => {
expect(component).toBeTruthy();
});
```
并在学生列表组件中加入分页组件:
V层:
```html
+++ b/first-app/src/app/student/student.component.html
@@ -35,3 +35,5 @@
</tr>
</tbody>
</table>
+
+<app-page [page]="pageData" (bePageChange)="onPage($event)"></app-page>
```
C层:
```typescript
+++ b/first-app/src/app/student/student.component.ts
@@ -26,4 +26,9 @@ export class StudentComponent implements OnInit {
onDelete(index: number, id: number): void {
}
+
+ onPage($event: number): void {
+ this.page = $event;
+ this.ngOnInit();
+ }
}
```
测试分页组件成功显示,点击分页按钮生效。

最后,为了保障在集成测试中的功能,我们在学生模块中加入路由模块以及分页模块:
```typescript
+++ b/first-app/src/app/student/student.module.ts
@@ -3,13 +3,17 @@ import {CommonModule} from '@angular/common';
import {AddComponent} from './add/add.component';
import {ReactiveFormsModule} from '@angular/forms';
import { StudentComponent } from './student.component';
+import {PageModule} from '../clazz/page/page.module';
+import {RouterModule} from '@angular/router';
@NgModule({
declarations: [AddComponent, StudentComponent],
imports: [
CommonModule,
- ReactiveFormsModule
+ ReactiveFormsModule,
+ PageModule,
+ RouterModule
]
})
export class StudentModule {
```
### 重构
重构是保障项目一直优秀的有效手段,也是必经之路。当前在`onPage`方法中调用了`ngOnInit`方法。在功能实现上这并没有任何问题,在却与**规则**相冲突。我们在讲`Angular`生命周期时提出`ngOnInit`方法将在组件初始化完成后执行1次,且只执行1次。但如果在`onPage`方法中调用`ngOnInit`方法,则会使得某点击一次分页`onOnInit`方法都会执行一次,这明显与其`只执行1次`的规则相违背,在开发中应该规避这种不规范的行为:
```typescript
+++ b/first-app/src/app/student/student.component.ts
export class StudentComponent implements OnInit {
pageData = {} as Page<Student>;
page = 0;
size = environment.size;
constructor(private studentService: StudentService) {
}
ngOnInit(): void {
this.loadData(this.page);
}
loadData(page: number): void {
this.studentService.pageOfCurrentTeacher({
page,
size: this.size
}).subscribe(data => this.pageData = data);
}
onDelete(index: number, id: number): void {
}
onPage($event: number): void {
this.page = $event;
this.loadData(this.page);
}
}
```
如此以来,我们既没有造重复的轮子,也没有违背`ngOnInit`只会被执行一次的规则。最后为自定义的方法加入注释:
```typescript
+++ b/first-app/src/app/student/student.component.ts
@@ -21,6 +21,10 @@ export class StudentComponent implements OnInit {
this.loadData(this.page);
}
+ /**
+ * 加载数据
+ * @param page 第几页
+ */
loadData(page: number): void {
this.studentService.pageOfCurrentTeacher({
page,
@@ -31,6 +35,10 @@ export class StudentComponent implements OnInit {
onDelete(index: number, id: number): void {
}
+ /**
+ * 点击分页时触发
+ * @param $event 第几页
+ */
onPage($event: number): void {
this.page = $event;
this.loadData(this.page);
```
## 总结
angular模块化的概念可以最大程度的满足我们对功能的复用。本节通过新建模块以及利用`export`的特性将分页功能由原班级模块中分离,使得学生模块与班级模块共用一个分页组件,这为日后的分页组件重构提供了坚实的基础,是不造重复轮子的有效方法。
| 名称 | 链接 |
| -------- | ------------------------------------------------------------ |
| 本节源码 | [https://github.com/mengyunzhi/angular11-guild/archive/step7.4.3.zip](https://github.com/mengyunzhi/angular11-guild/archive/step7.4.3.zip) |
- 序言
- 第一章 Hello World
- 1.1 环境安装
- 1.2 Hello Angular
- 1.3 Hello World!
- 第二章 教师管理
- 2.1 教师列表
- 2.1.1 初始化原型
- 2.1.2 组件生命周期之初始化
- 2.1.3 ngFor
- 2.1.4 ngIf、ngTemplate
- 2.1.5 引用 Bootstrap
- 2.2 请求后台数据
- 2.2.1 HttpClient
- 2.2.2 请求数据
- 2.2.3 模块与依赖注入
- 2.2.4 异步与回调函数
- 2.2.5 集成测试
- 2.2.6 本章小节
- 2.3 新增教师
- 2.3.1 组件初始化
- 2.3.2 [(ngModel)]
- 2.3.3 对接后台
- 2.3.4 路由
- 2.4 编辑教师
- 2.4.1 组件初始化
- 2.4.2 获取路由参数
- 2.4.3 插值与模板表达式
- 2.4.4 初识泛型
- 2.4.5 更新教师
- 2.4.6 测试中的路由
- 2.5 删除教师
- 2.6 收尾工作
- 2.6.1 RouterLink
- 2.6.2 fontawesome图标库
- 2.6.3 firefox
- 2.7 总结
- 第三章 用户登录
- 3.1 初识单元测试
- 3.2 http概述
- 3.3 Basic access authentication
- 3.4 着陆组件
- 3.5 @Output
- 3.6 TypeScript 类
- 3.7 浏览器缓存
- 3.8 总结
- 第四章 个人中心
- 4.1 原型
- 4.2 管道
- 4.3 对接后台
- 4.4 x-auth-token认证
- 4.5 拦截器
- 4.6 小结
- 第五章 系统菜单
- 5.1 延迟及测试
- 5.2 手动创建组件
- 5.3 隐藏测试信息
- 5.4 规划路由
- 5.5 定义菜单
- 5.6 注销
- 5.7 小结
- 第六章 班级管理
- 6.1 新增班级
- 6.1.1 组件初始化
- 6.1.2 MockApi 新建班级
- 6.1.3 ApiInterceptor
- 6.1.4 数据验证
- 6.1.5 教师选择列表
- 6.1.6 MockApi 教师列表
- 6.1.7 代码重构
- 6.1.8 小结
- 6.2 教师列表组件
- 6.2.1 初始化
- 6.2.2 响应式表单
- 6.2.3 getTestScheduler()
- 6.2.4 应用组件
- 6.2.5 小结
- 6.3 班级列表
- 6.3.1 原型设计
- 6.3.2 初始化分页
- 6.3.3 MockApi
- 6.3.4 静态分页
- 6.3.5 动态分页
- 6.3.6 @Input()
- 6.4 编辑班级
- 6.4.1 测试模块
- 6.4.2 响应式表单验证
- 6.4.3 @Input()
- 6.4.4 FormGroup
- 6.4.5 自定义FormControl
- 6.4.6 代码重构
- 6.4.7 小结
- 6.5 删除班级
- 6.6 集成测试
- 6.6.1 惰性加载
- 6.6.2 API拦截器
- 6.6.3 路由与跳转
- 6.6.4 ngStyle
- 6.7 初识Service
- 6.7.1 catchError
- 6.7.2 单例服务
- 6.7.3 单元测试
- 6.8 小结
- 第七章 学生管理
- 7.1 班级列表组件
- 7.2 新增学生
- 7.2.1 exports
- 7.2.2 自定义验证器
- 7.2.3 异步验证器
- 7.2.4 再识DI
- 7.2.5 属性型指令
- 7.2.6 完成功能
- 7.2.7 小结
- 7.3 单元测试进阶
- 7.4 学生列表
- 7.4.1 JSON对象与对象
- 7.4.2 单元测试
- 7.4.3 分页模块
- 7.4.4 子组件测试
- 7.4.5 重构分页
- 7.5 删除学生
- 7.5.1 第三方dialog
- 7.5.2 批量删除
- 7.5.3 面向对象
- 7.6 集成测试
- 7.7 编辑学生
- 7.7.1 初始化
- 7.7.2 自定义provider
- 7.7.3 更新学生
- 7.7.4 集成测试
- 7.7.5 可订阅的路由参数
- 7.7.6 小结
- 7.8 总结
- 第八章 其它
- 8.1 打包构建
- 8.2 发布部署
- 第九章 总结